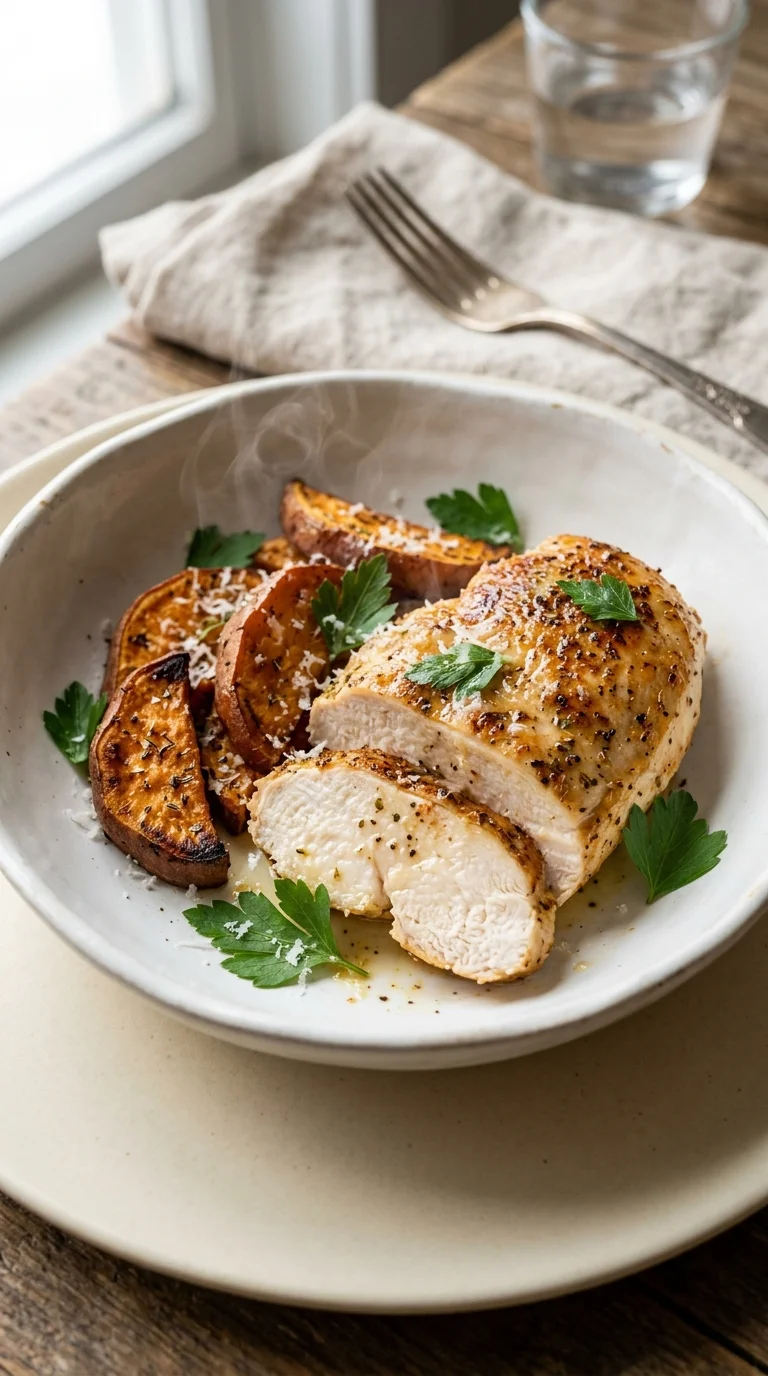
The transition from traditional roasting to the rapid air circulation of the modern air fryer represents a shift in the home kitchen toward efficiency without sacrificing the sensory joy of a home-cooked meal. While the concept of high-heat roasting has existed for centuries, the air fryer chicken breast adapts this technique by mimicking the effects of deep frying through convection, creating a Maillard reaction that browns the surface quickly.
Historically, chicken breast was often simmered or braised to prevent it from drying out, as the lean meat lacks the fat found in thighs. The introduction of precision temperature control and rapid air flow allows the meat to sear on the outside while locking in moisture, bridging the gap between a healthy preparation and a gourmet texture.
Culturally, this method reflects a growing desire for 'clean eating' that doesn't feel like a sacrifice. By using simple pantry staples like smoked paprika and lemon zest, a basic protein is transformed into a versatile centerpiece that fits into the fast pace of modern life while honoring the tradition of a warm, shared dinner.
Why You'll Love It
-
- Honestly, it's just such a relief to have a dinner that doesn't take all night, but still feels like a real meal.
-
- I love how the 4 boneless, skin‑free chicken breast halves get that lovely golden crust while staying so tender inside.
-
- Well, look, the way the smoked paprika and garlic powder smell while they're cooking... it just makes the whole kitchen feel cozy.
-
- It's a simple, grounded kind of meal that doesn't fuss too much, yet it's so satisfying for everyone at the table.
"Finally, a chicken breast that isn't dry! My kids actually asked for seconds, and cleanup was a breeze. Just lovely."
Essential Ingredient Guide
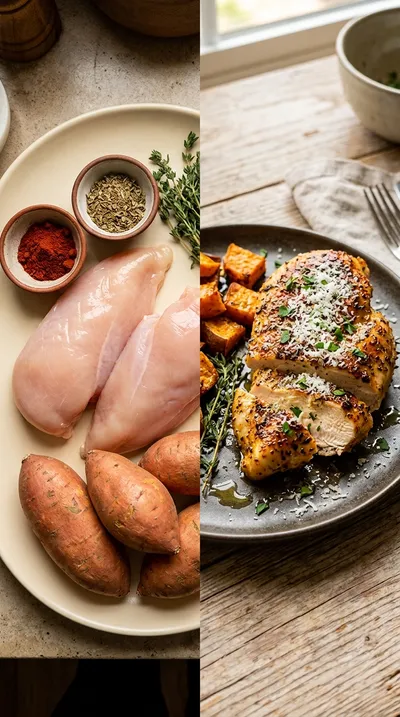
- 4 boneless, skin‑free chicken breast halves (about 7 oz each): I always try to find pieces that are similar in size so they cook evenly. Just make sure they're patted dry, or they won't get that nice crisp we're looking for.
- 2 tbsp olive oil: This is what carries all those lovely spices into the meat. It helps the chicken stay moist and gives it a soft, golden glow.
- 2 tbsp grated Parmesan cheese (optional): If you're in the mood for something a bit more savory, this adds a wonderful salty crust. It's just a little something extra that makes it feel fancy.
- 1 tsp smoked paprika: Oh, this is where the magic happens. It gives the chicken a deep, woody flavor that reminds me of a slow summer barbecue.
- Zest of 1 lemon (optional): A little bit of zest adds a bright, sunny note to the coating. It cuts through the richness of the oil and wakes everything up.
- 1 tsp dried oregano: I find this adds a gentle, earthy scent that pairs so well with the garlic. It's a classic touch that never fails.
Complete Cooking Process
-
Getting Ready:
First, we preheat the air fryer to 375°F and pat the chicken dry. It's a small step, but it's so important for getting that seasoning to really stick.
-
Building the Flavor:
We whisk together the olive oil, garlic powder, smoked paprika, salt, pepper, oregano, and maybe some Parmesan and lemon zest. Brushing this paste on ensures every inch is covered in goodness.
-
Achieving the Crunch:
Cooking them in a single layer is key. Flipping the breasts halfway through ensures both sides get that lovely, consistent brown color.
-
The Final Check:
I always use a meat thermometer to hit exactly 165°F. Then, we let them rest for 5 minutes so the juices can settle back into the meat.
-
The Perfect Serve:
A little drizzle of fresh lemon juice right at the end adds a lovely brightness. It's best served immediately while that exterior is still crisp.
-
Use a parchment paper liner or silicone mat to make cleanup a breeze.
-
Always use a real meat thermometer to avoid overcooking the chicken.
-
Try a light mist of cooking spray for a deeper, more golden crunch.
-
Let the chicken rest on a cutting board for 5 minutes to keep it moist.
Pro Tips
Just take your time and enjoy the process, you've got this!
 Family Favorites
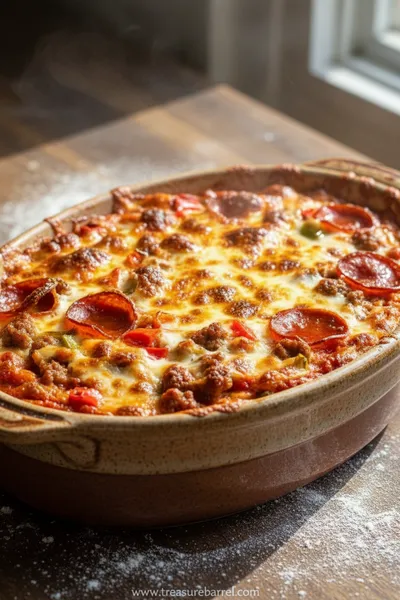
Meat Lovers Pizza Casserole Recipe
A comforting baked dish that brings pizza night flavors together in one easy casserole.
Better For You Treats
This dish is just so light and clean, being high-protein and low-carb. If you're watching your intake, you can easily omit the 2 tbsp grated Parmesan cheese for an even lighter version.
Ways to Make it Your Own
I sometimes like a tangy twist by adding a cup of lemon‑yogurt sauce and fresh dill. Or, if you're feeling adventurous, brush on a blend of Sriracha and honey during the last 2 minutes for some sweet heat.
Serving Suggestions
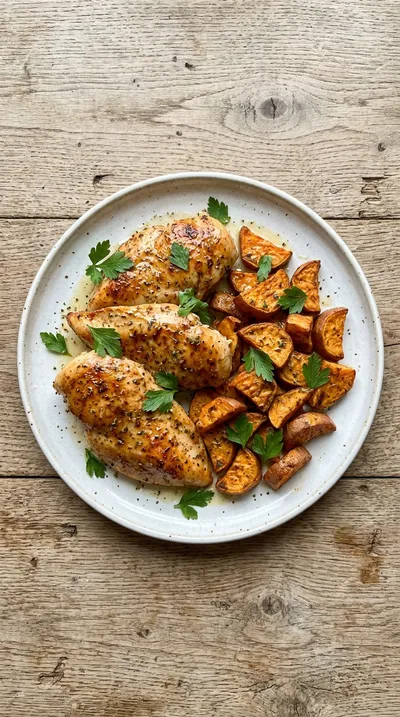
I love pairing this with roasted sweet potato wedges and a green salad. For something a bit heartier, try quinoa pilaf and steamed broccoli with a sprinkle of fresh parsley on top.
Frequently Asked Questions
→ Can I freeze the cooked chicken for later?
Oh, absolutely. Just put them in airtight containers for up to 6 months and thaw them in the fridge overnight.
→ What if my chicken breasts are different sizes?
No worries at all, just keep an eye on them and use your thermometer. Pull the smaller ones out as soon as they hit 165°F.
→ Do I really need to pat the chicken dry?
Yeah, honestly you do. If they're damp, the oil and spices just slide off and you won't get that lovely crispiness.
Nutrition Facts
per serving
320
Calories
42g
Protein
4g
Carbs
14g
Fat
Taste Profile
A savory, herb-forward profile with a hint of smokiness and a bright citrus finish.
Ingredient Substitutions
Don't have an ingredient? Try these alternatives
Great for a vegan or dairy-free cheesy flavor.
Works well due to its high smoke point.
Offers a more earthy, woody flavor profile.
Recipe Variations
Try these delicious twists on the original
Lemon‑Herb Air Fryer Chicken Breast
For something a bit tangier, serve this with a cup of lemon‑yogurt sauce and a sprinkle of fresh dill on top.
Spicy Sriracha‑Glazed Air Fryer Chicken Breast
If you like a bit of heat, brush the chicken with a blend of Sriracha and honey during the last 2 minutes of cooking.
Common Mistakes to Avoid
Learn from others' mistakes for perfect results
- Skipping the drying step, which leads to steamed rather than seared meat.
- Overcrowding the basket, which prevents the sides from crisping.
- Pulling the meat out too early or too late, affecting juiciness.
Meal Prep & Storage
Make Ahead Tips
You can prep the chicken by coating it in the seasoning paste and storing it in the fridge for a few hours before air frying.
Leftover Ideas
Store in airtight containers in the fridge. Reheat gently in the air fryer at 350°F for a few minutes to maintain the crispness.
Perfect Pairings
Serve this with...
Cooking Timeline
Preheat the air fryer to 375°F.
Dry the chicken and mix the seasoning paste.
Coat the chicken and begin the first phase of cooking.
Flip the chicken and finish cooking until 165°F.
Rest the meat for 5 minutes before serving.
 Warm Meals
Beef Ragu Pasta Recipe in Tomato Sauce
A rich and hearty pasta dish with slow-cooked beef ragu in a savory tomato sauce.
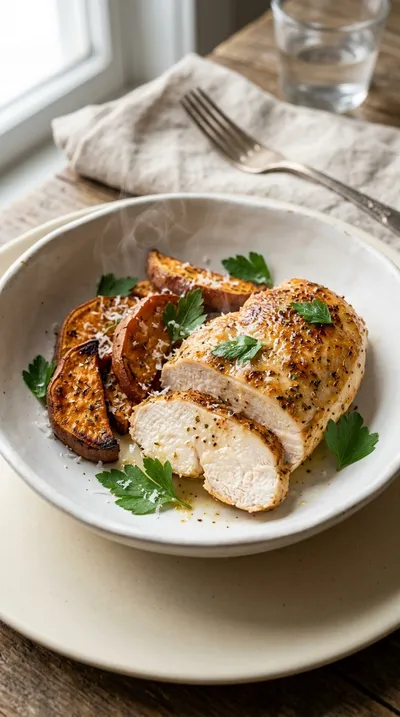
Air Fryer Chicken Breast – Juicy Quick Dinner
Savor a tender air fryer chicken breast that's golden on the outside and wonderfully moist inside. It's a quiet, comforting meal that brings the scent of smoked paprika and garlic powder into your kitchen in minutes.
Timing
Prep Time
10 Minutes
Cook Time
12 Minutes
Total Time
22 Minutes
Recipe Details
Ingredients
Main Ingredients
-
01
4 boneless, skin‑free chicken breast halves (about 7 oz each)
-
02
2 tbsp olive oil
Seasoning Paste
-
01
1 tsp garlic powder
-
02
1 tsp smoked paprika
-
03
1/2 tsp salt
-
04
1/4 tsp black pepper
-
05
1 tsp dried oregano
-
06
2 tbsp grated Parmesan cheese (optional)
-
07
Zest of 1 lemon (optional)
Instructions
First things first, let's get that air fryer warmed up. Preheat it to 375°F (190°C) for about 3 minutes. It just helps the basket get hot and makes sure any little bits of moisture on the chicken don't slow down the crisping.
Now, take a moment to pat those chicken breasts dry with some paper towels. Honestly, it seems like a small thing, but it's the secret to getting the oil and seasonings to really bind and crisp up nicely.
In a small bowl, whisk together your olive oil, garlic powder, smoked paprika, salt, pepper, and oregano. If you're feeling it, go ahead and stir in that Parmesan and lemon zest. It turns into a lovely little coating paste.
Brush the seasoning paste onto both sides of each chicken breast. Press it in gently so it really sticks. Now, place them in the air fryer basket in a single layer—just make sure to leave a little gap between them so the air can move.
Cook them for 10 minutes. When you hit the halfway mark—around 5 minutes in—use your tongs to flip the breasts. We want them to brown evenly on both sides, yeah?
Let them cook for another 3–5 minutes. I always check with a meat thermometer here; you're looking for an internal temperature of 165°F (74°C).
Carefully move the chicken to a cutting board and let them rest for 5 minutes. I know it's hard to wait, but resting keeps those juices locked inside so the meat stays moist.
You can slice them up now or serve them whole. If you have a lemon handy, a little fresh squeeze over the top adds such a nice brightness.
Arrange your chicken on a platter with whatever sides you've picked. If you're in a rush, just let the plate rest for a second while you finish the sides.
Serve it up immediately! Wow, that contrast between the crisp exterior and the juicy inside is just wonderful.
Notes & Tips
-
1
Resting the meat for 5 minutes is non-negotiable for juiciness.
-
2
Ensure chicken is patted completely dry before oiling.
-
3
Avoid overcrowding the basket to ensure proper air circulation.
Tools You'll Need
-
Air fryer for high-heat circulation
-
Small mixing bowl for the seasoning paste
-
Tongs for safe flipping
-
Meat thermometer to prevent overcooking
-
Cutting board with knife for resting and slicing
-
Paper towel or clean kitchen towel for drying
Must-Know Tips
-
Parchment liners, Use a parchment paper liner or silicone mat to make cleanup a breeze.
-
Thermometer use, Use a real meat thermometer because chicken can get dry so quickly if pulled too late.
-
Extra Crunch, Spray a light mist of cooking spray for a deeper, more golden crust.
Professional Secrets
-
The 'Dry-Pat' Method: removing surface moisture allows the Maillard reaction to happen faster.
-
Coating Paste Technique: mixing spices into oil creates a barrier that locks in moisture while flavoring the outside.
-
Temperature Precision: pulling chicken at exactly 165°F ensures a tender result every time.
What readers are saying
Community reviews from home cooks like you
Can't believe how simple this was. I really liked how the 4 boneless, skin‑free chicken breast halves (about 7 oz each) and 2 tbsp olive oil came together. It took slightly longer than the recipe said. Thanks for sharing this one!
Perfect for a busy weeknight. I really liked how the 4 boneless, skin‑free chicken breast halves (about 7 oz each) and 2 tbsp olive oil came together. Saving this for later.
So easy and delicious. I really liked how the 4 boneless, skin‑free chicken breast halves (about 7 oz each) and 2 tbsp olive oil came together. Will be making this regularly.
So easy and delicious. I really liked how the 4 boneless, skin‑free chicken breast halves (about 7 oz each) and 2 tbsp olive oil came together. I swapped one ingredient and it still worked. Will be making this regularly.
My new favorite way to make Air Fryer Chicken Breast – Juicy Quick Dinner. I really liked how the 4 boneless, skin‑free chicken breast halves (about 7 oz each) and 2 tbsp olive oil came together. I found it a bit sweet for my taste. Saving this for later.
So easy and delicious. I really liked how the 4 boneless, skin‑free chicken breast halves (about 7 oz each) and 2 tbsp olive oil came together. My kids even asked for seconds.
My new favorite way to make Air Fryer Chicken Breast – Juicy Quick Dinner. I really liked how the 4 boneless, skin‑free chicken breast halves (about 7 oz each) and 2 tbsp olive oil came together. Highly recommend giving it a try.
This exceeded my expectations. I really liked how the 4 boneless, skin‑free chicken breast halves (about 7 oz each) and 2 tbsp olive oil came together. Next time I'll double the sauce. My kids even asked for seconds.
Perfect for a busy weeknight. I really liked how the 4 boneless, skin‑free chicken breast halves (about 7 oz each) and 2 tbsp olive oil came together. Will be making this regularly.
This exceeded my expectations. I really liked how the 4 boneless, skin‑free chicken breast halves (about 7 oz each) and 2 tbsp olive oil came together. Already shared it with a friend.
Good, but not amazing. The each) flavor was nice, but i would reduce the salt a little. I might try it again with some adjustments.
Can't believe how simple this was. I really liked how the 4 boneless, skin‑free chicken breast halves (about 7 oz each) and 2 tbsp olive oil came together. Highly recommend giving it a try.
Will definitely make this again. I really liked how the 4 boneless, skin‑free chicken breast halves (about 7 oz each) and 2 tbsp olive oil came together. It took slightly longer than the recipe said. Highly recommend giving it a try.
Perfect for a busy weeknight. I really liked how the 4 boneless, skin‑free chicken breast halves (about 7 oz each) and 2 tbsp olive oil came together. The texture was a touch off, but the flavor saved it. Thanks for sharing this one!
Will definitely make this again. I really liked how the 4 boneless, skin‑free chicken breast halves (about 7 oz each) and 2 tbsp olive oil came together. My oven needed an extra 5 minutes. Saving this for later.
The flavors were spot on. I really liked how the 4 boneless, skin‑free chicken breast halves (about 7 oz each) and 2 tbsp olive oil came together. Already shared it with a friend.

Recipe by
Evelyn MaeEvelyn celebrates old-school flavors 🕰️🍽️, classic recipes 🥘✨, and timeless nostalgia 💛🕯️. She brings past traditions to modern kitchens 🏡🍳.
Get Delicious Recipes Weekly
Join 25,000+ home cooks getting our best recipes straight to their inbox.
Free forever • No spam • Unsubscribe anytime