
I learned about brown butter from my great-aunt Martha, who used to make these incredible butter cookies every Christmas. She'd stand at her old gas stove, watching the butter like it was a precious gemstone, and I'd sit on a stool clutching my doll, mesmerized by the transformation from pale yellow to deep amber. She'd always say, "Honey, patience makes the flavor," and she was so right.
Years later, when I had my own kitchen and my first batch of chocolate chip cookies turned out flat and sad, I remembered her words. I started browning the butter first, and oh my gosh, the difference was incredible. The cookies held their shape better, had this incredible chew factor, and that nutty flavor complemented the chocolate in a way that still surprises me every time.
Now my daughter stands on that same stool I used to, sneaking chocolate chips while I brown the butter. She calls them "magic cookies" because of how the golden butter smells like caramel when it's ready. We've made them for school bake sales, for neighbors going through tough times, for rainy day pick-me-ups... they're our little edible hugs.
The real secret, though? Letting the dough chill overnight. It feels like forever when you're craving cookies, but that waiting time lets the flour hydrate and the flavors deepen. When you finally bake them the next day, the edges get perfectly crisp while the centers stay gloriously soft and chewy. It's worth the wait, I promise.
Why You'll Love It
-
That incredible brown butter flavor - Oh my gosh, it's the star of the show. When you brown butter properly, it develops these amazing nutty, almost caramel-like notes that regular butter just can't match. It adds this depth that makes people say "Wow, what's in these?" every single time. The smell alone is worth the extra few minutes at the stove, honestly.
Perfect chewy texture - These cookies have that bakery-style chew that's so hard to achieve at home. The brown butter helps create a more moist dough, and when you chill it properly, you get these gorgeous cookies with crisp edges and soft, almost-gooey centers. They don't spread into flat pancakes, which is my pet peeve with some cookie recipes.
Simple ingredients, magical results - You probably have everything you need right in your pantry. No fancy equipment or hard-to-find ingredients - just butter, sugar, flour, and good chocolate. The magic happens in the technique, not complicated ingredients, which makes these perfect for beginner bakers and experts alike.
Freezes beautifully - I always make a double batch and freeze half the dough for impromptu cookie cravings. The dough balls freeze perfectly, and you can bake them straight from frozen - just add a minute or two to the baking time. Having cookie dough ready in the freezer feels like having a secret superpower for unexpected guests.
"My family now requests these weekly - the brown butter makes them taste like a fancy bakery cookie but with that home-baked soul."
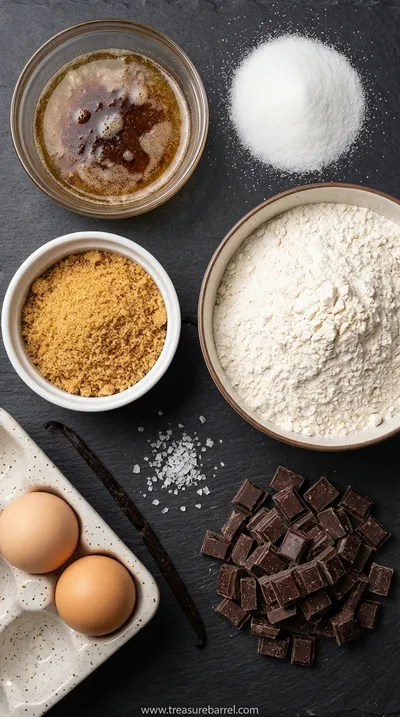
Essential Ingredient Guide
- Unsalted butter: Using unsalted butter lets you control the salt level perfectly. When you brown it, watch for those little brown specks at the bottom - that's the milk solids toasting up and creating that incredible nutty flavor. Don't walk away during this step! It goes from perfectly browned to burnt surprisingly fast. The aroma should smell like toasted nuts, not bitter or acrid.
- Dark brown sugar: The molasses in dark brown sugar gives these cookies their signature chewiness and deep caramel flavor. Make sure you pack it firmly into your measuring cup - none of that loose scooping business. If you only have light brown sugar, you can use it, but the cookies will be slightly less chewy and have a milder flavor profile.
- Good quality chocolate: Splurge on the good chocolate here - it makes such a difference. I like using a mix of chocolate chips and chopped chocolate bars for varied texture and melty pockets. The chocolate should be your favorite eating chocolate because you'll taste it in every bite. Cheap chocolate can make the cookies taste waxy, and we don't want that.
 Sweet Treats
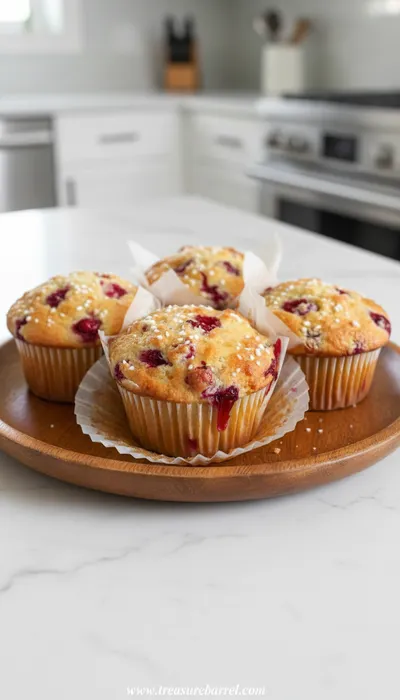
Cranberry and Orange Yogurt Muffins
Bright cranberry‑orange muffins with a soft yogurt crumb and a whisper of citrus.
Complete Cooking Process
-
Brown the Butter:
Start by cutting your butter into chunks and placing it in a light-colored saucepan - this helps you see the color change better. Melt it over medium heat, swirling the pan occasionally. You'll hear it sizzle as the water evaporates, then it will foam up. Keep watching for those little brown specks forming at the bottom - that's your cue it's ready. The whole process takes about 5-8 minutes, and the aroma will shift from buttery to nutty and caramel-like. Pour it into a heatproof bowl immediately to stop the cooking, making sure to scrape all those toasted bits in.
-
Mix the Dough:
Let the brown butter cool for about 15 minutes - you want it warm but not hot enough to cook the eggs. Then whisk in both sugars until the mixture looks like wet sand. Add the eggs one at a time, beating well after each addition - this creates that lovely cookie structure. The vanilla goes in next, then gradually add your dry ingredients. Mix just until combined - overmixing makes tough cookies. Finally, fold in your chocolate chunks gently.
-
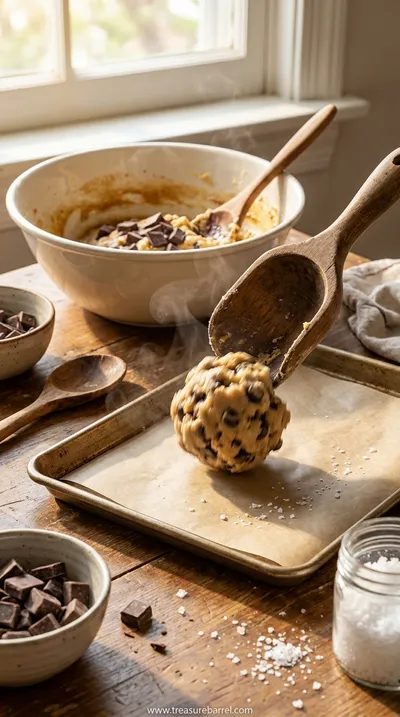
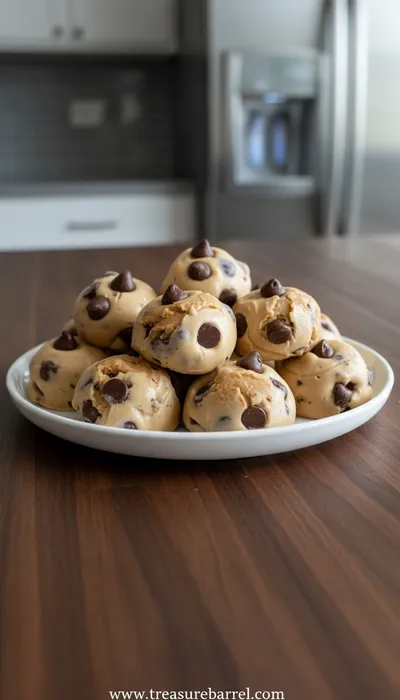
Chill and Bake:
This is the hardest part - patience! Cover the dough and chill it for at least 2 hours, but overnight is magical. The flour hydrates, the flavors meld, and the cookies bake up thicker. When you're ready, scoop generous tablespoons onto parchment-lined sheets, leaving room for spreading. Bake until the edges are golden but the centers still look slightly underdone - they'll finish cooking as they cool. That's the secret to chewy centers!
-
Use a light-colored pan for browning butter - you can see the color change much better
-
Chill your dough balls for 10 minutes before baking if you skipped the long chill - it helps prevent spreading
-
Rotate your baking sheets halfway through for even browning - every oven has hot spots
Pro Tips
Don't skip the cooling rack step - letting cookies cool completely on the sheet helps them set up properly without becoming hard.
The Magic of Brown Butter
Brown butter is really just butter that's been cooked until the water evaporates and the milk solids toast up. But oh, what a transformation! It goes from regular butter to this golden, nutty, almost caramel-flavored liquid gold. The French call it beurre noisette, which means hazelnut butter, and that's exactly what it smells like - toasted nuts and caramel.
What's incredible is how this simple step elevates everything it touches. It gives these cookies a depth of flavor that makes people pause after the first bite. They can't quite place what's different, but they know it's special. It's my secret weapon in so many recipes now - from pasta sauces to banana bread to simple vegetable sautés.
You Must Know
-
Brown butter continues cooking after you take it off heat - pour it into a cool bowl immediately
-
Chilling the dough is non-negotiable for thick, chewy cookies
-
Underbake slightly for the perfect soft center - they'll firm up as they cool
Frequently Asked Questions
→ Can I use salted butter instead of unsalted?
You can, but you'll want to reduce the added salt in the recipe by about 1/4 teaspoon. Honestly, I prefer unsalted because different brands have different salt levels, and it lets me control the flavor perfectly. Salted butter can work in a pinch though - the cookies will still be delicious, just slightly saltier.
→ Why do I need to chill the dough?
Chilling does two magical things: First, it allows the flour to fully hydrate, which gives you a chewier texture. Second, it solidifies the butter so your cookies don't spread into flat pancakes in the oven. That waiting time also lets the flavors meld together beautifully. I know it's tempting to bake them right away, but trust me - the wait is worth it.
→ My butter burned - can I save it?
Oh honey, I've been there! Unfortunately, burnt butter has a bitter taste that you can't fix. It's better to start over - believe me, I learned this the hard way. The good news is butter is relatively inexpensive, and now you know exactly what to watch for next time. The moment it smells nutty and has those golden specks, it's ready.
→ Can I make these without a mixer?
Absolutely! I often make them by hand when I want that nostalgic feeling of stirring cookie dough with a wooden spoon. Just make sure your butter is cooled enough that it won't cook the eggs, and mix vigorously when adding the eggs to incorporate them well. It's a great arm workout, honestly.
→ How long do these cookies stay fresh?
They're best within 3 days stored in an airtight container. The brown butter flavor actually deepens on the second day, which is lovely. If they start to get stiff, you can revive them with 10 seconds in the microwave - just enough to warm them slightly and bring back that fresh-baked softness.
→ Can I freeze the baked cookies?
Yes! They freeze beautifully for up to 3 months. Let them cool completely, then layer them between parchment paper in an airtight container. To serve, just let them thaw at room temperature or pop them in a 300°F oven for 5 minutes to refresh them. The dough balls freeze even better though - ready for spontaneous cookie emergencies.
→ What's the best chocolate to use?
I love using a mix of chocolate chips and chopped chocolate bars - the chips hold their shape while the chopped bits create those lovely melty pockets. Dark chocolate around 60-70% cacao works beautifully with the brown butter's nuttiness. But use what you love - milk chocolate makes them sweeter, while white chocolate creates a nice contrast.
→ Can I make these gluten-free?
I've had good results with a 1:1 gluten-free flour blend, though the texture will be slightly more cakey. Make sure your blend contains xanthan gum, which helps with structure. The chilling step becomes even more important with GF flour to prevent excessive spreading. They won't be quite as chewy, but still delicious!
Nutrition Facts
per serving
180
Calories
2g
Protein
24g
Carbs
9g
Fat
Taste Profile
Rich, nutty caramel notes with sweet chocolate bursts
Ingredient Substitutions
Don't have an ingredient? Try these alternatives
Cookies will be less chewy and have milder flavor
Creates more varied texture with melty pockets
Recipe Variations
Try these delicious twists on the original
Salted Caramel Version
Add 1/2 cup chopped soft caramels and sprinkle with flaky sea salt before baking
Nutty Delight
Fold in 1 cup toasted walnuts or pecans along with the chocolate chips
Common Mistakes to Avoid
Learn from others' mistakes for perfect results
- Burning the butter - watch carefully for color change
- Skipping the chill - leads to flat, spread-out cookies
- Overmixing the dough - creates tough cookies
- Overbaking - results in dry, hard cookies
- Uneven portioning - causes inconsistent baking
Meal Prep & Storage
Make Ahead Tips
The dough can be made up to 3 days in advance and stored chilled. You can also portion the dough balls and refrigerate them on baking sheets ready to bake. For longer storage, freeze the dough balls for up to 3 months. Browned butter can be made ahead and stored in the refrigerator for up to 1 week. Let it come to room temperature before using in the recipe. This is great for planning baking sessions around busy schedules. You can even mix the dry ingredients ahead and store them in an airtight container. When ready to bake, just combine with the wet ingredients. This makes spontaneous cookie baking so much easier.
Leftover Ideas
Leftover cookies make incredible ice cream sandwiches when slightly softened. They're also perfect crumbled over yogurt or oatmeal for a special breakfast treat. Stale cookies can be blended into milkshakes for a cookies-and-cream delight. Cookie crumbs make a wonderful pie crust when mixed with melted butter - perfect for cheesecakes or pudding pies. They can also be used as a topping for banana bread before baking for added texture. If you have more cookies than you can eat, they freeze beautifully and make wonderful gifts. Package them in pretty boxes or tins for teachers, neighbors, or friends who need cheering up.
Perfect Pairings
Serve this with...
Cooking Timeline
Brown the butter and let it cool slightly
Mix dough ingredients until just combined
Chill dough for optimal texture development
Preheat oven and portion dough balls
Bake cookies until golden edged
Cool on sheets then transfer to racks
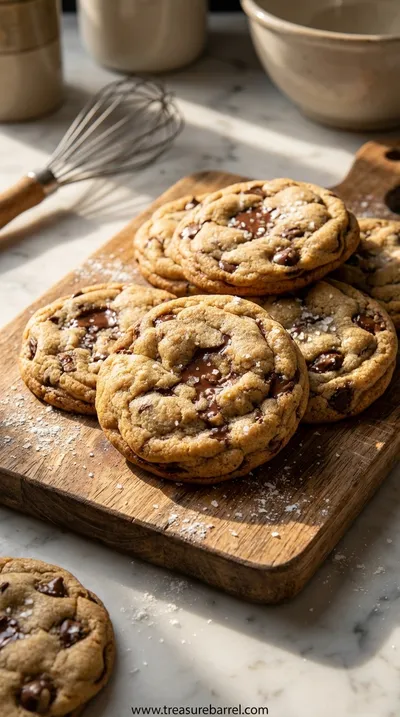
Brown Butter Chocolate Chip Cookies Recipe
Chewy brown butter chocolate chip cookies with toasty flavor.
Timing
Prep Time
20 Minutes
Cook Time
12 Minutes
Total Time
32 Minutes
Recipe Details
Ingredients
Cookie Dough
-
01
1 cup unsalted butter
-
02
1 cup dark brown sugar, packed
-
03
1/2 cup granulated sugar
-
04
2 large eggs
-
05
2 teaspoons vanilla extract
-
06
2 1/4 cups all-purpose flour
-
07
1 teaspoon baking soda
-
08
1/2 teaspoon salt
-
09
2 cups chocolate chips or chunks
Instructions
Start by browning your butter. Cut the butter into chunks and place in a light-colored saucepan over medium heat. Melt it completely, then continue cooking, swirling occasionally, until it foams up and you see brown specks forming at the bottom. This should take 5-8 minutes - you'll smell a nutty aroma when it's ready. Immediately pour into a heatproof bowl, scraping all the browned bits in. Let it cool for 15 minutes until warm but not hot.
In a large bowl, whisk the cooled brown butter with both sugars until the mixture looks like wet sand. It won't be fluffy like creamed butter - that's normal. Add the eggs one at a time, beating well after each addition. The mixture might look slightly curdled at first, but keep whisking until it comes together. Stir in the vanilla extract until everything is well combined.
In a separate bowl, whisk together the flour, baking soda, and salt. Gradually add this to the wet ingredients, mixing just until combined - don't overmix here. Finally, gently fold in your chocolate chips or chunks. The dough will be soft and somewhat sticky, which is perfect. Cover the bowl and chill for at least 2 hours, or ideally overnight.
When ready to bake, preheat your oven to 375°F and line baking sheets with parchment paper. Scoop tablespoon-sized balls of dough, placing them about 2 inches apart. If you have time, chill the shaped dough balls for 10 minutes before baking - it helps them hold their shape. Bake for 10-12 minutes until the edges are golden but centers still look soft. Let them cool on the baking sheet for 5 minutes before transferring to a wire rack to cool completely.
Notes & Tips
-
1
The brown butter step is crucial - watch it carefully as it can burn quickly. The moment it smells nutty and has golden specks, it's done.
-
2
Chilling the dough is non-negotiable for thick, chewy cookies. If you're impatient, freeze the dough balls for 30 minutes instead of refrigerating.
-
3
These cookies continue cooking after you take them out of the oven, so slightly underbaking gives you that perfect soft center.
-
4
For extra flavor, you can add 1/2 teaspoon of cinnamon or a pinch of nutmeg to the dry ingredients - it complements the brown butter beautifully.
-
5
If your cookies spread too much, your butter might have been too warm when you mixed the dough, or you might need to chill the shaped dough balls longer.
-
6
The dough freezes beautifully - portion it into balls and freeze on a sheet pan before transferring to a bag. Bake from frozen, adding 1-2 minutes to the baking time.
Tools You'll Need
-
Light-colored saucepan for browning butter - you need to see the color change clearly
-
Mixing bowls in various sizes - one for browning butter, one for dry ingredients
-
Whisk and spatula - for thorough mixing and scraping every bit of goodness
-
Measuring cups and spoons - precision matters in baking, honestly
-
Baking sheets lined with parchment - prevents sticking and makes cleanup easy
-
Cookie scoop or tablespoon measure - for evenly sized cookies that bake uniformly
-
Wire cooling rack - allows air circulation so bottoms don't get soggy
Must-Know Tips
-
Watch the butter like a hawk - It goes from perfectly browned to burnt in seconds
-
Chill the dough thoroughly - This prevents spreading and develops flavor
-
Don't overmix after adding flour - Gentle folding keeps cookies tender
-
Bake one sheet at a time - Even baking beats speed every time
-
Let cool on the sheet - They continue setting up as they cool
Professional Secrets
-
Room temperature eggs - They incorporate better than cold eggs
-
Weigh your flour - Cup measurements vary wildly in baking
-
Rotate pans halfway - Ovens have hot spots you need to account for
-
Underbake slightly - Cookies firm up as they cool on the sheet

Recipe by
Lila GraceLila creates magical desserts 🍫🧁, sprinkles joy 🌈✨, and shares sweet moments 🍬💖. Her kitchen is full of smiles 😄 and sugar-dusted memories 🍪🍯.
Get Delicious Recipes Weekly
Join 25,000+ home cooks getting our best recipes straight to their inbox.
Free forever • No spam • Unsubscribe anytime