
Chocolate chip cookies have a history that stretches back to the 1930s, when Ruth Wakefield first added chocolate morsels to her butter cookies. The result was an instant classic that continues to charm generations. The bar version carries that legacy, offering the same comforting flavors in a slice‑ready shape, ideal for busy mornings or afternoon tea. The gentle aroma of toasted butter and vanilla fills the kitchen, reminding us why this treat has endured.
Why You'll Love It
-
- Easy to make in one pan
-
- Soft, chewy texture that melts in your mouth
-
- Ideal for portion control and sharing
-
- Stores well for quick snack grabs
"These bars are the perfect balance of soft and chocolatey—my kids can’t get enough!"
Essential Ingredient Guide
- Unsalted butter: Provides richness and a tender crumb; use softened butter for easy mixing.
- Brown sugar: Adds moisture and a caramel‑like depth; pack it firmly when measuring.
- Chocolate chips: Choose semi‑sweet for balance; they stay soft and melt beautifully.
- Vanilla extract: A splash lifts the flavor, echoing the classic cookie aroma.
- Eggs: Bind the dough; room‑temperature eggs blend more smoothly.
- All‑purpose flour: Creates structure; sift it to avoid lumps.
Complete Cooking Process
-
Ingredient Readiness:
Soften butter, measure sugars, and pre‑heat the oven while the kitchen fills with a buttery scent.
-
Flavor Development:
Cream butter and sugars together until light, then stir in vanilla and eggs to build a glossy base.
-
Texture Control:
Fold in flour gently before adding chocolate chips, ensuring a tender crumb without over‑mixing.
-
Finishing Touches:
Spread the batter evenly, bake until the edges are golden, and let the bars cool slightly to set.
-
Serving Timing:
Cut the bars while still warm for a soft chew, then let them rest to achieve the perfect balance.
-
Use a light‑colored pan to monitor browning without surprise.
-
Chill the dough 10 minutes before baking for a fudgier center.
-
Swap half the brown sugar for white for a slightly crisper edge.
-
Add a pinch of sea salt on top before baking for flavor contrast.
Pro Tips
Well, those little adjustments can really change the experience. I remember once forgetting the pinch of salt and the bars felt a bit flat—adding that mineral spark brings the chocolate forward. So, trust these tips; they’re the little whispers of a seasoned kitchen that make the difference.
 Home Baking
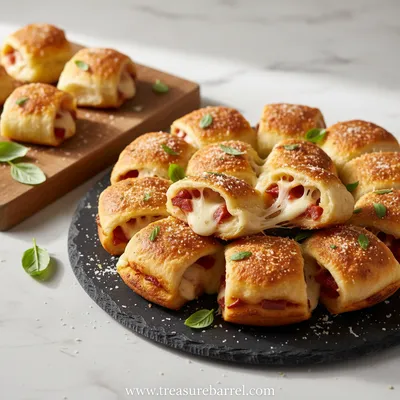
High Protein Beef Pepperoni Pizza Rolls
Crispy, cheesy, protein‑rich pizza rolls made with beef pepperoni and a tender homemade dough.
The essence of the dish:
A buttery dough that stays soft, punctuated by melty chocolate chips, creating a comforting chew that’s both familiar and fresh.
A fun fact or historical angle:
The original chocolate chip cookie was invented by Ruth Wakefield in the 1930s; these bars honor that legacy by keeping the same classic flavor profile.
Flavor or sensory focus:
Expect a fragrant vanilla aroma, a warm caramel note from the brown sugar, and a lingering chocolate richness that lingers on the palate.
You Must Know
-
Do not over‑bake; the center should stay slightly soft.
-
Use high‑quality chocolate chips for best melt.
-
Allow the bars to rest before cutting for clean slices.
Frequently Asked Questions
→ Can I use honey instead of sugar?
Yes, swap the brown sugar with an equal amount of honey, but reduce the butter slightly to keep the texture balanced.
→ How do I store leftovers?
Store the cooled bars in an airtight container at room temperature for up to three days or freeze for longer keep.
→ Can I add nuts?
Feel free to fold in toasted walnuts or pecans for a crunchy contrast; about ½ cup works well.
→ Is this recipe gluten‑free?
Replace the all‑purpose flour with a 1‑to‑1 gluten‑free flour blend and the bars remain delicious.
→ What if I don’t have a pan?
A standard 8‑inch square baking dish works; just adjust the baking time by a couple of minutes.
→ Can I make them ahead?
Absolutely—bake the bars, cool completely, and wrap each piece in parchment for a grab‑and‑go snack.
Nutrition Facts
per serving
310
Calories
4g
Protein
38g
Carbs
16g
Fat
Taste Profile
Rich buttery sweetness with melted chocolate highlights
Ingredient Substitutions
Don't have an ingredient? Try these alternatives
Margarine keeps the texture, coconut oil adds a mild tropical note.
Provides a deeper cocoa flavor; may be slightly less sweet.
Recipe Variations
Try these delicious twists on the original
Spicy Version
Add ½ tsp cayenne pepper and a sprinkle of crushed red pepper flakes for a subtle heat.
Mediterranean Style
Fold in ¼ cup chopped dried apricots, ¼ cup toasted almonds, and a drizzle of honey.
Common Mistakes to Avoid
Learn from others' mistakes for perfect results
- Over‑mixing the dough, leading to dense bars.
- Baking too long, which dries out the center.
- Using melted butter, which can make the texture greasy.
Meal Prep & Storage
Make Ahead Tips
You can prepare the batter a day ahead, store it covered in the refrigerator, and bake when needed for fresh‑warm bars.
Leftover Ideas
Reheat gently in a preheated 300°F oven for 5‑7 minutes or in a microwave for 20 seconds for a soft bite.
Perfect Pairings
Serve this with...
Cooking Timeline
Preheat oven, grease pan, and gather all ingredients.
Cream butter and sugars, then blend in eggs and vanilla.
Fold in dry ingredients followed by chocolate chips.
Spread batter, bake until edges are golden.
Cool slightly, slice into bars, and serve.
 Sweet Treats
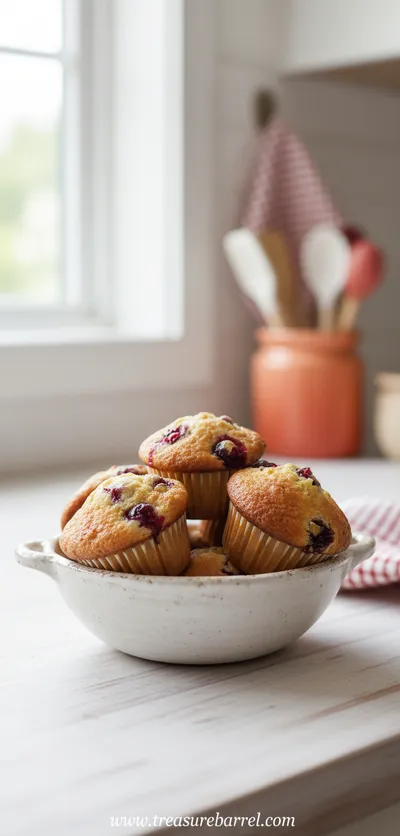
Cranberry Orange Muffins
Tender muffins bursting with orange zest and tart cranberries, ideal for a comforting morning treat.
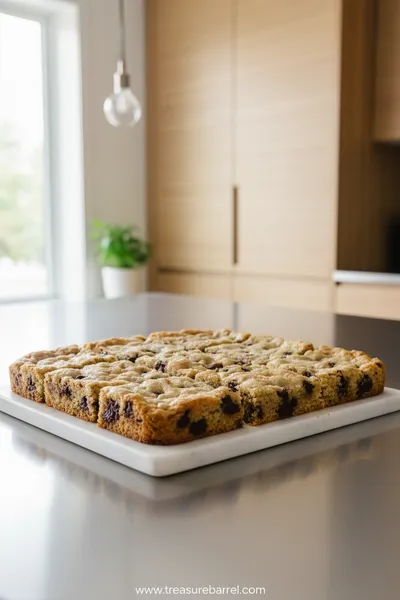
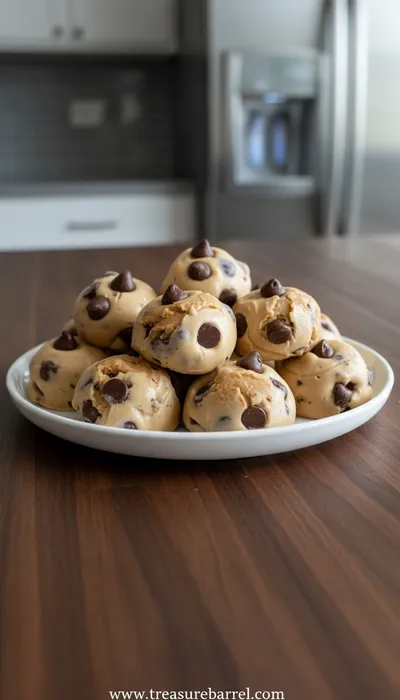
Chocolate Chip Cookie Bars
Soft, chewy chocolate chip cookie bars that are quick to bake and perfect for any sweet craving, offering a comforting bite of buttery dough studded with melty chocolate chips.
Timing
Prep Time
15 Minutes
Cook Time
20 Minutes
Total Time
35 Minutes
Recipe Details
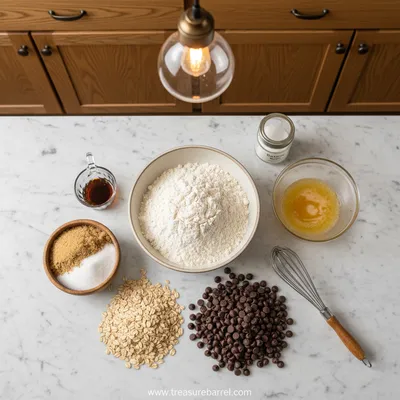
Ingredients
Main Ingredients
-
01
1 cup unsalted butter, softened
-
02
¾ cup brown sugar, packed
-
03
½ cup white granulated sugar
-
04
2 large eggs, room temperature
-
05
2 tsp vanilla extract
-
06
2 ¼ cups all‑purpose flour
-
07
1 tsp baking soda
-
08
½ tsp salt
-
09
1 ½ cups semi‑sweet chocolate chips
Optional Add‑Ins
-
01
½ cup chopped walnuts or pecans
-
02
½ tsp espresso powder for depth
Instructions
Preheat the oven to 350°F (175°C). Lightly grease a 9‑inch square pan; the butter scent will already start filling the kitchen.
In a large bowl, cream together the softened butter, brown sugar, and white sugar until the mixture is light and fluffy, about 2‑3 minutes.
Add the eggs one at a time, mixing well after each, then stir in the vanilla extract. The batter will look glossy and smooth.
Whisk together flour, baking soda, and salt; gradually fold into the wet mixture, being careful not to over‑mix.
Gently stir in the chocolate chips (and optional nuts) until evenly distributed. The dough should be thick but spreadable.
Spread the dough evenly in the prepared pan, pressing lightly to an even surface. Bake for 18‑20 minutes, until the edges turn a light golden brown and a toothpick comes out with a few moist crumbs.
Remove from oven and let cool in the pan for 10 minutes before slicing into bars. The bars stay soft and chewy while they finish setting.
Notes & Tips
-
1
If you prefer a chewier interior, pull the bars out at the 18‑minute mark.
-
2
For a crispier edge, let the pan sit on the counter an extra 5 minutes before slicing.
-
3
Try sprinkling a pinch of flaky sea salt on top before baking for an extra flavor pop.
 Warm Meals
Best Chicken and Rice Casserole: Family Favorite Recipe
Savory chicken and rice bake with vegetables, ideal for make-ahead meals.
Tools You'll Need
-
9‑inch square baking pan
-
Mixing bowls
-
Hand mixer or stand mixer
-
Spatula
-
Measuring cups and spoons
-
Wire rack
Must-Know Tips
-
Don’t over‑beat the butter and sugar; keep it light and airy.
-
Let the dough rest briefly for a fudgier center.
-
Cool the bars slightly before cutting to avoid crumbling.
Professional Secrets
-
Room temperature butter integrates evenly, preventing pockets of greasiness.
-
Baking on a light‑colored pan lets you see true color change without burning.
-
Letting the bars rest after baking continues the cooking process, keeping the center soft.

Recipe by
Lila GraceLila creates magical desserts 🍫🧁, sprinkles joy 🌈✨, and shares sweet moments 🍬💖. Her kitchen is full of smiles 😄 and sugar-dusted memories 🍪🍯.
Get Delicious Recipes Weekly
Join 25,000+ home cooks getting our best recipes straight to their inbox.
Free forever • No spam • Unsubscribe anytime