
Chocolate mousse brownies trace their roots to mid‑century American bakeries, where bakers sought to combine the decadence of mousse with the handheld convenience of brownies. The result was a layered treat that married airy richness with fudgy depth, offering a dessert that feels both luxurious and home‑grown.
Why You'll Love It
-
- Two textures in one bite: fudgy and mousse-like
-
- Simple pantry ingredients, no fancy equipment
-
- Perfect for both casual snack and special occasion
-
- Holds up well for leftovers, staying moist
"These brownies remind me of holiday gatherings—soft, chocolatey, and pure comfort."
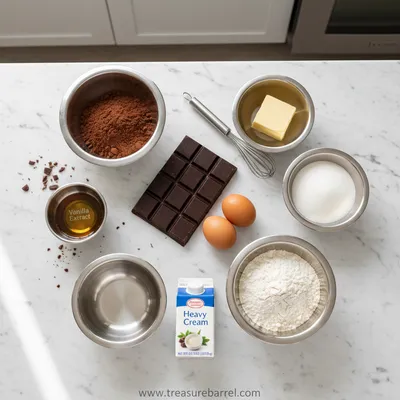
Essential Ingredient Guide
- Dark chocolate: Choose a chocolate with 60‑70% cocoa for depth; melt gently over simmering water.
- Heavy cream: Full‑fat cream gives the mousse its silkiness; keep it chilled until whipping.
- Eggs: Separate yolks and whites; yolks enrich the brownie, whites are whipped for air.
- Sugar: Granulated sugar balances bitterness; dissolve into the melted chocolate.
- Vanilla extract: A splash adds warmth; use pure extract for the best aroma.
- Flour: All‑purpose flour provides structure without making it dense.
Complete Cooking Process
-
Ingredient Readiness:
Measure and sift flour, melt chocolate, chill the cream, and separate eggs before you start.
-
Flavor Development:
Combine melted chocolate with sugar and yolks, letting the mixture become glossy and smooth.
-
Texture Control:
Fold in whipped egg whites gently, preserving the airy mousse layer.
-
Finishing Touches:
Spread the brownie base, top with mousse, and sprinkle a pinch of sea salt before baking.
-
Serving Timing:
Allow the brownies to cool completely; the mousse sets beautifully after a few hours in the fridge.
-
Use a double boiler to melt chocolate evenly
-
Chill the mixing bowl for whipping cream
-
Do not over‑mix the mousse to keep it light
-
Store in airtight container for up to 3 days
Pro Tips
These little habits make a big difference. I often set the bowl on a frozen bag of peas—simple, but it guarantees a crisp whip. And when the brownies are done, I let them rest; that quiet moment before slicing is like a small celebration.
The essence of the dish:
It’s the marriage of two beloved desserts—rich, dense brownies underneath and a cloud‑like chocolate mousse on top—creating a contrast that feels both comforting and elegant.
A fun fact or historical angle:
The idea of layering mousse over baked goods first appeared in 1960s Paris, where patissiers experimented with mousse as a filling for cakes.
Flavor or sensory focus:
The first bite offers a snap of brownie, followed quickly by the melt‑in‑your‑mouth mousse, all wrapped in a fragrant chocolate aroma with a whisper of vanilla.
You Must Know
-
Mousse should be folded, not stirred
-
Brownie base must be baked just until set
-
Cool completely before cutting
Frequently Asked Questions
→ Can I make this gluten‑free?
Yes, swap the all‑purpose flour for a 1‑to‑1 gluten‑free blend; the texture remains tender.
→ Do I need to use a water bath?
No water bath is required; a regular 350°F oven works perfectly.
→ How long can I store leftovers?
Keep them refrigerated in an airtight container for up to 3 days; they stay moist.
→ Can I freeze the brownies?
Absolutely—wrap tightly and freeze for up to a month; thaw in the fridge before serving.
→ What if I don’t have heavy cream?
You can substitute whipping cream with a blend of half‑and‑half and butter, but texture will be less airy.
→ Is there a dairy‑free version?
Use coconut cream in place of heavy cream and a dairy‑free chocolate; the mousse will stay luscious.
Nutrition Facts
per serving
320
Calories
4g
Protein
35g
Carbs
18g
Fat
Taste Profile
Rich chocolate with a silky, airy finish
Ingredient Substitutions
Don't have an ingredient? Try these alternatives
Maintains depth; may be slightly more intense.
Use 3 tbsp aquafaba per egg white; whip to stiff peaks.
Recipe Variations
Try these delicious twists on the original
Spicy Version
Add a pinch of cayenne pepper to the mousse and sprinkle chipotle chocolate shards on top.
Mediterranean Style
Stir in chopped toasted almonds and a drizzle of orange blossom honey after chilling.
Common Mistakes to Avoid
Learn from others' mistakes for perfect results
- Over‑mixing the brownie batter, leading to a cakey texture.
- Folding the mousse too vigorously, deflating the airy texture.
- Skipping the cooling step before adding mousse, causing it to melt.
Meal Prep & Storage
Make Ahead Tips
Prepare the brownie base and mousse separately, assemble, and refrigerate up to 24 hours before serving.
Leftover Ideas
Reheat gently in a microwave for 10 seconds per piece; the mousse will stay soft.
Perfect Pairings
Serve this with...
Cooking Timeline
Gather and measure all ingredients; preheat oven.
Prepare brownie batter and bake.
Cool brownie, melt chocolate, whip cream and egg whites.
Fold mousse components and spread over brownie.
Refrigerate to set mousse, then slice and serve.
 Sweet Treats
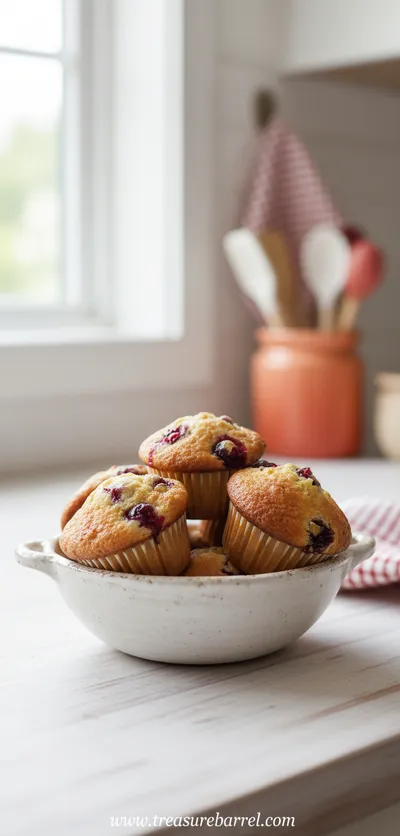
Cranberry Orange Muffins
Tender muffins bursting with orange zest and tart cranberries, ideal for a comforting morning treat.
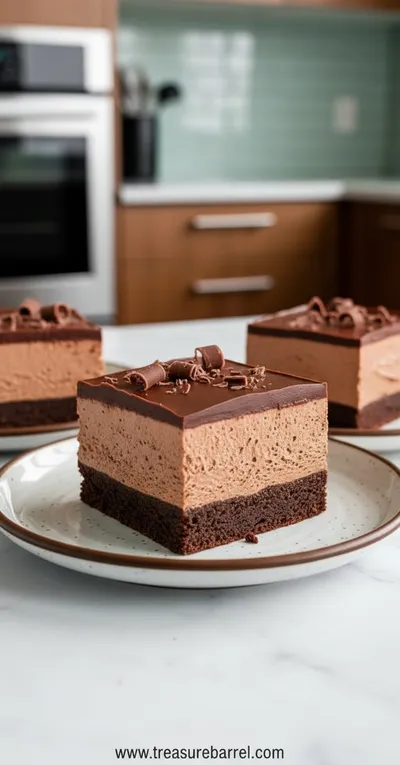
Chocolate Mousse Brownies – Creamy, Decadent Treat
Indulge in rich chocolate mousse brownies with silky layers and deep cocoa flavor—perfect for a cozy dessert any time.
Timing
Prep Time
20 Minutes
Cook Time
25 Minutes
Total Time
45 Minutes
Recipe Details
Ingredients
Brownie Base
-
01
1/2 cup unsalted butter, melted
-
02
3/4 cup granulated sugar
-
03
2 large eggs
-
04
1 tsp vanilla extract
-
05
1/3 cup cocoa powder
-
06
1/2 cup all‑purpose flour
-
07
1/4 tsp salt
Chocolate Mousse
-
01
8 oz dark chocolate, chopped
-
02
1 cup heavy cream, chilled
-
03
2 large egg whites
-
04
2 tbsp powdered sugar
-
05
1 tsp vanilla extract
Instructions
Preheat the oven to 350°F (175°C). Line a 9×9‑inch pan with parchment paper.
In a bowl, whisk melted butter with sugar until glossy, then beat in eggs one at a time and stir in vanilla.
Sift cocoa, flour, and salt into the wet mixture; fold gently until just combined.
Spread the batter evenly in the prepared pan and bake for 12‑15 minutes, until the surface looks set but still slightly soft.
While the brownie bakes, melt the dark chocolate over a double boiler, then let it cool slightly.
In a chilled bowl, whip the heavy cream to soft peaks; set aside.
In another clean bowl, beat egg whites with powdered sugar until stiff peaks form.
Fold the whipped cream into the melted chocolate, then gently fold in the beaten egg whites, preserving the airy texture.
When the brownie layer is done, let it cool for 5 minutes, then spread the chocolate mousse evenly over the top.
Refrigerate the pan for at least 2 hours to let the mousse set. Slice into squares and serve.
Notes & Tips
-
1
Use high‑quality dark chocolate for the richest flavor.
-
2
Do not over‑bake the brownie; it should remain fudgy.
-
3
For an extra touch, sprinkle flaky sea salt just before chilling.
 Sweet Treats
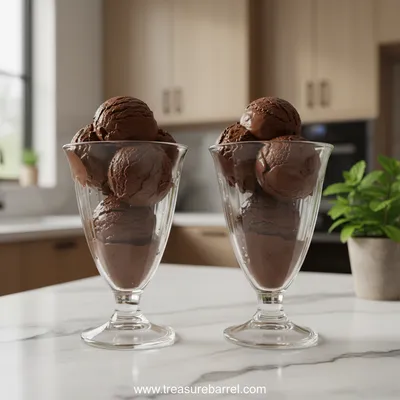
Duo of Chocolate Ice Cream Glasses
Elegant chocolate ice cream duo served in glasses – creamy, refreshing, and utterly satisfying.
Tools You'll Need
-
9×9‑inch baking pan
-
Parchment paper
-
Mixing bowls
-
Electric mixer
-
Spatula
-
Double boiler or heat‑proof bowl
Must-Know Tips
-
Don’t over‑mix the brownie batter; it keeps the crumb tender.
-
Whip the cream until just soft peaks; over‑whipping makes it grainy.
-
Fold egg whites carefully to retain air for a fluffy mousse.
Professional Secrets
-
Room‑temperature butter melts evenly, preventing lumps.
-
A gentle shake of the pan after adding mousse levels the layer.
-
Chill the mixing bowl for whipping cream to speed up aeration.

Recipe by
Lila GraceLila creates magical desserts 🍫🧁, sprinkles joy 🌈✨, and shares sweet moments 🍬💖. Her kitchen is full of smiles 😄 and sugar-dusted memories 🍪🍯.
Get Delicious Recipes Weekly
Join 25,000+ home cooks getting our best recipes straight to their inbox.
Free forever • No spam • Unsubscribe anytime