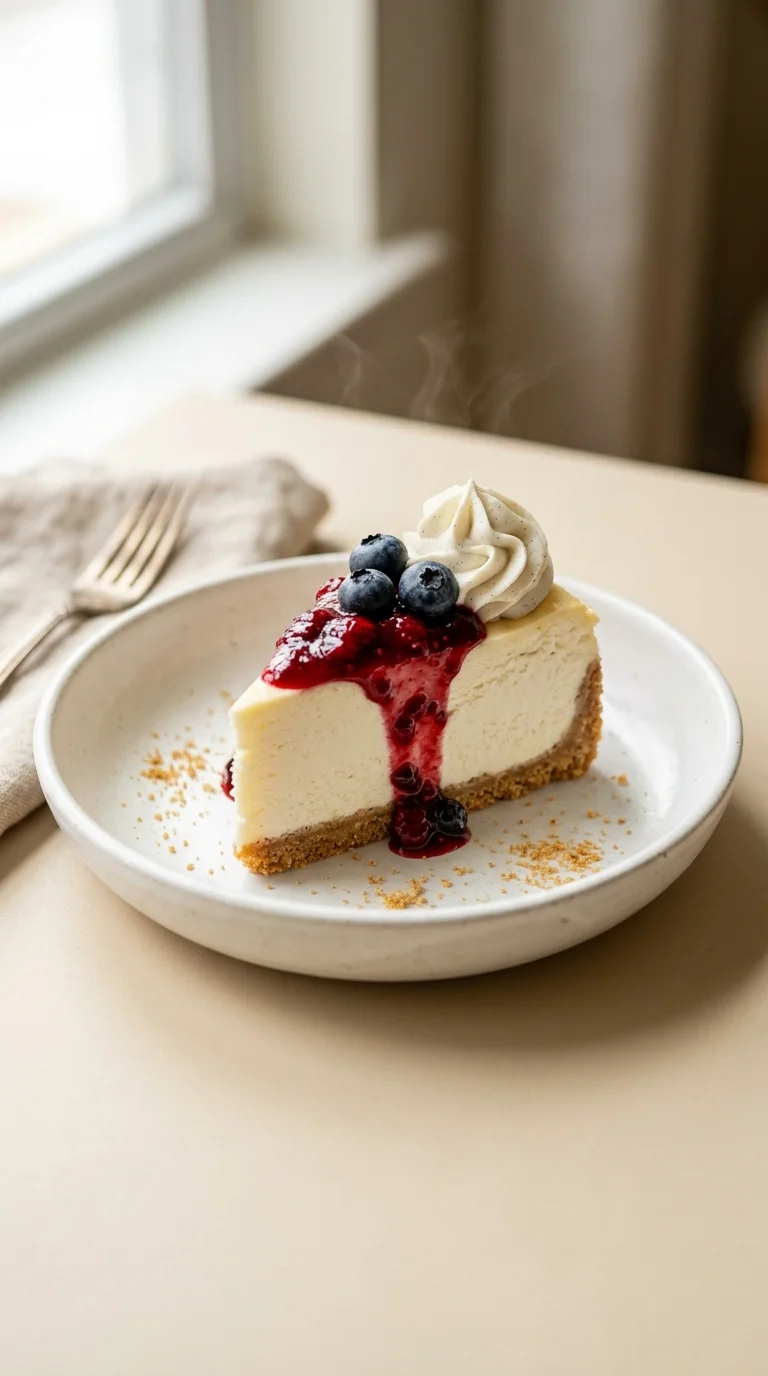
The lineage of the classic cheesecake stretches back further than many realize, finding its earliest roots in ancient Greece where it was often served to athletes during the first Olympic games. While those early versions were more like honeyed cheese cakes, the evolution toward the creamy, rich version we love today took a definitive turn in North America. The introduction of processed cream cheese in the early 20th century transformed the dessert into the velvety staple found at family gatherings today.
Culturally, this dessert has become a symbol of celebration and indulgence. Whether it is the New York style known for its dense, rich texture or the lighter European varieties, the core appeal remains the same: a balance of tang and sweetness. The use of a water bath—a technique borrowed from professional pastry kitchens—is what separates a home-style cake from a bakery masterpiece, ensuring the proteins in the eggs don't overcook.
Over the decades, the classic cheesecake has maintained its place as a cornerstone of the dessert table. Its ability to adapt, from a simple graham cracker crumbs base to more modern twists, shows why it remains a beloved tradition across generations. It is a dish that invites slow eating and long conversations.
Why You'll Love It
-
- Honestly, that velvety smooth texture is just something else, like a little slice of heaven on a plate.
-
- I mean, the way the buttery graham cracker crumbs ground the richness of the cream cheese is just... wow, it's perfect.
-
- Well, look, it's the kind of dessert that makes a house feel like a home, especially when it's chilling in the fridge overnight.
-
- Dang, the water bath method really does the trick; no scary cracks here, just a beautiful, pale golden finish.
"Honestly, I've tried a dozen recipes, but this one is just right. So creamy and’ exactly how I remember it from childhood."
Essential Ingredient Guide
- 4 (8 oz) packages cream cheese, softened (904g): The heart of the cake. Make sure it's truly soft, or you'll get lumps, and ugh, nobody likes a lumpy cheesecake.
- 1 cup sour cream, at room temperature (240ml): This adds a lovely, gentle tang that cuts through the richness. I always let it sit out so it blends in just right.
- Parchment paper (optional): It's optional, yeah, but it's such a lifesaver for getting that cake out of the pan without a fuss.
- 2 teaspoons vanilla extract (10ml): Just a little bit goes a long way in giving it that warm, nostalgic aroma we all love.
- 1/4 cup granulated sugar, for crust (50g): A tiny bit of sweetness for the base. It helps the crust crisp up and feel just right against the creamy filling.
- 1 cup granulated sugar (200g): This provides the main sweetness. I find it's just enough to be indulgent without being too much.
 Sweet Treats
Salted Caramel Ice Cream Recipe
Silky salted caramel ice cream using the Ninja Creami – sweet, buttery, and perfectly salty.
Complete Cooking Process
-
Getting Everything Ready:
I always make sure my cream cheese and sour cream are truly at room temperature. If they're too cold, you'll be fighting the mixer, and we want this to be a peaceful process.
-
Building the Base:
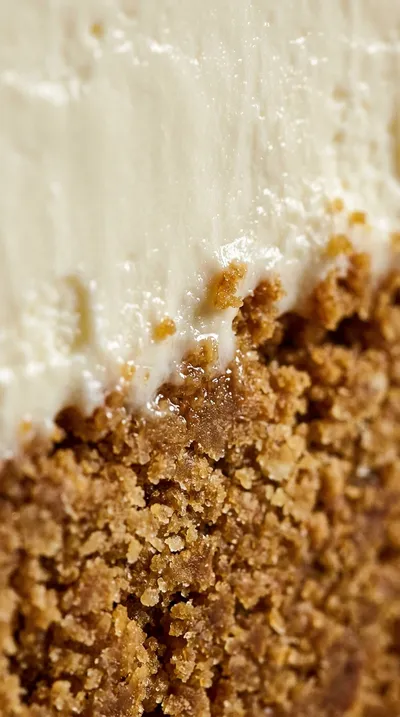
Mixing the graham cracker crumbs with melted butter and sugar creates that lovely, sandy texture. Pressing it firmly into the pan ensures it holds up to the heavy filling.
-
Managing the Texture:
The secret is adding eggs one by one on low speed. We want it silky, not airy, so we avoid over-mixing to keep that dense, creamy dream.
-
The Gentle Bake:
Using a water bath is key for that professional look. It keeps the edges from browning too fast and prevents those dreaded cracks from appearing.
-
The Patient Wait:
Letting it cool slowly in the oven and then resting overnight in the fridge is where the magic happens. It sets the texture and lets the flavors settle in.
-
Stir in the sour cream on low speed right after beating the eggs to prevent the batter from curdling.
-
If you notice the edges crisping up too fast, tent the pan with a strip of aluminum foil during baking.
-
For an extra silky texture, let the batter rest in the fridge for 30 minutes before pouring it into the crust.
-
Turn off the oven and crack the door slightly for 1 hour to let the cheesecake cool gradually.
Pro Tips
Just take your time with it, and it'll turn out beautifully.
Better For You Treats
Now, this is a rich treat with full-fat dairy, so we enjoy it in moderation. If you're looking for something a bit lighter, you can substitute low-fat cream cheese and light sour cream to keep things a bit more mindful.
Ways to Make it Your Own
I love experimenting! You could try a Lemon-Zest Classic Cheesecake by adding 1 tablespoon of grated lemon zest to the filling, or swap the graham cracker crumbs for 1 cup crushed Oreo cookies for a chocolatey twist.
Serving Suggestions
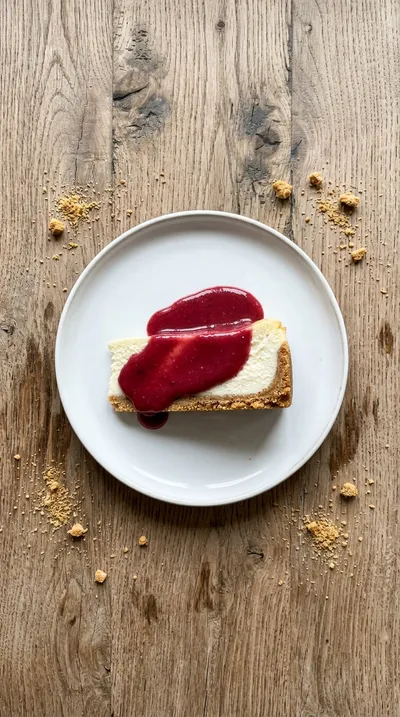
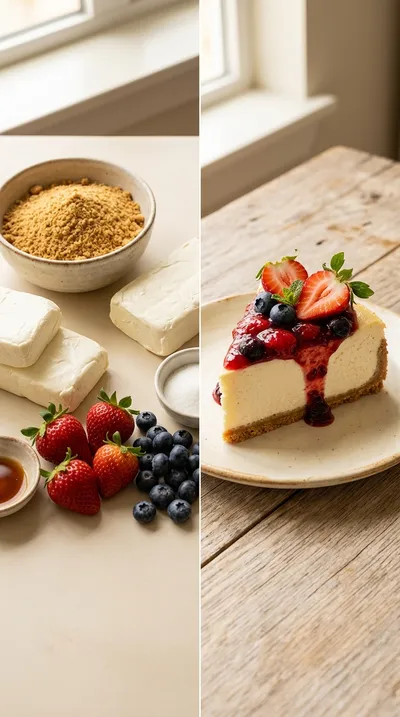
It's lovely with fresh berries or a dollop of vanilla whipped cream on top. For something different, I've found that serving a small wedge with a cracked chocolate chip cookie on the side is just delightful.
Frequently Asked Questions
→ Why did my cheesecake crack on top?
Oh, it happens to the best of us! Usually, it's from over-mixing the eggs or cooling it too quickly, which is why I swear by the water bath and the cracked oven door.
→ Can I make this the day before?
Actually, I prefer it! Letting it sit in the fridge overnight really helps the texture set and makes the flavors taste more grounded.
→ How do I know when it's actually done baking?
Look for a slight wobble in the center when you gently shake the pan. You want the edges set, but that middle should still move just a little bit.
Nutrition Facts
per serving
580
Calories
8g
Protein
38g
Carbs
42g
Fat
Taste Profile
A rich, creamy balance of sweetness with a slight tang from the sour cream.
Ingredient Substitutions
Don't have an ingredient? Try these alternatives
Provides a similar buttery crunch.
Adds a bit more tang and a similar consistency.
Recipe Variations
Try these delicious twists on the original
Lemon-Zest Classic Cheesecake
For a bright, citrusy twist, stir 1 tablespoon of grated lemon zest into the filling and garnish each slice with a little lemon twist.
Oreo Crust Classic Cheesecake
Swap out the graham cracker crumbs for 1 cup of crushed Oreo cookies for a deeper, chocolatey base, and finish it off with a chocolate ganache drizzle.
Common Mistakes to Avoid
Learn from others' mistakes for perfect results
- Over-mixing the batter, which introduces too much air and causes the cake to puff and then collapse.
- Using cold cream cheese, which leads to a lumpy filling that's impossible to smooth out.
- Removing the cake from the oven too early, resulting in a center that doesn't set.
Meal Prep & Storage
Make Ahead Tips
This is actually better made ahead! Bake it the day before and let it set in the fridge overnight for the best texture.
Leftover Ideas
Store any remaining slices in the refrigerator, covered, for up to 4 days. If you freeze it, it stays good for 2 weeks; just thaw it slowly in the fridge.
Perfect Pairings
Serve this with...
Cooking Timeline
Preheat oven and prepare the springform pan.
Mix and bake the graham cracker crust.
Beat cream cheese and sugar, then fold in eggs and sour cream.
Bake in the water bath for 55-60 minutes.
Gradual cool-down in the oven for 1 hour.
 Sweet Treats
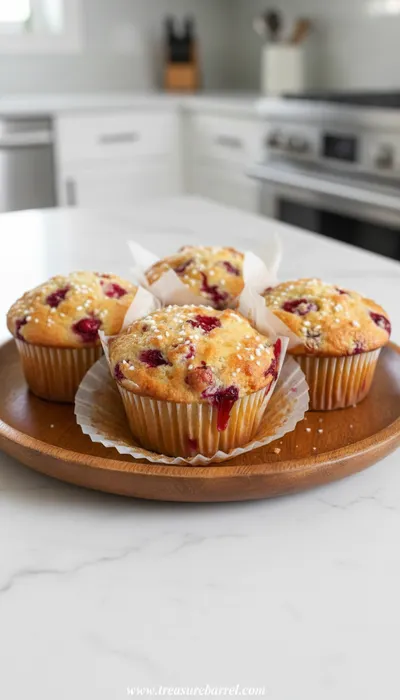
Cranberry and Orange Yogurt Muffins
Bright cranberry‑orange muffins with a soft yogurt crumb and a whisper of citrus.
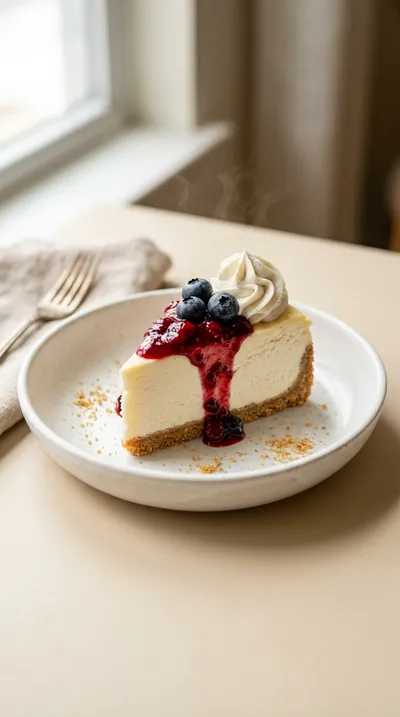
Classic Cheesecake Recipe – Rich & Creamy
A velvety smooth classic cheesecake resting on a buttery graham cracker crumbs base. This rich dessert blends 4 (8 oz) packages cream cheese, softened and 1 cup sour cream, at room temperature for a melt-in-your-mouth finish.
Timing
Prep Time
20 Minutes
Cook Time
60 Minutes
Total Time
80 Minutes
Recipe Details
Ingredients
For the Crust
-
01
2 cups graham cracker crumbs (200g)
-
02
2/3 cup unsalted butter, melted (115g)
-
03
1/4 cup granulated sugar, for crust (50g)
For the Filling
-
01
4 (8 oz) packages cream cheese, softened (904g)
-
02
1 cup granulated sugar (200g)
-
03
1 cup sour cream, at room temperature (240ml)
-
04
4 large eggs (200g)
-
05
2 teaspoons vanilla extract (10ml)
Optional
-
01
Parchment paper (optional)
Instructions
First things first, go ahead and preheat your oven to 325°F (165°C). I like to line the bottom of my 9-inch springform pan with a strip of parchment paper; it just gives me peace of mind so nothing sticks.
In a medium bowl, stir together the graham cracker crumbs, melted butter, and 1/4 cup sugar. Mix it until the crumbs look perfectly coated in butter. Now, press that mixture firmly into the bottom of your pan to make an even crust. Pop it in the oven for 10 minutes, then let it cool completely on a rack. Patience is key here, yeah?
Using your stand mixer on medium speed, beat the softened cream cheese and 1 cup sugar together. You're looking for something smooth and creamy, which usually takes about 2 minutes. I always scrape down the sides of the bowl; you don't want any little lumps of cheese left behind.
Now, add the eggs one by one, beating on slow speed after each one until they're just combined. Stir in the vanilla extract and sour cream. Mix it until the batter is silky but still has a bit of thickness to it. Honestly, try not to over-mix it, or you'll lose that lovely airy quality.
Pour that creamy filling over your cooled crust and use a spatula to smooth out the top. If you're feeling fancy, you can dust a few more graham cracker crumbs on top for a little garnish.
Place your springform pan inside a larger baking dish. Carefully pour hot water into the dish until it's about 1 inch above the cheesecake. This water bath is a lifesaver—it stops the edges from browning too fast and helps prevent those pesky cracks.
Bake it for 55–60 minutes. You'll know it's ready when the top is set but the center still has a slight wobble when you gently shake the pan. The edges should look pale golden, not brown.
Turn off the oven and just crack the door open a bit. Let the cheesecake sit inside for 1 hour. This gradual cooling is the secret to avoiding cracks, and the residual heat finishes the center perfectly.
Take the pan out of the water and let it cool completely on a rack at room temperature. Once it's cool, cover it loosely with foil or plastic wrap and put it in the fridge for at least 4–6 hours—though, look, overnight is really best for the texture.
When you're ready to serve, run a thin knife around the edge to loosen things up. Release the springform, slice it with a clean knife, and serve it chilled. It's lovely with fresh berries, whipped cream, or maybe a drizzle of chocolate.
Notes & Tips
-
1
The water bath is essential for a crack-free top.
-
2
Room temperature ingredients ensure a smooth batter without lumps.
-
3
A slow cool-down in the oven prevents the cake from sinking or cracking.
Tools You'll Need
-
9-inch springform pan for easy release
-
Large mixing bowls for the batter and crust
-
Electric hand mixer or stand mixer for creamy results
-
Measuring cups and spoons for accuracy
-
Spatula for smoothing the top
-
Pastry brush for prepping the pan
-
Large baking dish for the water bath
-
Hot water (1-in. deep) for the steam
-
Cooling rack to prevent soggy bottoms
-
Oven mitts for safety
-
Timer to track the bake
-
Scale (optional) for precision
Must-Know Tips
-
Low speed mixing, stir in the sour cream on low speed right after eggs to prevent curdling.
-
Aluminum foil tenting, if you notice the edges crisping up too fast, tent the pan with a strip of foil.
-
Batter resting, for an extra silky texture, let the batter rest in the fridge for 30 minutes before pouring.
Professional Secrets
-
The 'Oven Crack' method: Cooling the cake in a slightly open oven prevents sudden temperature shifts.
-
The Wobble Test: Baking until the center just wobbles ensures the cake doesn't overbake and dry out.
-
The Cold Set: Refrigerating overnight allows the fats to stabilize, creating a velvety mouthfeel.
What readers are saying
Community reviews from home cooks like you
Absolutely loved this recipe! I really liked how the 2 cups graham cracker crumbs (200g) and 2/3 cup unsalted butter, melted (115g) came together. I added a bit more seasoning next time. Perfect as written.
Absolutely loved this recipe! I really liked how the 2 cups graham cracker crumbs (200g) and 2/3 cup unsalted butter, melted (115g) came together. Already shared it with a friend.
My new favorite way to make Classic Cheesecake Recipe – Rich & Creamy. I really liked how the 2 cups graham cracker crumbs (200g) and 2/3 cup unsalted butter, melted (115g) came together. My oven needed an extra 5 minutes. Highly recommend giving it a try.

Recipe by
Lila GraceLila creates magical desserts 🍫🧁, sprinkles joy 🌈✨, and shares sweet moments 🍬💖. Her kitchen is full of smiles 😄 and sugar-dusted memories 🍪🍯.
Get Delicious Recipes Weekly
Join 25,000+ home cooks getting our best recipes straight to their inbox.
Free forever • No spam • Unsubscribe anytime