
I remember the first time I made these with my kids. It was a rainy Saturday, the kind where the sky is a soft, sleepy gray and all you want to do is stay inside. We had originally planned a big pizza night, but their little hands were so eager to help that I thought, why not make it more interactive? We rolled out the dough on the floured counter, their tiny fingers pressing and stretching it. There was flour on their noses and a little bit of sauce on their cheeks, and the kitchen was filled with laughter. It wasn't about making a perfect meal, it was about making a memory. Now, whenever I make them, I'm transported right back to that cozy, messy, wonderful afternoon. It’s funny how food can do that, how it can hold so much more than just flavor. It holds moments.
Why You'll Adore These Pizza Rolls
-
Perfectly Chewy & Golden: The dough bakes up with a satisfyingly chewy bite and a beautifully golden-brown crust. It’s that ideal texture—soft on the inside, a little crisp on the outside—that makes them so irresistible.
-
Gooey, Cheesy Center: The heart of every great pizza roll is, of course, the cheese. We use plenty of mozzarella that melts into a glorious, stretchy, gooey river of deliciousness when you bite into it. It’s pure satisfaction.
-
Infinitely Adaptable: This is such a wonderful base recipe. You can stick with classic cheese and turkey pepperoni, or get creative with your favorite pizza toppings like olives, mushrooms, or even some leftover cooked beef sausage. It’s a great way to use up little bits of things from the fridge.
-
A Fun Kitchen Project: Making these is almost as fun as eating them. It’s a simple, tactile process of rolling, filling, and shaping that’s perfect for getting kids involved or for a relaxing solo baking session. It’s a recipe that invites you to slow down and enjoy the making.
These are, without a doubt, a million times better than the frozen kind. My family is obsessed!
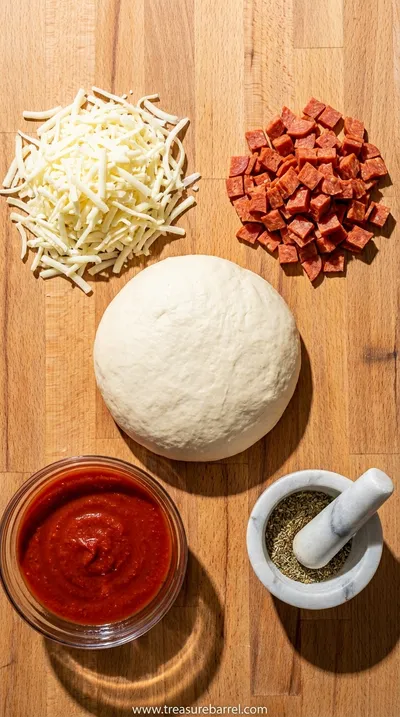
Essential Ingredient Guide
- Pizza Dough: You can absolutely use your favorite store-bought dough to make this a quick and easy process. I often do on busy weeknights! But if you have the time, a simple homemade dough really elevates the texture, making it softer and chewier. Look for a ball of plain pizza dough in the refrigerated section of your grocery store, near the prepared pastas or cheeses.
- Shredded Mozzarella Cheese: For that iconic cheese pull, low-moisture, part-skim mozzarella is your best friend. It melts beautifully without releasing too much water, which could make your rolls soggy. I prefer to buy a block and shred it myself because pre-shredded cheeses often have anti-caking agents that can affect the melt, but honestly, the pre-shredded kind works just fine too!
- Marinara or Pizza Sauce: The key here is to use a thick sauce. A thin, watery sauce will leak out during baking and create a mess, ugh. If your favorite sauce seems a little thin, you can simmer it on the stove for a few minutes to thicken it up. Look for a sauce with a simple, rich tomato flavor that will complement, not overpower, the other fillings.
 Warm Meals
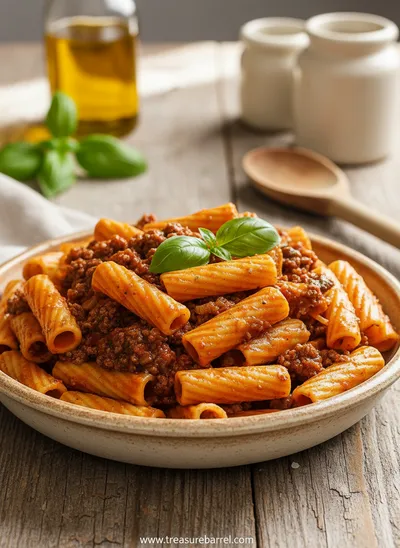
Beef Ragu Pasta Recipe in Tomato Sauce
A rich and hearty pasta dish with slow-cooked beef ragu in a savory tomato sauce.
Complete Cooking Process
-
Preparing the Dough and Fillings:
The first step is all about getting your canvas ready. If you’re using refrigerated dough, let it sit on the counter for about 20-30 minutes. This little rest makes it so much easier to roll out without it snapping back. While it’s resting, gather all your fillings. Shred your cheese, chop your pepperoni or any veggies, and get your sauce ready in a small bowl. Having everything prepped and within reach, mise en place style, makes the assembly process feel so calm and graceful.
-
Assembling the Rolls:
This is the fun, creative part! On a lightly floured surface, gently roll your dough into a large rectangle. Try to keep the thickness even, about a quarter of an inch. Spread a thin, even layer of your sauce over the dough, leaving a small border around the edges. Then, sprinkle your cheese and toppings evenly over the sauce. Starting from one of the long edges, roll the dough up into a tight log. This part reminds me of making my best crepe recipe; the gentle rolling motion is so satisfying.
-
Baking to Golden Perfection:
Once your log is rolled, you’ll slice it into individual rolls, about an inch and a half thick. I like to use a sharp knife or even unflavored dental floss for a super clean cut. Place them on a parchment-lined baking sheet, giving them a little space to puff up. The final touch, a little brush of melted butter and a sprinkle of garlic powder, is what gives them that gorgeous color and extra layer of flavor. They bake pretty quickly, so keep an eye on them until they're perfectly golden and the cheese is just starting to bubble out the sides.
-
Don't overfill! It's so tempting to pack them with toppings, but this is the number one reason for leaky rolls. Less is definitely more.
-
Pinch the seam of the dough log firmly to seal it before slicing. This helps keep all that cheesy goodness inside while baking.
-
Let them cool for a few minutes before diving in. The cheese and sauce inside will be incredibly hot, so a little patience will save your mouth!
Pro Tips for Perfect Rolls
These little details make such a difference, turning a good snack into a great one. It's all about handling the ingredients with a bit of care.
 Warm Meals
Garlic Steak Tortellini – A Warm Classic
Steak meets garlic‑kissed tortellini in a creamy, herb‑filled sauce for a cozy night in.
Frequently Asked Questions
→ Can I make my own pizza dough for this recipe?
Absolutely! A homemade dough would be wonderful here. Any standard pizza dough recipe will work beautifully. Just allow it to go through its first rise before you roll it out. The texture of homemade dough is often a bit softer and has a more complex flavor, which really makes these little rolls feel extra special and lovingly crafted. I find the process of making dough so therapeutic on a quiet afternoon.
→ How do I prevent the filling from leaking out during baking?
Ah, the classic challenge! The best way to prevent leaks is to not overfill the rolls. Use a thin layer of a thick sauce and don't go too heavy on the cheese or toppings. It's also crucial to roll the dough into a tight log and firmly pinch the seam to seal it shut before slicing. When you place the rolls on the baking sheet, you can gently pinch the bottom of each roll to ensure it's sealed as well. A little bit of cheese bubbling out is okay, that's part of the charm!
→ Can I make these pizza rolls ahead of time?
Yes, this recipe is great for planning ahead. You can assemble the rolls completely, place them on the baking sheet, cover them tightly with plastic wrap, and refrigerate for up to 24 hours before baking. Just take them out of the fridge about 15 minutes before they go into the oven. This is perfect for party prep or for a quick after-school snack that’s ready to bake. It's a bit like prepping my cheesy sausage breakfast casserole the night before.
→ Can I freeze homemade pizza rolls?
They freeze beautifully! For best results, I recommend flash-freezing them. After baking and cooling completely, arrange the rolls in a single layer on a baking sheet and freeze until solid. Then, transfer them to a freezer-safe bag or container. They can be stored for up to 3 months. To reheat, just bake them from frozen at 375°F (190°C) for about 10-15 minutes, or until heated through and crispy.
→ What are some other filling ideas?
This is where you can get so creative! Think of your favorite pizza combinations. A veggie version with finely diced bell peppers, onions, and mushrooms is delicious. For a different flavor profile, try cooked, crumbled beef sausage with some fennel seeds. A white pizza version with ricotta, mozzarella, and garlic is also divine. Just remember to pre-cook any raw vegetables or meats and chop all fillings finely so they roll up easily.
→ My dough is hard to roll out. What did I do wrong?
It's likely that the dough is just too cold. Gluten, the protein in flour, gets tight and elastic when it's cold. If you find your dough keeps snapping back and resisting being rolled, just cover it with a clean kitchen towel and let it rest on the counter for another 10-15 minutes. This gives the gluten time to relax, and you'll find it becomes much more cooperative and easy to work with.
→ What's the best sauce to dip these in?
While they are perfectly delicious on their own, serving them with a dipping sauce is always a good idea! A simple bowl of warm marinara sauce is the classic choice. For something a little different, creamy ranch dressing, garlic butter sauce, or even a pesto aioli would be wonderful. It just adds another layer of flavor and makes the experience even more fun and interactive.

Nutrition Facts
per serving
150
Calories
6g
Protein
15g
Carbs
7g
Fat
Taste Profile
Savory and rich, with the classic comforting taste of pizza in a bite-sized form.
Ingredient Substitutions
Don't have an ingredient? Try these alternatives
For a different texture, you can use refrigerated crescent roll dough. The rolls will be flakier and more buttery. Puff pastry will result in a very light, airy, and crispy roll. You may need to adjust baking times slightly.
Any of your favorite pizza toppings will work! Just be sure that any meat is pre-cooked and everything is chopped into small pieces so the rolls are easy to slice and they hold together well.
Recipe Variations
Try these delicious twists on the original
Veggie Lover's Rolls
Finely dice some bell peppers, onions, mushrooms, and black olives. Sauté the veggies for a few minutes to cook off excess moisture before adding them to the rolls. It's a great way to sneak some extra vegetables in!
Three Cheese & Herb
Swap the pepperoni for a blend of mozzarella, ricotta, and grated parmesan. Add a sprinkle of fresh basil or parsley to the filling for a bright, herby flavor. This version feels a little more grown-up and elegant.
Common Mistakes to Avoid
Learn from others' mistakes for perfect results
- Using cold dough. It will fight you the whole way! Let it rest and relax first.
- Spreading the sauce all the way to the edges. Leave a border so you can get a good seal on your dough log.
- Cutting with a dull knife. This will squish your rolls instead of slicing them cleanly.
- Not letting them cool. The filling is molten hot and will burn your mouth. Patience is a virtue here!
Meal Prep & Storage
Make Ahead Tips
You can assemble the rolls, slice them, and place them on the baking sheet. Cover tightly with plastic wrap and refrigerate for up to one day before baking. It makes for an incredibly easy snack or appetizer when you need it. It’s my favorite trick for party prep. Just like prepping hash brown casserole for brunch.
Leftover Ideas
Leftover pizza rolls are fantastic! Store them in an airtight container in the fridge. To revive them, reheat in a 350°F (175°C) oven or toaster oven for 5-8 minutes until warm and crisp. They make a wonderful quick lunch or snack the next day, and I think they are almost as good as when they are fresh.
Perfect Pairings
Serve this with...
Cooking Timeline
Preheat oven and line baking sheet. Let dough rest.
Roll out the dough into a rectangle on a floured surface.
Spread sauce and sprinkle on toppings. Roll into a tight log and seal the seam.
Slice the log into rolls, place on the baking sheet, and brush with garlic butter.
Bake for 12-15 minutes until golden brown. Let cool slightly before serving.
 Cozy Classics
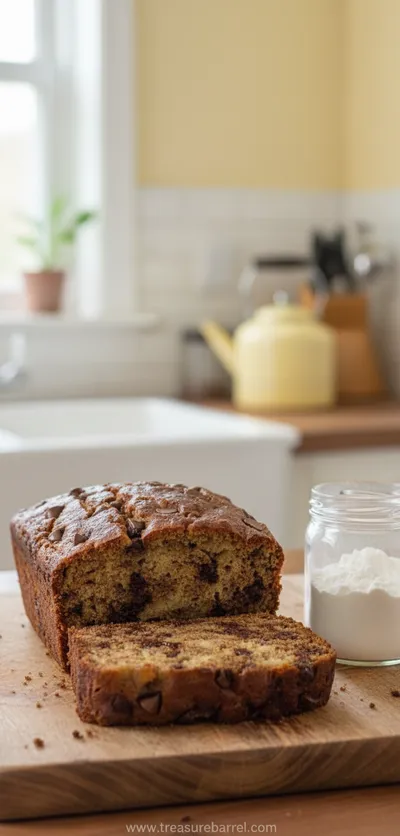
Easy Chocolate Chip Banana Bread
Moist chocolate chip banana bread, quick to bake, perfect for cozy breakfasts.

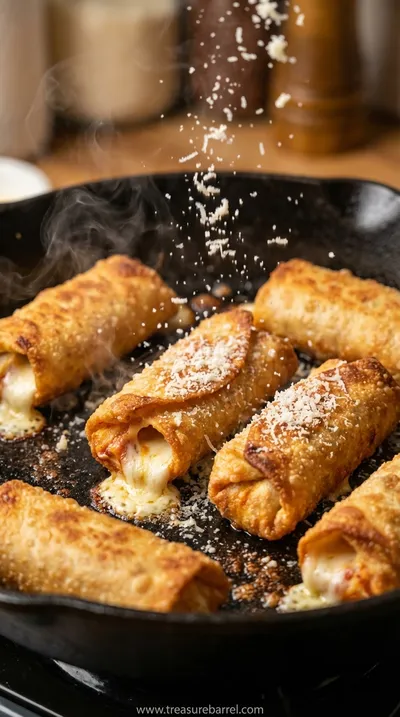
Homemade Pizza Rolls: Easy Family Favorite Recipe
Make delicious homemade pizza rolls with this simple recipe. Perfect for snacks, parties, or quick comfort meals.
Timing
Prep Time
20 Minutes
Cook Time
15 Minutes
Total Time
35 Minutes
Recipe Details
Ingredients
For the Pizza Rolls
-
01
1 lb refrigerated pizza dough
-
02
1/2 cup thick marinara or pizza sauce
-
03
1 1/2 cups shredded low-moisture mozzarella cheese
-
04
1/2 cup mini turkey pepperoni, or regular turkey pepperoni, chopped
-
05
2 tablespoons melted unsalted butter
-
06
1/2 teaspoon garlic powder
-
07
1/4 teaspoon dried oregano or Italian seasoning
-
08
Flour, for dusting the work surface
For Serving (Optional)
-
01
Warm marinara sauce for dipping
-
02
Freshly chopped parsley
Instructions
First, let's get everything ready. Preheat your oven to 400°F (200°C) and line a large baking sheet with parchment paper. This little step makes cleanup so much easier later. Let your pizza dough rest on a lightly floured countertop for about 15-20 minutes to come to room temperature. While it's resting, you can mix your melted butter with the garlic powder and oregano in a tiny bowl and set it aside. Having all your elements in place before you start feels so much calmer, doesn't it?
Now for the assembly. Gently press the dough out with your fingers, then use a rolling pin to shape it into a large rectangle, roughly 12x16 inches. Don't worry about perfect corners; rustic is beautiful. Spread the marinara sauce evenly over the dough, leaving about a half-inch border clean all around the edges. Sprinkle the mozzarella cheese over the sauce, followed by your chopped turkey pepperoni. I find this much more relaxing than making something complex like a hash brown egg casserole, though both are total comfort foods.
Starting from one of the long sides, carefully and tightly roll the dough up into a log. Try to keep it snug as you go to make sure the fillings stay put. Once it's all rolled up, pinch the seam along the entire length of the log to seal it securely. This is the most important part to prevent leaks! Using a sharp knife, slice the log into 16 even pieces, each about an inch wide. You can now arrange them, cut-side up, on your prepared baking sheet, leaving a little space between each one.
For the finishing touch, gently brush the tops and sides of each roll with the garlic butter mixture. This is what gives them that irresistible golden color and an extra layer of savory flavor. Pop the baking sheet into your preheated oven and bake for 12-15 minutes. You'll know they're ready when they are puffed up, golden brown, and the cheese is bubbly and melted. Let them cool on the pan for at least 5 minutes before serving—they will be incredibly hot inside! Serve them warm with extra marinara for dipping.
Notes & Tips
-
1
Feel free to experiment with the fillings! Finely chopped black olives, mushrooms, or bell peppers are lovely additions. Just be sure to not overstuff them, as that can cause them to burst open while baking.
-
2
If you find your marinara sauce is a bit thin, you can pour it into a small saucepan and let it simmer for 5-10 minutes to thicken up. A thicker sauce is much less likely to leak out of the rolls.
-
3
For an extra cheesy top, you can sprinkle a little grated Parmesan cheese over the rolls along with the garlic butter before baking. It adds a wonderful salty, nutty crust that is just divine.
Tools You'll Need
-
Baking Sheet: A large, sturdy baking sheet is essential. I recommend lining it with parchment paper to prevent any sticking and to make cleanup practically nonexistent. It helps the bottoms of the rolls bake evenly without getting too dark.
-
Rolling Pin: A simple rolling pin will help you get the dough to an even thickness, which is key for consistent baking. A French-style tapered pin gives you a bit more control, but any kind you have will work just fine.
-
Sharp Knife or Pizza Cutter: You'll need a sharp knife to slice the log into individual rolls. A serrated knife can sometimes work well, too, or even a pizza cutter to score and then cut. The goal is a clean cut that doesn't squish the roll and its fillings.
-
Pastry Brush: A small pastry brush is so helpful for applying the garlic butter mixture evenly over the tops of the rolls. This ensures every single one gets that beautiful golden, flavorful crust. Silicone or natural bristle brushes both work perfectly.
Must-Know Tips
-
Use Thick Sauce: A watery sauce will turn the dough soggy and leak everywhere. Thicken it by simmering if needed.
-
Don't Overstuff: It's tempting, I know! But too much filling is the main cause of messy, exploded rolls. A light, even layer is best.
-
Seal the Seam Well: Take an extra moment to firmly pinch the seam of the dough log. This creates a barrier to keep the melty cheese inside.
Professional Secrets
-
Room Temperature Dough: Cold dough is stiff and hard to roll. Letting it rest on the counter for 20-30 minutes makes it pliable and easy to work with.
-
A Touch of Sugar in the Dough: If you're making homemade dough, adding a tiny pinch of sugar helps the yeast get active and results in a more golden-brown crust.
-
Let Them Cool Slightly: The molten cheese and sauce inside are like lava right out of the oven. Letting them rest for 5 minutes allows the filling to set up a bit and prevents a burnt tongue.

Recipe by
Clara JoyClara’s kitchen is all about family 👨👩👧👦💖, sharing timeless favorites 🍝🍰, and creating memories 🕯️✨. She loves easy meals 🍳 and heartwarmi ...
Get Delicious Recipes Weekly
Join 25,000+ home cooks getting our best recipes straight to their inbox.
Free forever • No spam • Unsubscribe anytime