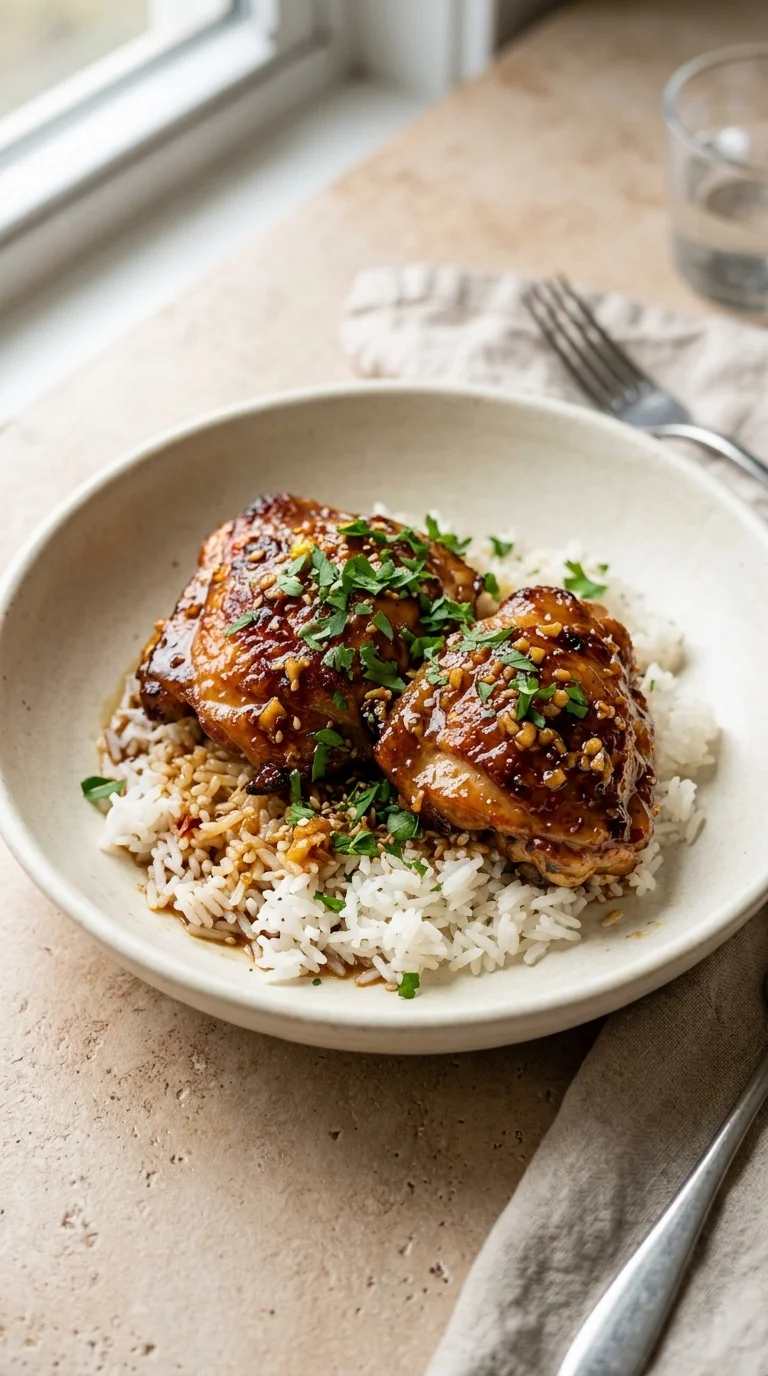
The marriage of honey and garlic is a timeless combination found in various forms across many cultures, blending the deep sweetness of nectar with the pungent, grounding heat of alliums. In East Asian culinary traditions, the use of soy sauce and ginger creates a savory foundation known as umami, which elevates simple proteins into something memorable. This particular approach to honey garlic chicken thighs mirrors the tradition of glazing meats to preserve moisture while creating a caramelized exterior.
Over time, this style of cooking has migrated into home kitchens worldwide because it balances flavors so effortlessly. The addition of apple cider vinegar provides a bright acidity that cuts through the richness of the chicken fat, a technique used by cooks for generations to ensure a balanced palate. It is a dish rooted in the idea that a few high-quality ingredients can create a complex, satisfying result.
Whether served in a bustling family kitchen or a quiet dining room, the appeal remains the same. It is a testament to how a simple glaze can transform a humble cut of meat into a centerpiece, bridging the gap between quick weeknight sustenance and a comforting, slow-cooked feel.
Why You'll Love It
-
- Honestly, there is something so comforting about that sticky, sweet glaze clinging to a piece of crispy chicken. It just feels like a warm hug on a plate.
-
- Well, look, it's just so simple to put together. I love that I can get this on the table without feeling like I've spent the whole afternoon in the kitchen.
-
- The way the honey and soy sauce meld together... wow, it creates this deep, savory flavor that always makes my family ask for seconds.
-
- I remember when I first started cooking these, the smell of the garlic and ginger hitting the pan just filled the whole house. It's just lovely.
"Honestly, my kids actually asked for seconds. The skin is so sticky and crisp—just perfect!"
Essential Ingredient Guide
- 8 bone-in skin-on chicken thighs (approx 1½ lb): I always stick with bone-in, skin-on because they stay so much juicier. Just make sure to pat them dry with a paper towel so they actually brown instead of steaming.
- 4 cloves garlic, minced: Fresh is always best here, though I've had my share of "oops" moments using the jarred kind. It gives the glaze that sharp, warm aromatic quality we all love.
- 1 Tbsp cornstarch, dissolved in 1 Tbsp water (optional): Now, this is optional, but if you like a sauce that really coats the back of a spoon, this is your secret. It turns the glaze into something truly luxurious.
- ½ tsp salt, to taste and ¼ tsp freshly ground black pepper: Don't be shy with these; seasoning both sides of the chicken before it hits the oil is what makes the flavor really pop. It's the little things, yeah?
- 2 Tbsp apple cider vinegar: This adds a little brightness that cuts right through the sweetness of the honey. It keeps the dish from feeling too heavy, which I really appreciate.
- ¼ cup honey: I use a good, runny honey for this. It caramelizes beautifully in the oven, giving the skin that gorgeous, golden glow.
 Family Favorites
Meat Lovers Pizza Casserole Recipe
A comforting baked dish that brings pizza night flavors together in one easy casserole.
Complete Cooking Process
-
Getting Everything Ready:
Before you even turn on the heat, get your garlic minced and your honey, soy sauce, and vinegar whisked together. It's just so much calmer when you aren't rushing to mix a sauce while the chicken is sizzling.
-
Building the Flavor:
The magic happens when the chicken sears in the olive oil and then meets that garlic and ginger glaze. That's where the deep, savory notes really start to develop and soak into the meat.
-
Achieving the Perfect Texture:
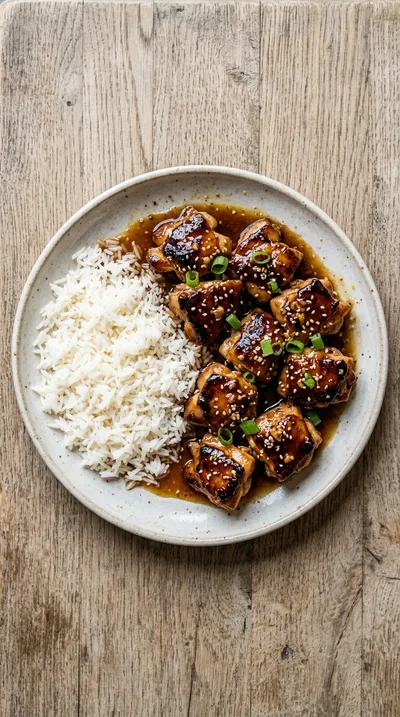
Searing skin-side down first is the key to that crispiness. Then, the 20-22 minutes in the oven lets the inside get tender while the glaze thickens into a sticky coating.
-
The Finishing Touch:
If the sauce looks a bit thin to you, just whisk in that cornstarch slurry over medium heat for a minute. A sprinkle of chopped parsley at the end adds a little bit of fresh color.
-
The Patience Phase:
I know it's tempting, but let the chicken rest for 5 minutes. It just lets those juices settle back in so every bite is as moist as it can be.
-
Sear the chicken first to lock in those juices and get a beautiful, crisp skin.
-
Use an instant-read thermometer to make sure the internal temperature hits exactly 165°F (74°C).
-
If you want it extra sticky, try adding 1 Tbsp brown sugar to your glaze.
-
Pat the chicken thighs very dry before seasoning to ensure a perfect golden sear.
Pro Tips
You've got this, just take your time and enjoy the process.
 Warm Meals
Beef Ragu Pasta Recipe in Tomato Sauce
A rich and hearty pasta dish with slow-cooked beef ragu in a savory tomato sauce.
Better For You Treats
I like to keep things balanced in my home. This meal gives you a good amount of protein, and you can easily use a bit less than the ¼ cup honey if you're watching your sugar.
Ways to Make it Your Own
If you're feeling bold, add ½ tsp red-pepper flakes for a spicy honey garlic chicken thighs version. Or, if you're mindful of salt, just use 2 Tbsp low-sodium soy sauce and leave out the extra salt.
Serving Suggestions
I love serving these over steamed jasmine rice with some broccoli; it just catches all that lovely sauce. Or, you could shred the cooled chicken and toss it into a fresh salad for a lighter dinner.
Frequently Asked Questions
→ Can I use chicken breasts instead of thighs?
You can, but breasts cook much faster and can dry out. If you do, just keep a close eye on them so they stay tender.
→ What if I don't have an oven-proof skillet?
No worries at all! Just sear the chicken in a regular pan and then move everything over to a baking sheet before putting it in the oven.
→ How do I store the leftovers?
Just cover them loosely and keep them in the fridge for up to 4 days. They reheat quite nicely in the oven or microwave.
Nutrition Facts
per serving
420
Calories
35g
Protein
18g
Carbs
24g
Fat
Taste Profile
A comforting balance of sweet honey and salty soy with a bright hint of lemon.
Ingredient Substitutions
Don't have an ingredient? Try these alternatives
Gives it a slightly woodsy, autumnal flavor.
A bit milder and very traditional for this style of glaze.
A great option for those who need a gluten-free alternative.
Recipe Variations
Try these delicious twists on the original
Spicy Honey Garlic Chicken Thighs
For those who like a little heat, just add ½ tsp red-pepper flakes to the glaze for a subtle, warming kick.
Low-Sodium Version
If you're watching your salt, use 2 Tbsp low-sodium soy sauce and omit the extra salt entirely.
Common Mistakes to Avoid
Learn from others' mistakes for perfect results
- Putting wet chicken in the pan, which leads to steaming instead of searing.
- Overcooking the chicken by not using a thermometer.
- Forgetting to let the meat rest, causing the juices to escape.
Meal Prep & Storage
Make Ahead Tips
You can prepare the glaze in advance and keep it in the fridge. The chicken can be seared and then stored, but it's best to bake and glaze right before serving.
Leftover Ideas
Store leftovers in an airtight container for up to 4 days. Reheat gently in a pan or oven to keep the skin from getting too soft.
Perfect Pairings
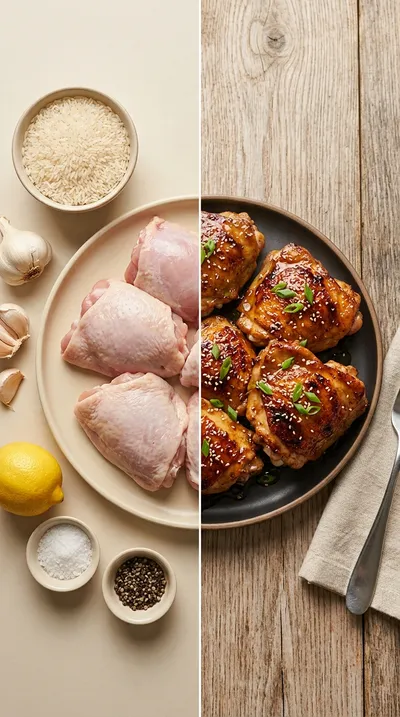
Serve this with...
Cooking Timeline
Preheat oven and prep chicken thighs
Sear chicken skin-side and then flip
Whisk glaze and coat the chicken
Bake in oven and optional sauce reduction
Rest the meat and garnish with parsley
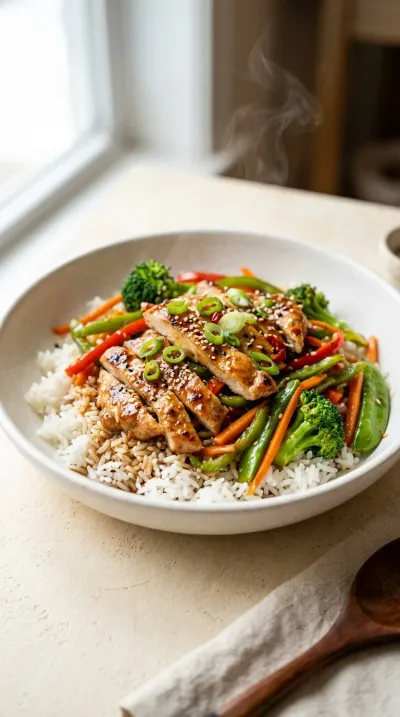
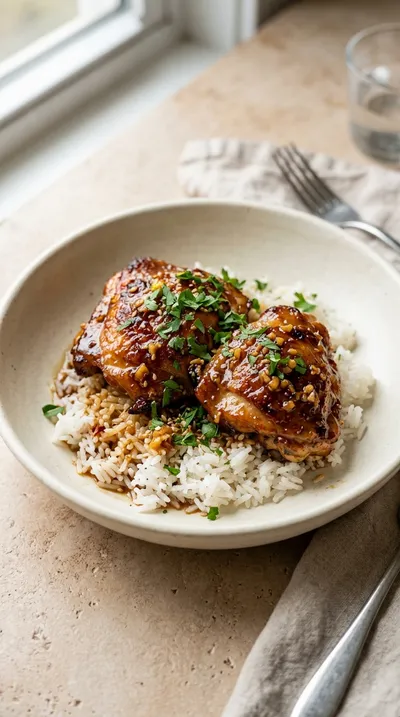
Honey Garlic Chicken Thighs – Easy Sweet & Savory Dinner
Tender bone-in skin-on chicken thighs glazed in a sticky, golden sauce that smells of warm honey and toasted garlic. These honey garlic chicken thighs make the kitchen feel cozy and the heart feel full.
Timing
Prep Time
15 Minutes
Cook Time
25 Minutes
Total Time
40 Minutes
Recipe Details
Ingredients
Main Ingredients
-
01
8 bone-in skin-on chicken thighs (approx 1½ lb)
-
02
2 Tbsp olive oil
-
03
½ tsp salt, to taste
-
04
¼ tsp freshly ground black pepper
Honey Garlic Glaze
-
01
4 cloves garlic, minced
-
02
¼ cup honey
-
03
¼ cup soy sauce
-
04
2 Tbsp apple cider vinegar
-
05
½ tsp grated fresh ginger
-
06
½ tsp lemon zest
-
07
1 Tbsp cornstarch, dissolved in 1 Tbsp water (optional)
Garnish
-
01
Fresh parsley, chopped, for garnish
Instructions
First things first, go ahead and preheat your oven to 400°F (200°C). It just gives the oven a bit of time to get nice and hot.
Now, take a paper towel and gently pat those chicken thighs dry. Honestly, this is the secret to a good sear. Once they're dry, season both sides with your ½ tsp salt, to taste and ¼ tsp freshly ground black pepper.
Warm up your 2 Tbsp olive oil in the skillet over medium-high heat. Carefully place the thighs skin side down and let them sizzle for 3-4 minutes until they're a lovely golden brown, then flip them over for another 2-3 minutes.
While the chicken is doing its thing, grab a small bowl and whisk together your ¼ cup honey, ¼ cup soy sauce, 2 Tbsp apple cider vinegar, 4 cloves garlic, minced, ½ tsp grated fresh ginger, ½ tsp lemon zest, and 1 Tbsp water. It smells wonderful, doesn't it?
Go ahead and pour that glaze right over the seared thighs. Use a spoon to make sure every single piece is coated evenly in that sticky goodness.
Slide the whole skillet into the preheated oven. Bake them for 20-22 minutes. You're looking for the skin to be crispy and the internal temperature to hit 165°F (74°C).
Now, look, if you like your sauce a bit thicker, just remove the chicken. Put the skillet back on medium heat and whisk in your 1 Tbsp cornstarch, dissolved in 1 Tbsp water (optional). Let it simmer for 1-2 minutes until it thickens, then nestle the thighs back in.
I know it's tempting, but let the chicken rest for about 5 minutes. It just lets the juices settle back in so the meat stays tender.
Sprinkle some Fresh parsley, chopped, for garnish over the top for a little pop of color.
Serve your honey garlic chicken thighs while they're hot with whatever sides you love most.
Notes & Tips
-
1
The cornstarch slurry is optional, but it really helps if you love a thick, syrupy glaze.
-
2
Make sure your skillet is oven-proof; if not, just transfer the seared chicken and sauce to a baking sheet.
-
3
Don't rush the searing process; that golden skin is where the magic happens.
Tools You'll Need
-
Oven for roasting
-
Large oven-proof skillet or baking sheet to sear and bake
-
Spatula for flipping the chicken
-
Whisk for blending the glaze
-
Measuring cups and spoons for accuracy
Must-Know Tips
-
Searing, this locks in the juices and creates that beautifully crisp skin we all love.
-
Temperature, use an instant-read thermometer to confirm the internal temperature has reached 165°F (74°C).
-
Sugar boost, add 1 Tbsp brown sugar to the glaze for extra caramel sweetness and stickiness.
Professional Secrets
-
Patting the skin completely dry before seasoning ensures a professional-grade sear without sticking.
-
Resting the meat for 5 minutes prevents the juices from running out the moment you cut into it.
-
Using a cornstarch slurry at the very end creates a restaurant-style glaze that clings to the meat.
What readers are saying
Community reviews from home cooks like you
I wanted to love this dish, but it didn't quite work for me. I would reduce the salt a little. I think with some tweaks it could be really good.
This was a hit with my family. I really liked how the 8 bone-in skin-on chicken thighs (approx 1½ lb) and 2 Tbsp olive oil came together. Next time I'll double the sauce. My kids even asked for seconds.
This was a hit with my family. I really liked how the 8 bone-in skin-on chicken thighs (approx 1½ lb) and 2 Tbsp olive oil came together. Perfect as written.
Absolutely loved this recipe! I really liked how the 8 bone-in skin-on chicken thighs (approx 1½ lb) and 2 Tbsp olive oil came together. I found it a bit sweet for my taste. Highly recommend giving it a try.
This exceeded my expectations. I really liked how the 8 bone-in skin-on chicken thighs (approx 1½ lb) and 2 Tbsp olive oil came together. Next time I'll double the sauce. Highly recommend giving it a try.
Perfect for a busy weeknight. I really liked how the 8 bone-in skin-on chicken thighs (approx 1½ lb) and 2 Tbsp olive oil came together. Great addition to my recipe rotation.
This exceeded my expectations. I really liked how the 8 bone-in skin-on chicken thighs (approx 1½ lb) and 2 Tbsp olive oil came together. Will be making this regularly.
Nice base recipe. The lb) flavor was nice, but i swapped one ingredient and it still worked. I might try it again with some adjustments.
This was a hit with my family. I really liked how the 8 bone-in skin-on chicken thighs (approx 1½ lb) and 2 Tbsp olive oil came together. Saving this for later.
Pretty good overall. The lb) flavor was nice, but i would reduce the salt a little. I might try it again with some adjustments.
It was okay, with a few tweaks. The lb) flavor was nice, but i found it a bit sweet for my taste. I might try it again with some adjustments.
Decent result for the effort. The lb) flavor was nice, but it took slightly longer than the recipe said. I might try it again with some adjustments.

Recipe by
Nora FaithNora makes meals simple 🍲👌, fuss-free 🥗✨, and full of flavor 😋💛. She loves calm evenings 🌙🍽️ and satisfying, easy dinners 🥘❤️.
Get Delicious Recipes Weekly
Join 25,000+ home cooks getting our best recipes straight to their inbox.
Free forever • No spam • Unsubscribe anytime