
The combination of honey and garlic in cooking dates back centuries across various cultures, particularly in Asian cuisine where these flavors form a classic foundation. In China, sweet and savory glazes have been used for generations to create dishes that balance contrasting tastes perfectly. The method of baking or frying wings until crispy then tossing them in sauce became popular in American households during the mid-20th century as chicken became more affordable and accessible. Today, this dish represents the beautiful fusion of Eastern flavor principles with Western cooking techniques, creating a universally loved appetizer that brings people together.
Why You'll Love It
-
The crispy texture gives way to tender, juicy meat inside
-
The sweet honey balances perfectly with the savory garlic
-
They're incredibly easy to make for large gatherings
-
The sticky glaze coats every wing beautifully
'My family can't get enough of these wings! The perfect balance of sweet and savory with that amazing crispy texture.'
Essential Ingredient Guide
- Chicken wings: Look for plump, fresh wings with smooth skin. Pat them completely dry before seasoning - this is crucial for that perfect crispiness we all love.
- Honey: Use good quality honey for the best flavor. The natural sweetness caramelizes beautifully in the oven, creating that glossy, sticky coating that makes these wings so irresistible.
- Garlic: Fresh minced garlic delivers the most vibrant flavor. Don't be shy with it - the sharpness mellows beautifully when cooked, blending perfectly with the honey.
- Soy sauce: This provides the salty, umami base that balances the sweetness. I like using reduced-sodium so I can control the salt level better.
- Rice vinegar: Just a splash cuts through the sweetness and adds brightness. It's that little secret that keeps the sauce from being too cloying.
- Cornstarch: This helps create that crisp exterior we all crave. It's the difference between soggy wings and perfectly crunchy ones.
 Warm Meals
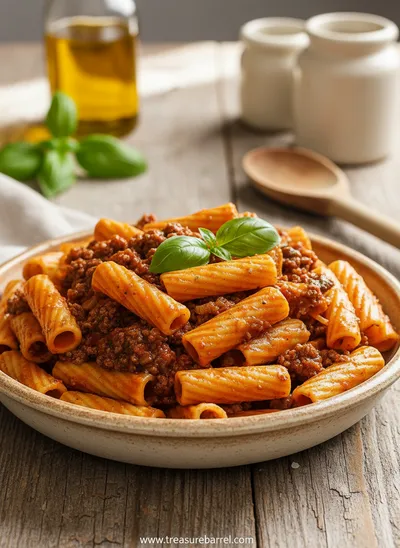
Beef Ragu Pasta Recipe in Tomato Sauce
A rich and hearty pasta dish with slow-cooked beef ragu in a savory tomato sauce.
Complete Cooking Process
-
Ingredient Readiness:
You'll want to start by patting those wings completely dry with paper towels. Honestly, this step makes all the difference between wings that steam and wings that crisp up beautifully. Then mix your sauce ingredients while the oven preheats - the flavors need a moment to get acquainted.
-
Flavor Development:
When you toss the wings in the cornstarch mixture, you're creating the foundation for that perfect crunch. The sauce simmers gently on the stove, filling the kitchen with that incredible honey-garlic aroma that takes me back to Sunday dinners with my own family.
-
Texture Control:
Baking the wings on a rack allows hot air to circulate all around, giving you that even crispiness without flipping. I always set my timer and resist peeking - the patience pays off with golden perfection.
-
Finishing Touches:
Tossing the hot wings in the warm sauce right when they come out of the oven creates that sticky glaze that clings to every nook and cranny. The sizzle when they hit the sauce bowl... that's the sound of success.
-
Serving Timing:
Serve these immediately while they're still hot and crispy. They're best enjoyed straight from the oven when the contrast between the crunchy exterior and tender interior is at its peak.
-
Pat wings completely dry - moisture is the enemy of crispiness
-
Use a wire rack on your baking sheet for even cooking
-
Don't overcrowd the pan - give each wing its space
-
Make extra sauce - everyone always wants more
Pro Tips
You know, I've made these wings for every major family gathering for years now. My niece's graduation, holiday parties, even just casual Friday nights when everyone flocks to our house. There's something about finger food that brings people together in a way fancy meals sometimes don't.
I remember one time, my youngest dropped an entire tray right before guests arrived. Oh, the panic! But we whipped up another batch, and honestly? The second batch turned out even crispier because we weren't rushing. Sometimes kitchen mishaps turn into blessings, don't they? These wings have seen it all - celebrations, quiet nights, even that time the power went out and we finished them on the grill. They're resilient, just like the families who enjoy them.
 Warm Meals
Garlic Steak Tortellini – A Warm Classic
Steak meets garlic‑kissed tortellini in a creamy, herb‑filled sauce for a cozy night in.

The essence of the dish:
What makes these wings so special is how they balance contrasting flavors and textures. The crispy exterior gives way to juicy meat, while the sweet honey and savory garlic create a symphony in every bite. It's comfort food that feels both familiar and exciting.
A fun fact or historical angle:
Did you know that chicken wings weren't always the prized party food they are today? Before the 1960s, they were often considered scrap parts. It took creative cooks and the rise of sports bars to turn them into the beloved appetizer we know now.
Flavor or sensory focus:
When you bite into these wings, you'll notice the crisp crackle of the skin first, then the tender meat beneath. The sauce hits with sweet honey upfront, followed by the warm, aromatic garlic that lingers pleasantly. It's a journey of textures and tastes that keeps you reaching for just one more.
You Must Know
-
Dry wings thoroughly before seasoning for maximum crispiness
-
The sauce thickens as it cools - toss wings while both are hot
-
Let wings rest a minute after saucing for the glaze to set
-
These reheat surprisingly well in the oven or air fryer
Frequently Asked Questions
→ Can I make these wings ahead of time?
You can prepare the wings up to the baking step a few hours ahead. Keep them refrigerated on the baking sheet, then pop them in the oven when ready. The sauce can be made a day in advance and reheated gently.
→ What's the best way to get crispy wings without frying?
The key is patting the wings completely dry, using cornstarch, and baking on a wire rack. The air circulation is crucial for that perfect crispiness we all love.
→ Can I use frozen wings?
Absolutely, but thaw them completely in the refrigerator first and pat extra dry. Frozen wings tend to release more moisture, so they might need a few extra minutes in the oven.
→ How do I prevent the sauce from burning?
The honey can caramelize quickly, so watch it closely during the last few minutes of baking. If your oven runs hot, reduce the temperature by 25°F during the final glazing stage.
→ What can I serve with these wings?
They're fantastic with celery sticks, carrot sticks, and a cool ranch or blue cheese dip. For a more substantial meal, try them with crispy chicken parmesan or a simple green salad.
→ Can I make these gluten-free?
Yes! Just use tamari instead of soy sauce and ensure your cornstarch is gluten-free. The recipe adapts beautifully to dietary needs.

Nutrition Facts
per serving
320
Calories
22g
Protein
18g
Carbs
18g
Fat
Taste Profile
Perfect balance of sweet honey and savory garlic with underlying umami notes
Ingredient Substitutions
Don't have an ingredient? Try these alternatives
Tamari is gluten-free, while coconut aminos are slightly sweeter - adjust honey if using
Will create a slightly different flavor profile but works beautifully
Adjust cooking time accordingly - drumsticks may need 10-15 minutes longer
Recipe Variations
Try these delicious twists on the original
Spicy Version
Add 1-2 teaspoons of sriracha or red pepper flakes to the sauce for a kick that balances the sweetness beautifully.
Lemon Garlic Version
Replace the rice vinegar with fresh lemon juice and add lemon zest for a brighter, citrus-forward flavor profile.
Common Mistakes to Avoid
Learn from others' mistakes for perfect results
- Not drying wings thoroughly - leads to steaming instead of crisping
- Overcrowding the baking sheet - prevents proper air circulation
- Adding sauce too early - makes wings soggy instead of crispy
- Using bottled minced garlic - fresh makes a huge difference
Meal Prep & Storage
Make Ahead Tips
You can prepare the sauce up to 2 days ahead and refrigerate. The wings can be dried and seasoned several hours before baking - keep them refrigerated on the baking sheet until ready to cook.
Leftover Ideas
Reheat leftovers in the oven at 350°F for 10-12 minutes or in an air fryer for 5-7 minutes. They won't be quite as crispy as fresh, but still delicious. Great for next-day lunches!
Perfect Pairings
Serve this with...
Cooking Timeline
Prep ingredients - pat wings dry, mince garlic, measure sauce ingredients
Toss wings with cornstarch mixture and arrange on baking rack
Bake wings, flipping halfway through, until golden and crispy
While wings bake, simmer sauce ingredients until thickened
Toss hot wings with warm sauce, bake 5 more minutes to set glaze
 Cozy Classics
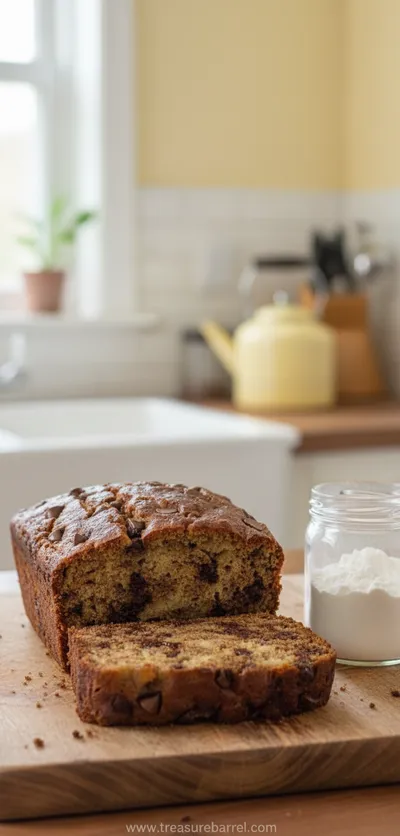
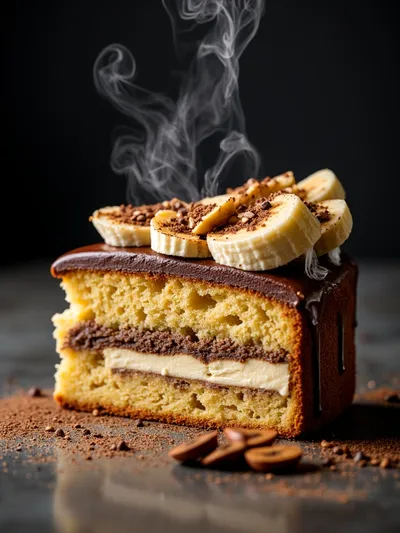
Easy Chocolate Chip Banana Bread
Moist chocolate chip banana bread, quick to bake, perfect for cozy breakfasts.
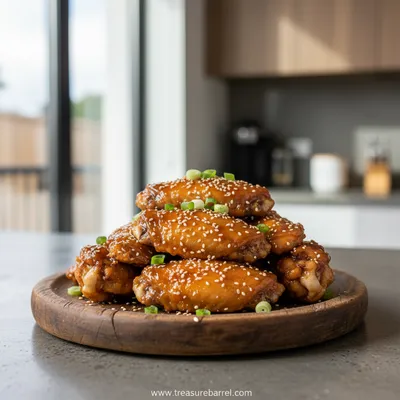
Honey Garlic Chicken Wings Recipe
These honey garlic chicken wings are the perfect balance of sweet and savory, with crispy skin and a sticky glaze that will have everyone reaching for more. They're ideal for game day, family gatherings, or just a cozy night in.
Timing
Prep Time
15 Minutes
Cook Time
45 Minutes
Total Time
60 Minutes
Recipe Details
Ingredients
For the Wings
-
01
2 lbs chicken wings, separated into drumettes and flats
-
02
2 tbsp cornstarch
-
03
1 tsp salt
-
04
½ tsp black pepper
-
05
1 tbsp olive oil
For the Honey Garlic Sauce
-
01
⅓ cup honey
-
02
4 cloves garlic, minced
-
03
3 tbsp soy sauce
-
04
1 tbsp rice vinegar
-
05
1 tsp sesame oil
-
06
½ tsp ginger powder
-
07
2 tbsp water
-
08
1 tbsp cornstarch
Instructions
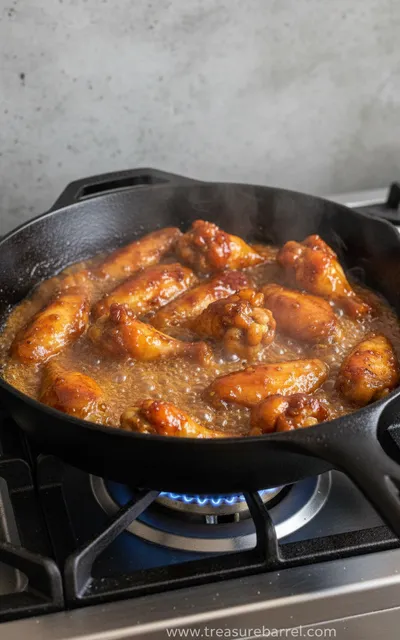
Preheat your oven to 400°F (200°C). Line a baking sheet with aluminum foil and place a wire rack on top. Pat the chicken wings completely dry with paper towels - this is crucial for crispiness.
In a large bowl, toss the dried wings with cornstarch, salt, and pepper until evenly coated. Arrange them in a single layer on the wire rack, making sure they're not touching.
Bake for 35-40 minutes, flipping halfway through, until the wings are golden brown and crispy. While they bake, whisk together all sauce ingredients except the cornstarch and water in a small saucepan.
Bring the sauce to a simmer over medium heat. Mix the cornstarch and water to make a slurry, then whisk it into the simmering sauce. Cook for 2-3 minutes until thickened slightly.
When wings are done, transfer them to a large bowl. Pour the warm sauce over and toss gently until each wing is evenly coated. Return to the rack and bake for another 5 minutes to set the glaze.
Let the wings rest for 2-3 minutes before serving. They'll be hot, sticky, and absolutely perfect for gathering around with loved ones.
Notes & Tips
-
1
The sauce will thicken as it cools - toss wings while both are hot for best coating
-
2
For extra crispy wings, you can broil for the last 2-3 minutes (watch closely!)
-
3
Double the sauce if you like them extra saucy - it's that good
-
4
These reheat beautifully in the oven at 350°F for 10-12 minutes
Tools You'll Need
-
Baking sheet with wire rack
-
Large mixing bowl
-
Small saucepan
-
Whisk
-
Tongs
-
Measuring cups and spoons
Must-Know Tips
-
Dry wings thoroughly - moisture is the enemy of crispiness
-
Don't overcrowd the baking sheet - air circulation is key
-
Toss wings in sauce immediately after baking for perfect adhesion
-
Let them rest a minute after saucing - the glaze will set beautifully
Professional Secrets
-
Room temperature wings cook more evenly - take them out 30 minutes before
-
A wire rack ensures crispiness all around - no soggy bottoms
-
The cornstarch slurry prevents the sauce from being too thin
-
Finishing with a quick bake sets the glaze perfectly

Recipe by
Clara JoyClara’s kitchen is all about family 👨👩👧👦💖, sharing timeless favorites 🍝🍰, and creating memories 🕯️✨. She loves easy meals 🍳 and heartwarmi ...
Get Delicious Recipes Weekly
Join 25,000+ home cooks getting our best recipes straight to their inbox.
Free forever • No spam • Unsubscribe anytime