
Chocolate has traveled across continents, from ancient Mesoamerican drinks to modern confectionery. In the 19th century, bakers began experimenting with layered desserts, seeking new textures. This layered chocolate mousse brownie draws on that heritage, pairing the classic brownie with a mousse technique that was once reserved for patisseries. The result is a timeless indulgence that feels both familiar and sophisticated.
Why You'll Love It
-
- Layers of contrasting textures that melt together
-
- Deep cocoa flavor without being bitter
-
- Simple ingredients you likely already have
-
- A dessert that feels special without extra effort
"These brownies are a cloud of chocolate bliss – could eat them every day!"
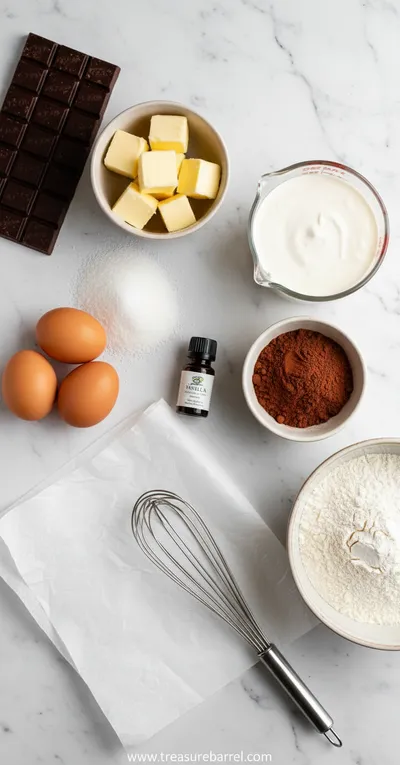
Essential Ingredient Guide
- Dark chocolate: Choose 70% cocoa for a balanced richness; melt gently to keep the shine.
- Heavy cream: Cold cream whips faster; it creates the airy mousse that sits atop the brownie.
- Unsalted butter: Adds moisture to the brownie base and a glossy finish.
- Granulated sugar: Dissolves fully to sweeten without grainy texture.
- Pure vanilla extract: A few drops enhance the chocolate depth.
- Salt: Just a pinch balances the sweetness and brings out flavor.
Complete Cooking Process
-
Ingredient Readiness:
Measure and prep all components before heating; chop chocolate, melt butter, and chill the cream.
-
Flavor Development:
Cook the brownie batter just until the edges set, preserving a fudgy center.
-
Texture Control:
Fold whipped cream gently into melted chocolate to keep the mousse light.
-
Finishing Touches:
Spread mousse over the cooled brownie, then chill to set layers.
-
Serving Timing:
Allow the brownies to sit at room temperature for a few minutes before slicing.
-
Use a silicone spatula to fold mousse without deflating.
-
Cool the brownie base completely before adding mousse.
-
Dust with cocoa powder for a rustic look.
-
Cut with a warm knife for clean slices.
Pro Tips
Honestly, a little patience at each stage makes the difference. When you let the brownie fully cool, the mousse won’t melt, and each bite stays distinct. So, take your time – the result is worth it. I remember waiting for that first slice to settle, and the aroma that filled the kitchen was pure comfort.
The essence of the dish:
It’s the marriage of a dense, chocolatey brownie with a cloud‑like mousse, offering a soft‑inside, indulgent experience that feels both homey and elegant.
A fun fact or historical angle:
The technique of layering mousse over cake originated in French patisseries in the early 1900s, where chefs sought to create desserts with height and elegance.
Flavor or sensory focus:
First, the scent of melted chocolate greets you, then a silky mouthfeel followed by a lingering cocoa finish that stays pleasantly on the palate.
You Must Know
-
Do not over‑beat the mousse; keep it airy.
-
Let the brownie cool completely.
-
Use high‑quality chocolate for depth.
Frequently Asked Questions
→ Can I make the mousse ahead of time?
Yes, you can whip the mousse a day before, keep it covered and chilled, then spread over the brownie when ready.
→ What type of chocolate works best?
70% dark chocolate gives a balanced flavor; avoid very low cocoa percentages which can taste too sweet.
→ Do I need a special pan?
A standard 8‑inch square baking pan works fine; just line it with parchment for easy removal.
→ Can I substitute butter?
You can use coconut oil for a subtle tropical note, but it may affect texture slightly.
→ How long can leftovers be stored?
Refrigerate in an airtight container for up to three days; bring to room temperature before serving.
→ Is this recipe gluten‑free?
Swap regular flour for a 1‑to‑1 gluten‑free blend; the texture remains wonderfully fudgy.
Nutrition Facts
per serving
320
Calories
4g
Protein
34g
Carbs
18g
Fat
Taste Profile
Rich chocolate with a balanced sweet finish
Ingredient Substitutions
Don't have an ingredient? Try these alternatives
Will be sweeter and less bitter; reduce powdered sugar in the mousse.
Gives a coconut hint; ensure it’s chilled for proper whipping.
Recipe Variations
Try these delicious twists on the original
Spicy Version
Add a pinch of cayenne pepper to the mousse for a subtle warmth.
Mediterranean Style
Fold in finely chopped pistachios and a drizzle of orange blossom honey into the mousse.
Common Mistakes to Avoid
Learn from others' mistakes for perfect results
- Over‑baking the brownie leads to a dry base.
- Folding the mousse too vigorously deflates it.
- Adding mousse before the brownie is fully cooled causes melting.
Meal Prep & Storage
Make Ahead Tips
You can prepare the brownie base a day ahead and store it wrapped; whip the mousse on the day of serving and chill together.
Leftover Ideas
Reheat gently in a microwave for 10 seconds per piece, or enjoy cold straight from the fridge.
Perfect Pairings
Serve this with...
Cooking Timeline
Gather and measure all ingredients, line the pan with parchment.
Mix brownie batter, bake, then cool completely.
Melt chocolate, whip cream, and fold into mousse.
Spread mousse over brownie, refrigerate to set.
Slice, dust with cocoa, and serve.
 Sweet Treats
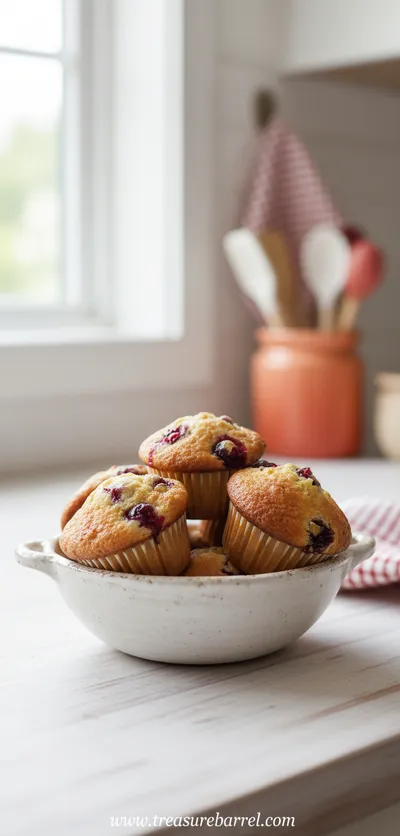
Cranberry Orange Muffins
Tender muffins bursting with orange zest and tart cranberries, ideal for a comforting morning treat.
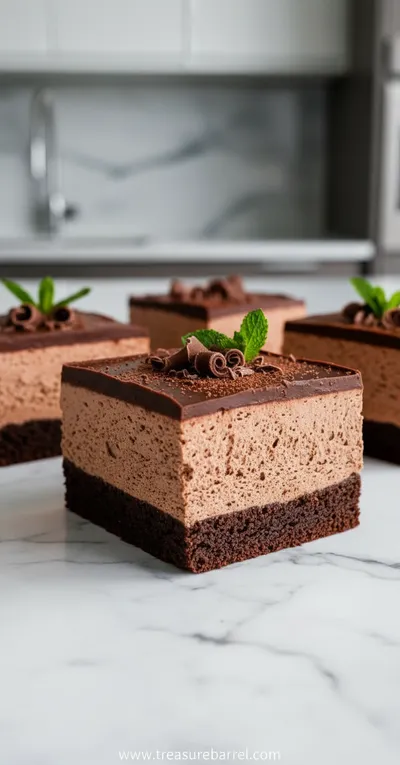
Layered Chocolate Mousse Brownies
Indulge in rich layered chocolate mousse brownies, a decadent treat perfect for any occasion. The silky mousse rests on a fudgy brownie base, creating a contrast of textures that feels like a gentle hug for the palate. Honestly, this dessert is a quiet celebration of chocolate.
Timing
Prep Time
20 Minutes
Cook Time
25 Minutes
Total Time
45 Minutes
Recipe Details
Ingredients
Brownie Base
-
01
1/2 cup unsalted butter, melted
-
02
1 cup granulated sugar
-
03
2 large eggs
-
04
1 tsp vanilla extract
-
05
1/3 cup unsweetened cocoa powder
-
06
1/2 cup all‑purpose flour
-
07
1/4 tsp salt
Chocolate Mousse
-
01
200g dark chocolate (70% cocoa), chopped
-
02
1 cup heavy cream, cold
-
03
2 tbsp powdered sugar
-
04
1 tsp vanilla extract
Instructions
Preheat the oven to 350°F (175°C). Grease an 8‑inch square pan and line with parchment.
In a bowl, whisk melted butter with sugar until smooth, then add eggs one at a time, mixing gently.
Stir in vanilla, cocoa powder, flour, and salt until just combined; pour into the prepared pan and bake for 20‑22 minutes. The center should still be slightly soft.
While the brownie cools, melt the dark chocolate over a simmering pot, then let it cool slightly.
In a chilled bowl, whip the cold heavy cream with powdered sugar and vanilla until soft peaks form.
Fold the melted chocolate into the whipped cream gently, preserving the airy texture.
Spread the chocolate mousse evenly over the cooled brownie layer, then refrigerate for at least 2 hours to set.
When ready, cut into squares, dust with cocoa powder, and serve. Enjoy with a glass of cold milk.
Notes & Tips
-
1
If you prefer a sweeter mousse, add an extra tablespoon of powdered sugar.
-
2
For a nutty twist, sprinkle toasted almonds on top before chilling.
-
3
I love pairing these brownies with a cup of coffee – the bitterness balances the sweetness.
 Sweet Treats
Duo of Chocolate Ice Cream Glasses
Elegant chocolate ice cream duo served in glasses – creamy, refreshing, and utterly satisfying.
Tools You'll Need
-
8‑inch square baking pan
-
Parchment paper
-
Mixing bowls
-
Hand mixer or whisk
-
Spatula
-
Knife for cutting
Must-Know Tips
-
Don’t over‑bake the brownie; a slightly undercooked center sets the perfect fudgy texture.
-
Whip the cream until soft peaks – this keeps the mousse light.
-
Use a sharp, warm knife for clean slices.
Professional Secrets
-
Room‑temperature chocolate melts evenly, avoiding grainy spots.
-
Chill the mixing bowl for the mousse to speed up whipping.
-
Cooling the brownie completely prevents the mousse from melting.

Recipe by
Lila GraceLila creates magical desserts 🍫🧁, sprinkles joy 🌈✨, and shares sweet moments 🍬💖. Her kitchen is full of smiles 😄 and sugar-dusted memories 🍪🍯.
Get Delicious Recipes Weekly
Join 25,000+ home cooks getting our best recipes straight to their inbox.
Free forever • No spam • Unsubscribe anytime