
The humble lemon bar first appeared in American cookbooks during the early 1900s, when bakers sought a quick, portable dessert that could be made with pantry staples. Its popularity grew during the Great Depression, offering a sweet indulgence without expensive ingredients. Over time, the crumbly topping evolved, adding butter and brown sugar for extra richness. Today, lemon crumb bars remain a beloved classic, bridging nostalgia and fresh flavors in one easy bake.
Why You'll Love It
-
- Bright citrus flavor that lifts the spirit
-
- No-fuss preparation, perfect for busy days
-
- Soft, buttery crust with a crumbly, sweet topping
-
- Versatile – great for brunch, tea, or a late‑night snack
"These lemon crumb bars are the perfect mix of bright and buttery – my family can’t get enough!"
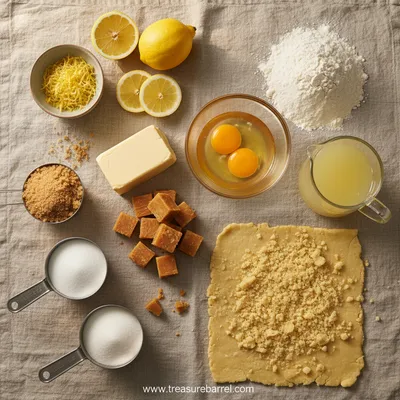
Essential Ingredient Guide
- Lemon zest and juice: Adds fresh aroma and tang; zest the lemon first, then juice to capture the brightest flavor.
- Unsalted butter: Provides richness for both crust and topping; use softened butter for easy mixing.
- All‑purpose flour: Creates structure; sift for a lighter crumb.
- Granulated and brown sugar: Balances tartness; brown sugar adds a subtle caramel note to the topping.
- Eggs: Bind the filling and give it a smooth, custardy texture.
- Salt: Just a pinch enhances the overall flavor profile.
Complete Cooking Process
-
Ingredient Readiness:
Zest the lemons, juice them, and measure flour and sugars before the oven heats; this keeps the workflow smooth.
-
Flavor Development:
The butter‑flour mixture for the crust is gently baked first, allowing a fragrant, nutty scent to develop.
-
Texture Control:
Mix the topping until just combined; over‑mixing would create a cakey texture instead of a crisp crumble.
-
Finishing Touches:
A light dusting of powdered sugar after cooling adds a subtle sweetness and visual polish.
-
Serving Timing:
Allow the bars to cool completely on a wire rack before cutting; this lets the filling set for clean slices.
-
Use room‑temperature butter for a tender crust
-
Add a teaspoon of vanilla extract to the filling for depth
-
Bake on the middle rack for even browning
-
Store bars in a single layer to keep the topping crisp
Pro Tips
Well, a little patience goes a long way. Let the bars chill on the rack; the scent of lemon will linger, making the kitchen feel cozy. If you’re planning ahead, you can wrap individual slices in parchment and keep them in an airtight container – they stay fresh for up to three days. I’ve found that a light dusting of powdered sugar just before serving adds that final, gentle sparkle.
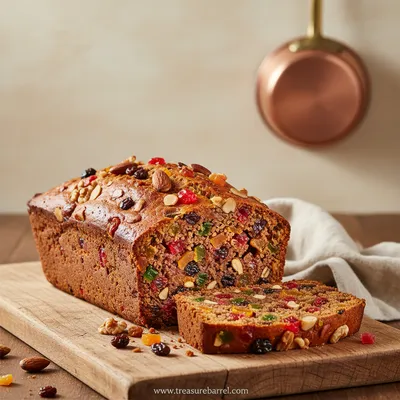
 Sweet Treats
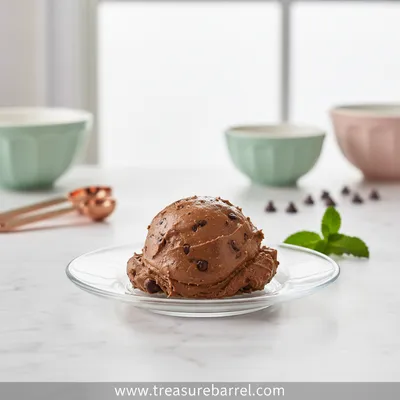
Duo of Chocolate Ice Cream Glasses
Elegant chocolate ice cream duo served in glasses – creamy, refreshing, and utterly satisfying.
The essence of the dish:
It’s the balance of bright lemon tang against a buttery, crumbly base that makes these bars unforgettable. The crust is soft yet firm enough to hold the silky filling, while the topping adds a satisfying crunch.
A fun fact or historical angle:
During the 1930s, lemon bars were a modest way to bring a splash of sunshine to families facing hard times – a sweet slice of optimism.
Flavor or sensory focus:
First you’ll notice the citrus perfume, then the smooth, custard‑like filling, and finally the golden crumb that offers a gentle snap with each bite.
You Must Know
-
Cool the bars completely before slicing
-
Use fresh lemons for the brightest flavor
-
Don’t over‑bake the topping; it should stay tender
Frequently Asked Questions
→ Can I make these bars gluten‑free?
Yes, substitute the all‑purpose flour with a 1‑to‑1 gluten‑free blend; the texture remains tender.
→ How long do the bars keep?
Store in an airtight container at room temperature for up to three days, or refrigerate for up to a week.
→ Can I add berries to the filling?
Absolutely – a handful of fresh blueberries or raspberries adds a lovely burst of flavor.
→ Do I need to chill the dough?
A brief 15‑minute chill helps the crust hold its shape, but it’s not strictly necessary.
→ What can I use instead of lemon zest?
Orange zest works well for a sweeter citrus note, though the classic lemon flavor is most popular.
→ Is a water bath required?
No, a water bath isn’t needed; the bars bake evenly on a standard baking sheet.
Nutrition Facts
per serving
280
Calories
4g
Protein
38g
Carbs
12g
Fat
Taste Profile
Bright citrus with buttery sweetness
Ingredient Substitutions
Don't have an ingredient? Try these alternatives
Use a blend that includes xanthan gum for best texture.
Adds a light caramel note; reduce by 1‑2 tbsp if you prefer less sweetness.
Recipe Variations
Try these delicious twists on the original
Spicy Version
Add 1/4 tsp cayenne pepper to the crumb topping for a subtle heat that balances the lemon.
Mediterranean Style
Stir in 2 tbsp crumbled feta and a handful of chopped mint into the topping for a savory twist.
Common Mistakes to Avoid
Learn from others' mistakes for perfect results
- Over‑mixing the crust, leading to a tough base
- Baking the topping too long, causing it to become hard
- Cutting bars while still warm, resulting in messy slices
Meal Prep & Storage
Make Ahead Tips
You can whisk the filling and keep it refrigerated for up to 24 hours; bake the crust and topping just before serving for maximum freshness.
Leftover Ideas
Reheat gently in a low‑heat oven (300°F) for 5‑7 minutes to revive the crumbly topping.
Perfect Pairings
Serve this with...
Cooking Timeline
Gather and prep ingredients – zest and juice lemons, soften butter.
Make crust, press into pan, and bake first layer.
Prepare filling, pour over crust, add crumb topping.
Bake until topping is golden, cool completely, dust with powdered sugar.
 Sweet Treats
Edible Cookie Dough: Easy No‑Bake Dessert
Safe, sweet edible cookie dough ready in minutes—no oven needed.
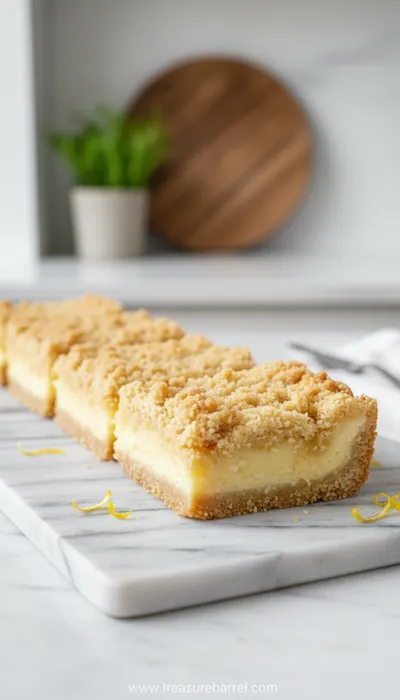
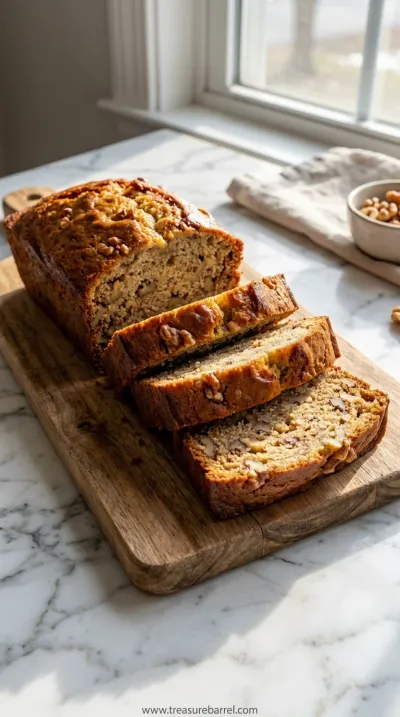
Lemon Crumb Bars – Easy Sweet Treat
Bright lemon crumb bars with a buttery crust and a tangy, sweet‑tart filling, perfect for a quick sweet treat any time of day. The scent of fresh lemon zest fills the kitchen, while the crumbly topping offers a comforting crunch that feels like a little hug on a plate.
Timing
Prep Time
15 Minutes
Cook Time
30 Minutes
Total Time
45 Minutes
Recipe Details
Ingredients
Crust
-
01
1 cup (115g) unsalted butter, softened
-
02
1/2 cup (100g) granulated sugar
-
03
2 cups (250g) all‑purpose flour
-
04
1/4 tsp salt
-
05
Zest of 1 lemon
Filling
-
01
3 large eggs
-
02
1 cup (200g) granulated sugar
-
03
1/3 cup (80ml) fresh lemon juice
-
04
Zest of 2 lemons
-
05
1/4 cup (60ml) whole milk
Crumb Topping
-
01
3/4 cup (95g) all‑purpose flour
-
02
1/2 cup (100g) light brown sugar
-
03
1/4 cup (57g) unsalted butter, cold and cubed
-
04
Pinch of salt
Instructions
Preheat the oven to 350°F (175°C). Line a 9x13‑inch baking pan with parchment paper, leaving overhang for easy removal.
In a large bowl, cream together the softened butter and granulated sugar until light and fluffy; stir in the lemon zest.
Add the flour and salt, mixing until just combined to form a dough. Press the dough evenly into the prepared pan, creating a smooth crust.
Bake the crust for 12‑15 minutes, or until lightly golden around the edges. While the crust bakes, whisk together eggs, sugar, lemon juice, lemon zest, and milk for the filling.
Remove the crust from the oven. Pour the filling over the hot crust, then sprinkle the crumb topping (flour, brown sugar, cold butter, salt) in an even layer. Return to the oven and bake for an additional 20‑25 minutes, until the topping is golden and the filling is set.
Allow the bars to cool completely on a wire rack. Dust with powdered sugar, cut into squares, and serve.
Notes & Tips
-
1
Keep an eye on the topping; it can go from golden to overly brown quickly.
-
2
If the filling seems too runny, bake an extra 2‑3 minutes.
-
3
For extra brightness, add a splash of lemon extract to the filling.
Tools You'll Need
-
9x13-inch baking pan
-
Parchment paper
-
Mixing bowls
-
Hand mixer or stand mixer
-
Rubber spatula
-
Zester
-
Wire rack
Must-Know Tips
-
Don’t over‑mix the crust; it stays tender.
-
Use fresh lemons for maximum aroma.
-
Cool bars completely before cutting for clean slices.
Professional Secrets
-
Room‑temperature butter ensures an even crust.
-
Baking the crust first creates a barrier that prevents sogginess.
-
A light dusting of powdered sugar adds visual appeal without extra sweetness.

Recipe by
Sofia BelleSofia bakes with love 🧁💛, sweet smells filling her home 🍪🏡, and flour on her hands 🤲✨. She believes every loaf 🍞 and cake 🎂 tells a story of wa ...
Get Delicious Recipes Weekly
Join 25,000+ home cooks getting our best recipes straight to their inbox.
Free forever • No spam • Unsubscribe anytime