
I remember the first time I tried to make this. It was a rainy evening, the kind that makes you want to curl up and forget the world. My husband and I had just cancelled a dinner reservation, and I was determined to make something that felt just as celebratory. I pulled out the chicken, the block of parmesan, and just started playing. There were a few oops moments—a bit too much garlic here, a slightly over-browned crust there—but the end result was... wow. It was more than just a meal; it was a testament to finding joy in simple, imperfect moments. It’s one of those cozy classics that instantly became part of our story, a dish that says 'I love you' without a single word.
Why You'll Adore This Recipe
-
Restaurant Quality at Home: Honestly, there is something so deeply satisfying about making a dish that tastes like you ordered it from a fancy menu. The crust is crunchy, the chicken is juicy, and the savory flavor is layered and complex. It’s a way to treat yourself and your family without ever leaving the house.
-
Incredibly Simple Process: Don’t let the gorgeous final plate fool you; this is not a complicated recipe. The steps are straightforward and forgiving. It’s mostly about dredging the chicken and giving it a good pan-sear, which is a lovely, rhythmic process. It feels like you're creating something truly elegant with very little stress.
-
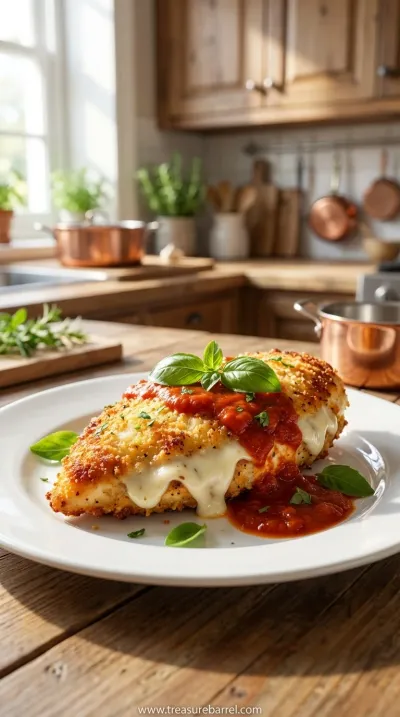
The Perfect Texture Combination: The contrast in this dish is just divine. You have the crisp, golden, cheesy crust giving way to incredibly tender and moist chicken inside. Every single bite is a little journey of textures, from that initial crunch to the soft, savory finish. It's one of those perfect warm meals.
-
A True Crowd-Pleaser: I have yet to serve this to someone who didn't immediately ask for the recipe. It appeals to everyone, from picky kids to discerning adults. It's elegant enough for a dinner party but comforting enough for a simple family meal, making it one of my go-to family favorites.
Wow, just wow. This recipe tastes exactly like the restaurant version but feels so much more special.
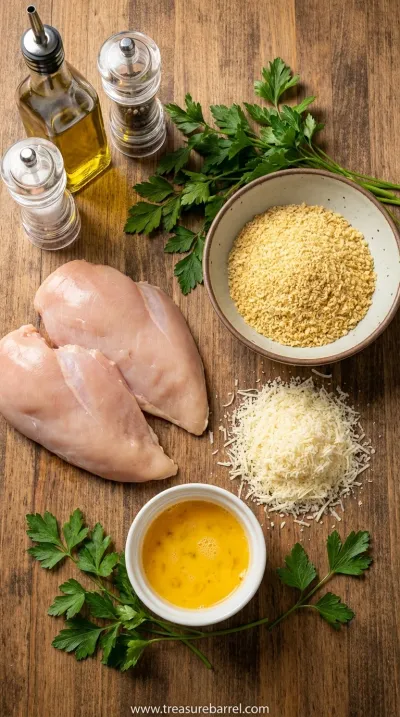
Essential Ingredient Guide
- Thinly Sliced Chicken Breasts: The key here is to have the chicken nice and thin, about a half-inch thick. You can buy them as cutlets or simply pound regular breasts between two sheets of parchment paper. This ensures the chicken cooks through quickly and evenly, staying juicy while the crust gets perfectly golden and crisp. It’s the foundation of the whole dish, so take a moment to get it right.
- Panko Breadcrumbs: Please, if you can, use Panko! These Japanese-style breadcrumbs are lighter and flakier than traditional breadcrumbs, which means they absorb less oil and create a much crunchier, more delicate crust. They are what gives this chicken that signature restaurant-quality texture. You can find them in most grocery stores now, and they make a world of difference.
- Freshly Grated Parmesan Cheese: Using a block of real Parmigiano-Reggiano and grating it yourself is a non-negotiable for me. The pre-shredded kind often has anti-caking agents that prevent it from melting as beautifully and can have a slightly dusty texture. The freshly grated cheese melts into the crust, creating a nutty, salty, and deeply savory flavor that is just heavenly. It's a small step that elevates the entire dish.
Complete Cooking Process
-
Preparation:
This first stage is all about mindful prep, setting up your space to make the cooking process feel like a gentle dance. I like to lay everything out in a row: the seasoned flour, the egg wash, and finally, the glorious parmesan and panko mixture. This little assembly line, or dredging station, makes everything flow so smoothly. Pat your chicken cutlets dry; this is so important for getting that crust to really adhere. It’s these small, quiet moments of preparation that make the final dish feel so effortless.
-
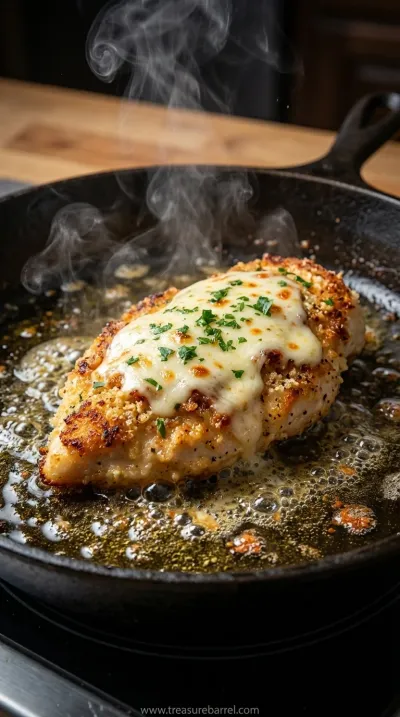
Cooking:
Now for the sensory part. Heating the oil in the skillet until it shimmers is a visual cue that you’re ready. When you lay the coated chicken in the pan, listen for that satisfying sizzle—it’s the sound of a perfect crust beginning to form. Don't be tempted to move it around too much. Just let it sit and develop that deep golden-brown color. The kitchen will start to fill with the most incredible aroma of toasting cheese and garlic. It's pure comfort.
-
Assembly:
Once the chicken is cooked, the final touches are simple but beautiful. I love to serve this over a bed of mashed potatoes or a light pasta. You can add a simple sauce or just let the chicken be the star. A little sprinkle of fresh parsley over the top adds a touch of freshness and a lovely pop of green against the golden crust. It's all about presenting this beautiful thing you've made in a way that feels special and inviting.
-
Ensure your oil is hot enough before adding the chicken. A simple test is to drop a breadcrumb in; if it sizzles immediately, you're good to go.
-
Use one hand for the dry ingredients (flour, breadcrumbs) and the other for the wet (egg) to avoid clumpy, messy fingers.
-
Don't overcrowd the pan. Cook the chicken in batches if you need to, giving each piece plenty of space to get crispy.
Pro Tips
These little tricks really do make a difference, turning a good meal into a great one. It's all about the details.
 Family Favorites
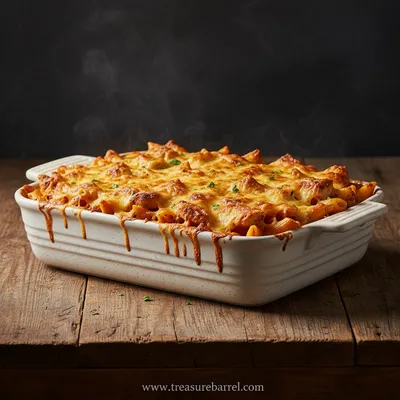
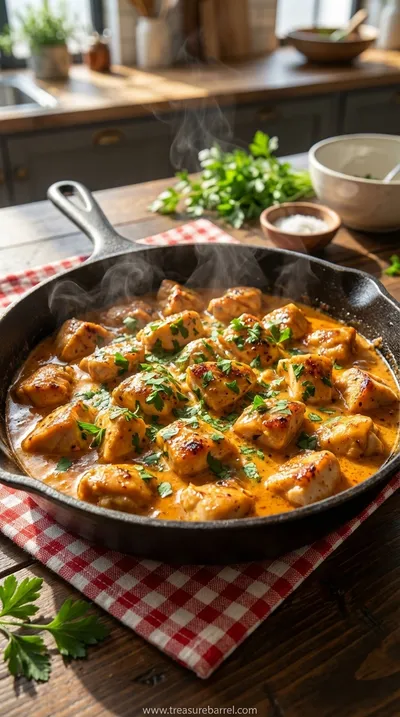
Cajun Cream Cheese Chicken Pasta Bake Recipe
Spicy Cajun-seasoned chicken and pasta baked in a rich cream cheese sauce.
Frequently Asked Questions
→ Can I make this recipe in an air fryer?
Yes, you absolutely can, and it's a wonderful way to get an extra-crispy crust with less oil. After breading the chicken, spritz it lightly with cooking spray and place it in the air fryer basket in a single layer. I'd suggest cooking at around 380°F (193°C) for about 12-15 minutes, flipping halfway through, until the chicken is cooked through and the crust is golden. It's a slightly different texture but equally delicious and a fantastic option for a lighter meal.
→ What's the best way to keep the chicken warm while I cook in batches?
This is a great question because you really want everyone to eat a warm, crispy piece of chicken at the same time. What I do is preheat my oven to a very low temperature, around 200°F (95°C). As each piece of chicken is finished cooking, I place it on a wire rack set over a baking sheet. The wire rack is key because it allows air to circulate underneath, preventing the bottom from getting soggy. They'll stay perfectly warm and crisp in the oven until you're ready to serve.
→ Can I use regular breadcrumbs instead of Panko?
Of course you can. The dish will still be absolutely lovely. Regular breadcrumbs will give you a more traditional, denser crust, which some people actually prefer. The Panko just provides a lighter, airier crunch. If you're using plain regular breadcrumbs, I would suggest adding a little extra seasoning to them, perhaps some more Italian herbs or garlic powder, to boost the flavor since they are a bit more neutral than Panko.
→ How do I know when the chicken is perfectly cooked?
The most reliable way is to use an instant-read thermometer. Chicken is safely cooked when it reaches an internal temperature of 165°F (74°C). Since these cutlets are thin, they cook quite quickly, so check them after about 3-4 minutes per side. If you don't have a thermometer, you can make a small cut into the thickest part of the chicken. The juices should run clear, and the meat should be opaque and white all the way through.
→ What kind of sauce goes well with this parmesan chicken?
While this chicken is stunning on its own, a simple sauce can be a beautiful addition. A light lemon butter sauce is divine, as is a simple white wine and garlic reduction. For something creamier, a light Alfredo-style sauce works well, much like in this creamy pasta comfort dish. However, unlike a traditional classic chicken parmesan, I would avoid a heavy tomato sauce, which can make the crispy coating soggy.
→ Can I make this gluten-free?
Definitely! It's very easy to adapt. Simply swap the all-purpose flour for a gluten-free all-purpose blend, and use gluten-free Panko breadcrumbs, which are becoming much more widely available. I've made it this way for friends with sensitivities, and it turns out just as crispy and delicious. Just be sure to check that all your other seasonings and ingredients are certified gluten-free as well.
Nutrition Facts
per serving
480
Calories
45g
Protein
20g
Carbs
25g
Fat
Taste Profile
Rich, savory, and cheesy with a nutty depth from the Parmesan and a hint of garlic.
Ingredient Substitutions
Don't have an ingredient? Try these alternatives
Turkey cutlets will cook similarly to chicken. Lamb will have a richer flavor and may cook slightly faster, so keep a close eye on it.
Cornflakes will give an extra-crunchy, slightly sweet crust. Crushed pork rinds are a fantastic keto-friendly option that gets incredibly crispy.
Recipe Variations
Try these delicious twists on the original
Spicy Version
Add 1/2 teaspoon of cayenne pepper or red pepper flakes to the Panko breadcrumb mixture for a gentle, warming heat that beautifully complements the savory cheese.
Herbed Version
Add 1 tablespoon of finely chopped fresh herbs, such as thyme, rosemary, or oregano, to the breadcrumb mix for a more aromatic and herbaceous crust.
Lemony Twist
Incorporate the zest of one lemon into the Panko and Parmesan mixture. This adds a bright, fragrant citrus note that cuts through the richness beautifully.
Common Mistakes to Avoid
Learn from others' mistakes for perfect results
- Not getting the chicken to an even thickness, resulting in some parts being dry while others are undercooked.
- Overcrowding the pan, which lowers the oil temperature and causes the chicken to steam instead of fry.
- Flipping the chicken too early or too often, which can dislodge the beautiful crust.
- Forgetting to pat the chicken dry, leading to a coating that doesn't stick well.
Meal Prep & Storage
Make Ahead Tips
You can prepare the chicken up to the breading stage several hours in advance. Place the coated chicken breasts on a parchment-lined baking sheet, cover loosely with plastic wrap, and refrigerate for up to 4 hours. This can actually help the coating adhere even better. I wouldn't recommend breading it a full day ahead, as the crumbs can become soggy.
Leftover Ideas
Leftover parmesan chicken is wonderful sliced and served cold over a salad the next day. You can also chop it up and add it to a creamy pasta dish, similar to a slow cooker meal, for a brand new dinner. To reheat, the oven or air fryer is your best friend to revive that crispy crust.
Perfect Pairings
Serve this with...
Cooking Timeline
Prepare your dredging station: flour, eggs, and Panko-Parmesan mixture in three separate dishes.
Pat chicken dry and coat each piece, first in flour, then egg, then the Panko mixture.
Heat oil in the skillet over medium-high heat.
Cook chicken in batches, about 3-4 minutes per side, until golden brown and cooked through.
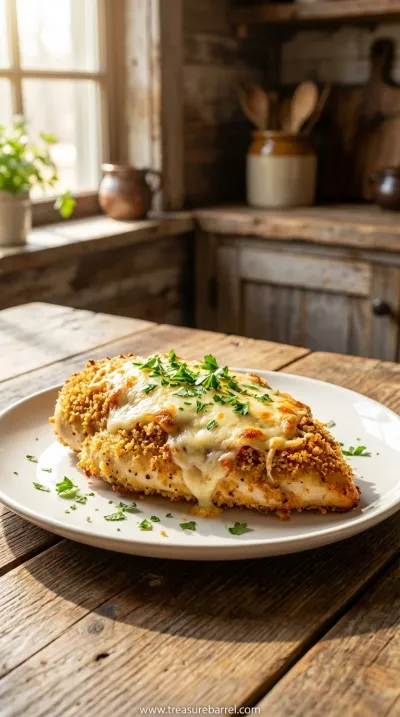
Let chicken rest on a wire rack. Garnish with parsley and lemon wedges before serving.
Longhorn Steakhouse Parmesan Chicken Recipe
A restaurant-style parmesan chicken recipe that's surprisingly simple to make at home for a cozy, satisfying family dinner.
Timing
Prep Time
15 Minutes
Cook Time
15 Minutes
Total Time
30 Minutes
Recipe Details
Ingredients
For the Parmesan Chicken
-
01
4 thin-sliced boneless, skinless chicken breasts (about 1.5 lbs total)
-
02
1/2 cup all-purpose flour
-
03
2 large eggs
-
04
1 cup Panko breadcrumbs
-
05
3/4 cup freshly grated Parmesan cheese
-
06
1 teaspoon garlic powder
-
07
1 teaspoon dried parsley
-
08
1/2 teaspoon salt
-
09
1/4 teaspoon black pepper
-
10
4 tablespoons olive oil or avocado oil, for frying
For Garnish (Optional)
-
01
Fresh parsley, chopped
-
02
Lemon wedges
Instructions
First, let's create our little dredging station. It makes the whole process feel so calm and organized. You'll need three shallow dishes. In the first one, whisk together the flour, salt, and pepper. In the second, lightly beat the two eggs with a splash of water. In the final dish, combine the Panko breadcrumbs, that beautiful freshly grated Parmesan, garlic powder, and dried parsley. Give it a good mix with your fingers to make sure everything is evenly distributed. Pat your chicken breasts completely dry with a paper towel—this is the secret to a crust that sticks!
Now for the gentle coating process. Take one piece of chicken at a time and lightly dredge it in the flour mixture, shaking off any excess. Then, dip it into the egg wash, allowing the extra to drip back into the bowl. Finally, press it firmly into the Panko-Parmesan mixture, making sure it's generously coated on all sides. I like to pile the crumbs on top and really press them in. Set the coated chicken on a clean plate and repeat with the remaining pieces. Let them rest for a few minutes while you heat the oil; this helps the coating set.
It's time to cook. Warm the olive oil in a large skillet over medium-high heat. The oil should shimmer slightly when it's ready. Carefully place two pieces of chicken in the skillet, being sure not to overcrowd the pan. Let them cook for about 3-4 minutes per side, until the crust is a deep golden brown and the chicken is cooked through. The sizzle and the smell are just divine at this point. You're looking for that perfect, irresistible crunch. This recipe reminds me of quick comfort at its finest.
Once cooked, transfer the chicken to a wire rack to rest for a moment. This keeps the bottom from getting steamed and soggy. While the first batch rests, cook the remaining two chicken breasts. When you're ready to serve, plate the chicken immediately. I love to give it a final flourish with a sprinkle of fresh, chopped parsley and a wedge of lemon on the side for squeezing over. It’s a simple touch that adds a wonderful brightness. For more ideas, you can always browse for more recipes on the site.
Notes & Tips
-
1
To make the chicken extra flavorful, you can brine it in a simple saltwater solution (1/4 cup salt to 4 cups water) for 30 minutes before you start. Just be sure to rinse and pat it very, very dry afterward.
-
2
Feel free to customize the breadcrumb mixture. A pinch of red pepper flakes adds a gentle heat, while a teaspoon of Italian seasoning can add a lovely herbaceous note. This is your canvas, so feel free to paint!
-
3
If you have any leftover breading mixture, don't throw it out! Toast it in a dry skillet until golden and sprinkle it over pasta or roasted vegetables for a delicious, crunchy topping. It's a wonderful no-waste tip.
Tools You'll Need
-
A heavy-bottomed skillet, like cast iron or stainless steel, is perfect here. It will distribute the heat evenly, ensuring you get a beautifully golden, consistent crust without any hot spots.
-
You'll need three of these for your dredging station. Pie plates, pasta bowls, or any wide, shallow dish will work perfectly. Setting them up in an assembly line makes the breading process clean and efficient.
-
A good pair of tongs is essential for flipping the chicken without piercing the beautiful crust you've just created. They also help you safely place the chicken in and remove it from the hot oil.
-
This is my secret weapon for crispy chicken. Resting the cooked pieces on a wire rack instead of a paper towel-lined plate allows air to circulate, keeping the bottom crust just as crunchy as the top.
Must-Know Tips
-
Don't Skip the Drying Step: Patting the chicken completely dry with paper towels is crucial. Moisture is the enemy of a crispy crust, so this simple step ensures the coating adheres properly.
-
Press the Coating Firmly: When you get to the breadcrumb stage, don't be shy. Use your hands to really press the Parmesan and Panko mixture onto the chicken to ensure a thick, even coating that won't fall off during cooking.
-
Maintain Oil Temperature: Keep your skillet at a steady medium-high heat. If the oil is too cool, the chicken will absorb it and become greasy. If it's too hot, the crust will burn before the chicken is cooked through. It's a delicate balance.
Professional Secrets
-
Rest Before Serving: Letting the chicken rest for a couple of minutes on a wire rack after cooking is so important. This allows the juices inside to redistribute, resulting in a much more tender and flavorful piece of meat.
-
Use Freshly Grated Cheese: I know I mentioned it before, but it bears repeating. The flavor and melting quality of a real block of Parmesan cheese that you grate yourself is leagues above the pre-shredded kind. It's a game-changer.
-
A Squeeze of Lemon: The final squeeze of fresh lemon juice at the end is not just a garnish. The acidity cuts through the richness of the cheese and fried crust, brightening all the flavors and making the dish feel lighter and more balanced.

Recipe by
Clara JoyClara’s kitchen is all about family 👨👩👧👦💖, sharing timeless favorites 🍝🍰, and creating memories 🕯️✨. She loves easy meals 🍳 and heartwarmi ...
Get Delicious Recipes Weekly
Join 25,000+ home cooks getting our best recipes straight to their inbox.
Free forever • No spam • Unsubscribe anytime