
Mini cheesecakes trace their roots to the classic New York cheesecake, a dessert that gained fame in the early 20th century. Over time, home bakers began to scale the dessert down, creating portable versions that could be served at tea parties and holiday gatherings. The concept of a single‑serve cheesecake reflects a cultural shift toward portion‑controlled indulgence, allowing more people to enjoy a slice of decadence without the heaviness of a full‑size cake. This evolution mirrors the broader trend in modern baking toward bite‑size treats that fit into busy lives.
Why You'll Love It
-
- Perfectly portioned for a sweet craving
-
- Creamy texture with a buttery crust
-
- Easy to customize with toppings
-
- Makes a lovely gift or party favor
"These mini cheesecakes are pure comfort in a jar—so easy, yet so elegant!"
Essential Ingredient Guide
- Cream cheese: Choose full‑fat cream cheese for richness; let it soften to room temperature before mixing.
- Graham crackers: Crush them finely and toast lightly for a fragrant, crunchy base.
- Sugar: Granulated sugar dissolves smoothly; you can substitute with brown sugar for a deeper flavor.
- Vanilla extract: A splash adds warmth; use pure extract for the best aroma.
- Lemon juice: A teaspoon brightens the filling and balances the sweetness.
- Sour cream: Adds a subtle tang and extra silkiness to the batter.
 Sweet Treats
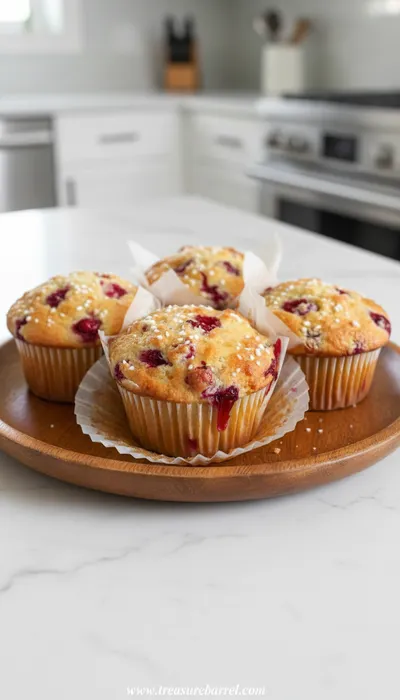
Cranberry and Orange Yogurt Muffins
Bright cranberry‑orange muffins with a soft yogurt crumb and a whisper of citrus.
Complete Cooking Process
-
Ingredient Readiness:
Soften the cream cheese, crush the crackers, and measure all wet and dry components before you start.
-
Flavor Development:
Blend the filling gently to keep air in the mixture, then let the crust toast in the oven for a nutty perfume.
-
Texture Control:
Avoid over‑mixing after adding the egg; this keeps the cheesecake smooth rather than grainy.
-
Finishing Touches:
Top each mini with fresh berries, a drizzle of honey, or a dusting of cocoa just before serving.
-
Serving Timing:
Allow the cheesecakes to chill for at least two hours; the flavors meld beautifully after a gentle rest.
-
Line the ramekins with parchment for easy removal
-
Use a water bath to prevent cracks
-
Chill in the freezer for 15 minutes for a firmer bite
-
Taste the filling before baking; adjust sweetness if needed
Pro Tips
Well, those little tricks keep the mini cheesecakes looking polished, even when the kitchen gets a little chaotic. I find that a short pause while they set in the fridge lets the aroma settle, making the first bite feel like a quiet celebration.
 Cozy Classics
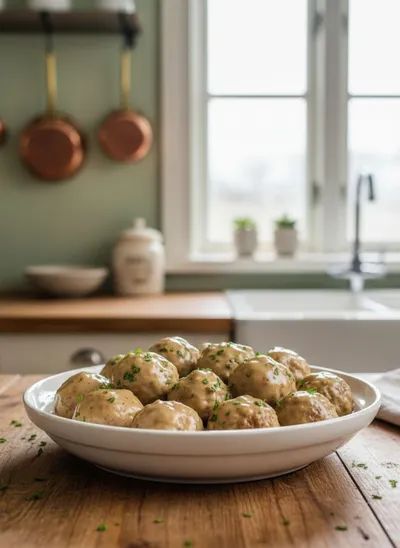
Swedish Meatballs – Classic Comfort Food
Classic Swedish meatballs in a rich, creamy sauce that bring warmth to any table.
The essence of the dish:
It’s the silky cream cheese custard that meets a buttery crumb, creating a contrast that’s both comforting and refined.
A fun fact or historical angle:
During the 1930s, confectioners started crafting individual cheesecake portions to serve at speakeasies, allowing guests to enjoy a sweet treat without the fuss of cutting a large cake.
Flavor or sensory focus:
You’ll notice the gentle tang of lemon, the buttery crunch of the crust, and a lingering vanilla scent that invites you to linger over each bite.
You Must Know
-
The crumb should be firm enough to hold its shape
-
Never over‑bake; the center should still wobble slightly
-
Cool slowly to avoid cracking
Frequently Asked Questions
→ Can I use a different crust?
Yes, you can swap graham crackers for oat cookies or even almond flour for a gluten‑free option.
→ How long can I store them?
Mini cheesecakes keep well sealed in the refrigerator for up to 5 days, or you can freeze them for up to a month.
→ Do I need a water bath?
A water bath is recommended to keep the edges from over‑cooking, but you can bake them without if you watch the time closely.
→ Can I add fruit layers?
Absolutely—layer a thin spread of fruit jam or puree before the filling for extra flavor.
→ What size ramekins work best?
4‑oz ramekins give a perfect bite‑size portion and fit nicely on a standard baking sheet.
→ How do I prevent cracks?
Avoid over‑mixing, bake at a gentle temperature, and let the cheesecakes cool gradually.
Nutrition Facts
per serving
210
Calories
4g
Protein
22g
Carbs
12g
Fat
Taste Profile
Rich and comforting with a subtle tang
Ingredient Substitutions
Don't have an ingredient? Try these alternatives
Slightly lower in fat, resulting in a lighter texture
Provides a similar crumbly base with a hint of malt
Recipe Variations
Try these delicious twists on the original
Spicy Version
Add a pinch of cayenne pepper to the filling and top with candied jalapeño slices.
Mediterranean Style
Stir in crumbled feta and chopped kalamata olives into the crust, and top with a drizzle of honey.
Common Mistakes to Avoid
Learn from others' mistakes for perfect results
- Over‑mixing the cream cheese batter, resulting in a grainy texture
- Baking at too high a temperature, causing cracks
- Skipping the water bath, leading to uneven cooking
Meal Prep & Storage
Make Ahead Tips
You can bake the crusts and fill them a day ahead; keep the fillings covered in the fridge and add toppings just before serving.
Leftover Ideas
Refrigerate in the original ramekin, covered with plastic wrap; enjoy within five days.
Perfect Pairings
Serve this with...
Cooking Timeline
Preheat oven, prepare crust mixture, press into ramekins
Bake crust, let cool while preparing filling
Mix filling ingredients until smooth
Fill ramekins, bake in water bath
Cool, then chill in refrigerator
Mini Cheesecakes – Quick & Creamy Sweet Treat
Mini cheesecakes are the perfect bite‑size indulgence, offering a velvety cream cheese filling atop a buttery graham crust. They feel like a tiny celebration in each spoonful, and you can pop them into the freezer for a quick treat any time you crave something sweet.
Timing
Prep Time
20 Minutes
Cook Time
15 Minutes
Total Time
35 Minutes
Recipe Details
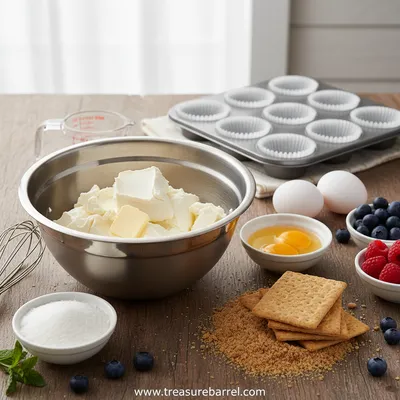
Ingredients
Crust
-
01
1 cup graham cracker crumbs
-
02
2 tbsp melted butter
-
03
2 tbsp sugar
Filling
-
01
16 oz full‑fat cream cheese, softened
-
02
1/2 cup sugar
-
03
2 large eggs
-
04
1/4 cup sour cream
-
05
1 tsp vanilla extract
-
06
1 tbsp lemon juice
Topping (optional)
-
01
Fresh berries
-
02
Honey drizzle
-
03
Chocolate shavings
Instructions
Preheat the oven to 325°F (160°C). Line a baking sheet with parchment.
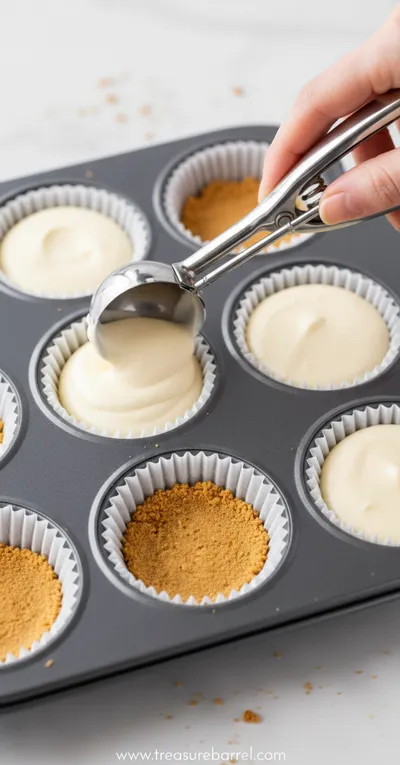
Combine graham crumbs, melted butter, and sugar; press the mixture into the bottom of each ramekin. Bake for 5 minutes until lightly golden.
While the crust cools, beat the cream cheese and sugar together until smooth, then add eggs one at a time, followed by sour cream, vanilla, and lemon juice.
Pour the filling over the crusts, place the ramekins in a water bath, and bake for 12‑15 minutes, until the edges are set but the centers still wobble.
Remove from the oven, let cool on the rack, then chill in the fridge for at least 2 hours.
Top with berries, honey, or chocolate just before serving.
Notes & Tips
-
1
If you prefer a sweeter crust, increase the sugar by a tablespoon.
-
2
For a tangier filling, add an extra teaspoon of lemon juice.
-
3
Feel free to swap the topping for a dollop of whipped cream or crushed nuts.
Tools You'll Need
-
12‑oz ramekins
-
Mixing bowls
-
Hand mixer or stand mixer
-
Rubber spatula
-
Baking sheet
-
Parchment paper
Must-Know Tips
-
Don’t over‑mix the batter; it keeps the texture silky
-
Use a water bath to protect the cheesecake edges
-
Cool gradually to avoid cracks
-
Serve chilled for the best bite‑size experience
Professional Secrets
-
Room temperature cream cheese mixes evenly, avoiding lumps
-
Gentle oven heat creates a uniform set without browning
-
Water bath captures steam, ensuring a smooth surface

Recipe by
Lila GraceLila creates magical desserts 🍫🧁, sprinkles joy 🌈✨, and shares sweet moments 🍬💖. Her kitchen is full of smiles 😄 and sugar-dusted memories 🍪🍯.
Get Delicious Recipes Weekly
Join 25,000+ home cooks getting our best recipes straight to their inbox.
Free forever • No spam • Unsubscribe anytime