
Fried chicken's journey to becoming an American staple is deeply woven into the nation's culinary fabric. While its roots trace back to Scottish immigrants who brought their frying traditions, the dish truly evolved in the Southern United States where enslaved African cooks perfected the technique using cast-iron cookware. The method of seasoning, dredging, and frying created what we now recognize as classic Southern fried chicken—a beautiful blend of crispy exterior and moist interior that became a cornerstone of comfort food across the country. This recipe honors that tradition while making it accessible for home cooks everywhere.
Why You'll Love It
-
- The crust stays crispy for hours without getting soggy
-
- Simple ingredients create incredible depth of flavor
-
- Juicy, tender meat that never dries out
-
- Perfect for family dinners, picnics, or Sunday suppers
"My family said this was the best fried chicken they've ever had—even better than my mother's!"
Essential Ingredient Guide
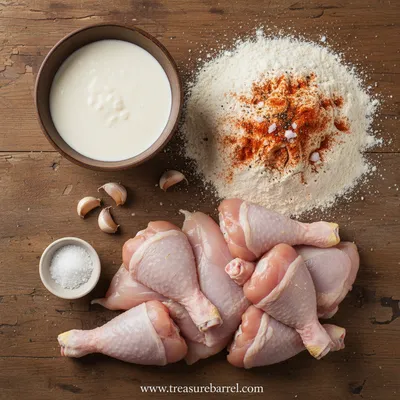
- Chicken pieces: Use a mix of dark and white meat for balance. Thighs and drumsticks stay especially juicy, while breasts cook faster. Let them come to room temperature for even cooking.
- Buttermilk: The acidity tenderizes the chicken while adding subtle tang. If you don't have buttermilk, you can make a quick substitute with milk and vinegar.
- Seasoned flour: This is where the magic happens. A blend of flour, cornstarch, and spices creates that signature crispy texture. Don't skip the cornstarch—it's the secret to extra crunch.
- Paprika: Provides that beautiful golden color and mild smoky flavor. Use smoked paprika for deeper flavor or sweet paprika for a brighter note.
- Garlic powder: Adds savory depth without burning like fresh garlic might. It infuses the crust with that familiar warmth we all love.
- Vegetable oil: Needs to have a high smoke point. Peanut oil works beautifully too, giving a slightly nutty flavor that complements the chicken perfectly.
 Warm Meals
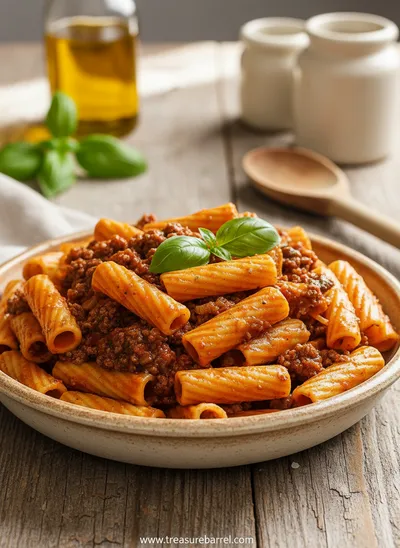
Beef Ragu Pasta Recipe in Tomato Sauce
A rich and hearty pasta dish with slow-cooked beef ragu in a savory tomato sauce.
Complete Cooking Process
-
Ingredient Readiness:
Patting the chicken dry before marinating ensures the buttermilk clings properly. Letting the coated chicken rest for 10 minutes helps the flour adhere, preventing the coating from sliding off during frying.
-
Flavor Development:
The buttermilk marinade works its magic over several hours, tenderizing the meat while the spices penetrate deeply. The frying process itself caramelizes the coating, creating complex flavors through Maillard reaction.
-
Texture Control:
Double-dredging creates multiple layers that puff up during frying. Maintaining the oil temperature between 325-350°F is crucial—too hot burns the outside before the inside cooks, too cool makes the chicken greasy.
-
Finishing Touches:
Letting the chicken drain on a rack instead of paper towels keeps the bottom crust crisp. A light sprinkle of flaky salt right after frying enhances the seasoning while the crust is still hot and porous.
-
Serving Timing:
Fried chicken is best served warm, about 5-10 minutes after frying. This brief rest allows the juices to redistribute without the crust losing its crispness.
-
Use a candy thermometer to monitor oil temperature accurately
-
Don't overcrowd the pan - fry in batches for even cooking
-
Let the oil temperature recover between batches
-
Season the flour mixture generously - it's your main flavor carrier
Pro Tips
The thing about frying chicken is that it’s more about patience than skill, honestly. I’ve burned my share of batches rushing things. The oil needs to be just right—not too hot, not too cool. When you drop that first piece in and it sizzles gently without splattering wildly, you’ll know you’ve got it perfect.
And the resting period after frying? Don’t skip it. I know it’s tempting to dig right in, but letting the chicken sit for those few minutes makes all the difference. The crust sets up, the juices settle back into the meat. It’s the difference between good fried chicken and great fried chicken.
The essence of the dish:
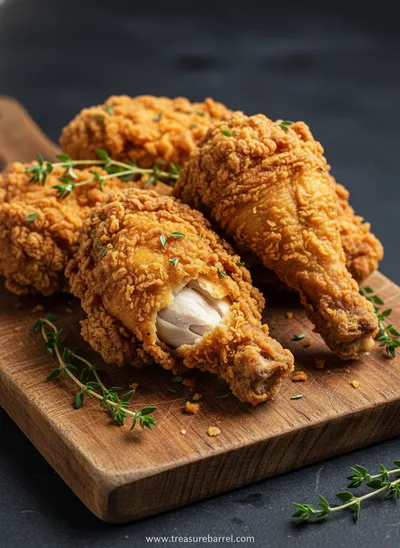
What makes this fried chicken special is that perfect balance between crunch and tenderness. The crust should crackle when you bite into it, giving way to steaming, juicy meat that pulls easily from the bone.
A fun fact or historical angle:
Did you know that fried chicken became a picnic staple because it travels well and tastes delicious at room temperature? This made it perfect for church gatherings, family reunions, and outdoor celebrations throughout American history.
Flavor or sensory focus:
The first thing you'll notice is the aroma—that heavenly blend of frying chicken, herbs, and spices that fills the whole house. Then comes the sound of the crust cracking under your teeth, followed by the rush of warm, savory juices.
You Must Know
-
Oil temperature is non-negotiable - use a thermometer
-
Patience during marinating makes tender chicken
-
Dry chicken before dredging prevents coating slippage
-
Don't skimp on seasoning the flour mixture
Frequently Asked Questions
→ Can I use boneless chicken for this recipe?
Absolutely, though cooking time will be shorter. Boneless thighs or breasts work well—just reduce frying time by 2-3 minutes and check for doneness with a meat thermometer (165°F internal temperature).
→ How long can I marinate the chicken?
Anywhere from 4 hours to overnight. The longer it marinates, the more tender and flavorful it becomes. Just don't exceed 24 hours or the texture can become mushy.
→ What's the best oil for frying chicken?
Vegetable, peanut, or canola oil all work beautifully. They have high smoke points and neutral flavors that let the chicken shine. Avoid olive oil as it burns at lower temperatures.
→ Can I make this gluten-free?
Yes! Simply substitute the all-purpose flour with your favorite gluten-free flour blend. Many brands work well for frying—just make sure it contains a binder like xanthan gum.
→ How do I keep the crust crispy if I'm not serving immediately?
Place the fried chicken on a wire rack set over a baking sheet in a 200°F oven. This keeps air circulating around it, preventing sogginess. It will stay crisp for up to an hour.
→ Can I reuse the frying oil?
Yes, once cooled and strained through cheesecloth or a fine mesh sieve. Store it in a cool, dark place and use within a month. You'll know it's gone bad if it smells rancid.
Nutrition Facts
per serving
420
Calories
35g
Protein
25g
Carbs
22g
Fat
Taste Profile
Savory, well-seasoned with herbal notes and subtle heat
Ingredient Substitutions
Don't have an ingredient? Try these alternatives
The acidity is key for tenderizing, so don't skip it entirely
Adjust cooking times accordingly based on what you're frying
Recipe Variations
Try these delicious twists on the original
Nashville Hot Chicken
After frying, brush chicken with a spicy mixture of cayenne pepper, brown sugar, and hot oil for that signature Nashville heat
Herb-Crusted Version
Add dried herbs like thyme, oregano, and rosemary to the flour mixture for an aromatic twist
Common Mistakes to Avoid
Learn from others' mistakes for perfect results
- Overcrowding the pan causes oil temperature to drop resulting in greasy chicken
- Not patting chicken dry before marinating leads to poor coating adhesion
- Frying cold chicken straight from refrigerator causes uneven cooking
- Skipping the resting period after dredging allows coating to fall off
Meal Prep & Storage
Make Ahead Tips
You can marinate the chicken up to 24 hours ahead. The flour mixture can be mixed and stored in an airtight container for up to a week. The coated chicken can rest in the refrigerator for up to 2 hours before frying.
Leftover Ideas
Reheat gently in a 375°F oven for 15 minutes to restore crispness. Leftover fried chicken also makes excellent chicken salad, sandwiches, or can be chopped and added to pasta dishes.
Perfect Pairings
Serve this with...
Cooking Timeline
Marinate chicken in buttermilk mixture - minimum 4 hours, up to 24 hours
Remove chicken from refrigerator, prepare dredging station, heat oil
Dredge chicken pieces, let coating set on wire rack
Fry first batch of chicken, maintaining oil temperature
Fry remaining batches, allowing oil to reheat between batches
Let chicken rest on wire rack, then serve warm
 Warm Meals
Garlic Steak Tortellini – A Warm Classic
Steak meets garlic‑kissed tortellini in a creamy, herb‑filled sauce for a cozy night in.
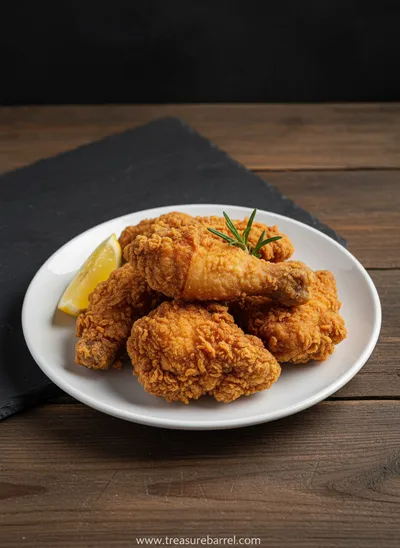
Ultra-Crispy Ultra-Juicy Fried Chicken Recipe
Learn how to make perfectly crispy yet juicy fried chicken with this simple recipe that delivers amazing results every single time, just like grandma used to make.
Timing
Prep Time
20 Minutes
Cook Time
25 Minutes
Total Time
4 Hours 45 Minutes
Recipe Details
Ingredients
For the Marinade
-
01
3 lbs chicken pieces (thighs, drumsticks, breasts)
-
02
2 cups buttermilk
-
03
1 tbsp hot sauce (optional)
-
04
1 tsp salt
-
05
1/2 tsp black pepper
For the Dredging Mixture
-
01
2 cups all-purpose flour
-
02
1/2 cup cornstarch
-
03
2 tbsp paprika
-
04
1 tbsp garlic powder
-
05
1 tbsp onion powder
-
06
2 tsp salt
-
07
1 tsp black pepper
-
08
1 tsp cayenne pepper (adjust to taste)
For Frying
-
01
Vegetable or peanut oil for frying (about 4-6 cups)
-
02
Flaky sea salt for finishing
Instructions
Place chicken pieces in a large bowl and pat dry with paper towels. In another bowl, whisk together buttermilk, hot sauce (if using), salt, and pepper. Pour over chicken, making sure each piece is well coated. Cover and refrigerate for at least 4 hours or overnight.
When ready to cook, remove chicken from refrigerator and let sit at room temperature for 30 minutes. In a large shallow dish or pie plate, whisk together flour, cornstarch, paprika, garlic powder, onion powder, salt, black pepper, and cayenne.
Remove chicken pieces from buttermilk, letting excess drip off. Dredge each piece thoroughly in the flour mixture, pressing the coating onto the chicken to ensure good adhesion. Place on a wire rack and let rest for 10 minutes to set the coating.
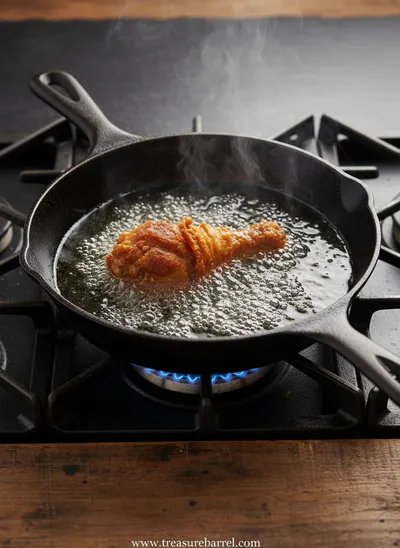
Meanwhile, pour oil into a large, heavy-bottomed pot or Dutch oven to a depth of about 2 inches. Heat over medium-high heat until it reaches 350°F on a candy thermometer.
Working in batches to avoid crowding, carefully lower chicken pieces into the hot oil using tongs. Fry for 12-15 minutes for dark meat, 8-10 minutes for white meat, turning occasionally, until golden brown and cooked through (internal temperature of 165°F).
Transfer fried chicken to a wire rack set over a baking sheet to drain. Sprinkle immediately with flaky sea salt. Let rest for 5-10 minutes before serving to allow juices to redistribute.
Notes & Tips
-
1
For extra crispy chicken, you can double-dredge: after the first coating sets, dip pieces back in buttermilk and flour mixture again
-
2
Maintain oil temperature between 325-350°F for best results - if it drops too low, the chicken will be greasy
-
3
Leftover fried chicken makes amazing chicken salad or can be reheated in a 375°F oven for 15 minutes to regain crispness
 Cozy Classics
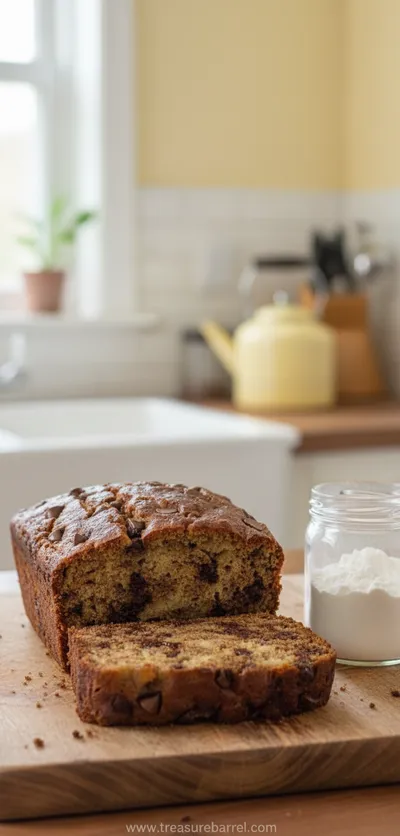
Easy Chocolate Chip Banana Bread
Moist chocolate chip banana bread, quick to bake, perfect for cozy breakfasts.
Tools You'll Need
-
Large heavy-bottomed pot or Dutch oven
-
Candy thermometer
-
Tongs
-
Wire rack set over baking sheet
-
Large mixing bowls
-
Shallow dishes for dredging
-
Paper towels
Must-Know Tips
-
Don't overcrowd the pan - fry in batches to maintain oil temperature
-
Let meat come to room temperature before frying for even cooking
-
Taste your flour mixture before dredging - if it doesn't taste seasoned enough, add more salt and spices
Professional Secrets
-
Room temperature chicken fries more evenly than cold chicken
-
High smoke point oil prevents burning and off flavors
-
Resting the coated chicken helps the flour adhere better during frying

Recipe by
Clara JoyClara’s kitchen is all about family 👨👩👧👦💖, sharing timeless favorites 🍝🍰, and creating memories 🕯️✨. She loves easy meals 🍳 and heartwarmi ...
Get Delicious Recipes Weekly
Join 25,000+ home cooks getting our best recipes straight to their inbox.
Free forever • No spam • Unsubscribe anytime