
During the 1930s, households faced limited resources and often lacked reliable ovens. Creative cooks turned to stovetop desserts, crafting a sweet treat that required only butter, sugar, and cocoa. This humble no‑bake cookie spread across America, offering a quick, satisfying indulgence that could be prepared with a single pot. Its longevity reflects both frugality and a yearning for simple pleasures, making it a beloved staple in vintage kitchens.
Why You'll Love It
-
- Minimal cleanup, just one pot
-
- No oven, perfect for summer heat
-
- Classic flavor that feels nostalgic
-
- Quick to make, ready in minutes
"These cookies take me back—soft, buttery, and just the right amount of chocolate. A true classic!"
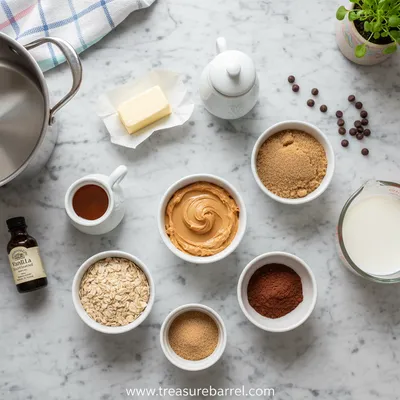
Essential Ingredient Guide
- Rolled oats: They give the cookie its hearty body; use old‑fashioned oats for the best texture.
- Cocoa powder: Provides the deep chocolate flavor; sift to avoid lumps.
- Unsalted butter: Adds richness and a glossy finish; melt gently.
- Granulated sugar: Creates the caramel base; can be adjusted for sweetness.
- Milk: Helps dissolve the sugar and butter; whole milk gives extra silkiness.
- Vanilla extract: A small splash brightens the overall flavor.
Complete Cooking Process
-
Ingredient Readiness:
Measure oats, cocoa, sugar, butter, milk, and vanilla. Have a parchment‑lined tray ready for dropping the cookies.
-
Flavor Development:
Melt butter, sugar, and milk together over medium heat, whisk until the mixture bubbles and turns a deep amber color.
-
Texture Control:
Stir in cocoa, then remove from heat and quickly fold in oats and vanilla. The batter thickens fast, so work swiftly.
-
Finishing Touches:
Spoon generous rounds onto the prepared tray, let cool for 10‑15 minutes until set.
-
Serving Timing:
Serve once the cookies have firmed but remain slightly yielding in the center; they soften as they sit.
-
Use a heavy‑bottomed saucepan to prevent scorching.
-
Work quickly when folding oats to avoid a gritty texture.
-
If you like a softer cookie, press down gently with a spoon while still warm.
-
Add a pinch of sea salt to elevate the chocolate flavor.
Pro Tips
Well, those little tricks make a big difference. I remember once letting the mixture sit a minute too long and ending up with a dry crumb—so now I keep my timer close. Also, the cookies taste even better after a short rest, when the flavors have settled together like old friends gathering around a table.
 Sweet Treats
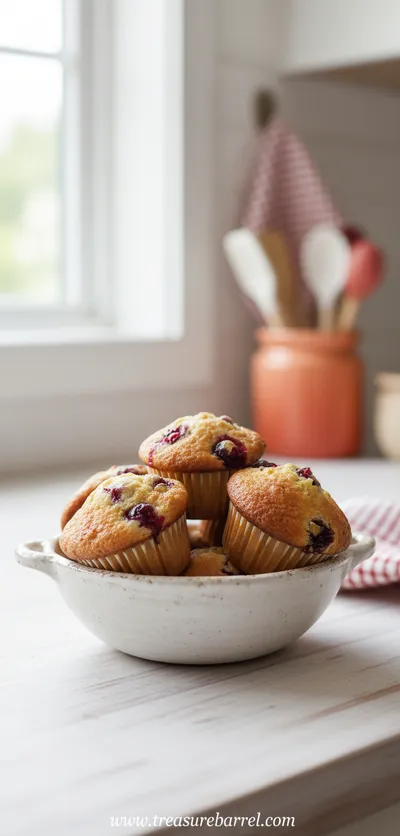
Cranberry Orange Muffins
Tender muffins bursting with orange zest and tart cranberries, ideal for a comforting morning treat.
The essence of the dish:
A sweet blend of buttery caramel, cocoa, and hearty oats creates a chew that is at once soft and satisfying. The aroma of melted butter and chocolate fills the kitchen, reminding you of a simpler time.
A fun fact or historical angle:
During the wartime rationing era, Vintage Eats emerged as families needed desserts that required fewer eggs and no oven. These cookies became a staple because they were quick, inexpensive, and brought a touch of comfort to busy households.
Flavor or sensory focus:
The first bite offers a warm, buttery mouthfeel, followed by the bittersweet kiss of cocoa. The oats provide a gentle chew, while a hint of vanilla rounds out the flavor. It’s a nostalgic symphony that lingers pleasantly on the palate.
You Must Know
-
Use old‑fashioned oats for the best bite.
-
Do not over‑cook the caramel; a light amber hue is perfect.
-
Cool the cookies on parchment to prevent sticking.
Frequently Asked Questions
→ Can I use quick‑cooking oats?
Yes, but the texture will be softer and less chewy. Old‑fashioned rolled oats give the authentic bite.
→ How do I store the cookies?
Place them in an airtight container at room temperature for up to a week. They stay soft and flavorful.
→ Can I make them gluten‑free?
Swap the rolled oats for certified gluten‑free oats or use a blend of rice flakes and quinoa flakes.
→ What if I want a richer chocolate flavor?
Add an extra tablespoon of cocoa powder or substitute half the cocoa with melted dark chocolate.
→ Do I need to chill them before serving?
No, they set at room temperature, but a brief chill can firm them up if you prefer a firmer bite.
→ Can I add nuts or dried fruit?
Absolutely—fold in chopped walnuts, almonds, or raisins after mixing the oats for added texture.
Nutrition Facts
per serving
210
Calories
4g
Protein
31g
Carbs
9g
Fat
Taste Profile
A comforting blend of buttery sweet and rich chocolate
Ingredient Substitutions
Don't have an ingredient? Try these alternatives
Provides a subtle coconut aroma; use the same amount.
Honey adds a gentle floral note; reduce to ¾ cup.
Recipe Variations
Try these delicious twists on the original
Gluten‑Free Oats
Replace rolled oats with certified gluten‑free oats for a safe alternative.
Nutty Version
Add ¼ cup chopped toasted almonds or walnuts for extra crunch.
Common Mistakes to Avoid
Learn from others' mistakes for perfect results
- Over‑cooking the caramel, which makes the cookies bitter.
- Adding oats too early, causing a gritty texture.
- Skipping the parchment line, leading to sticking.
Meal Prep & Storage
Make Ahead Tips
You can prepare the caramel base up to 24 hours ahead; store it in the fridge and gently re‑heat before mixing with oats.
Leftover Ideas
Reheat gently in a skillet over low heat with a splash of milk to restore softness.
Perfect Pairings
Serve this with...
Cooking Timeline
Gather and measure all ingredients; line the baking sheet.
Melt butter, sugar, and milk; bring to a gentle boil.
Add cocoa, remove from heat, stir in oats and vanilla.
Spoon onto tray, let cool and set.
 Warm Meals
Best Chicken and Rice Casserole: Family Favorite Recipe
Savory chicken and rice bake with vegetables, ideal for make-ahead meals.
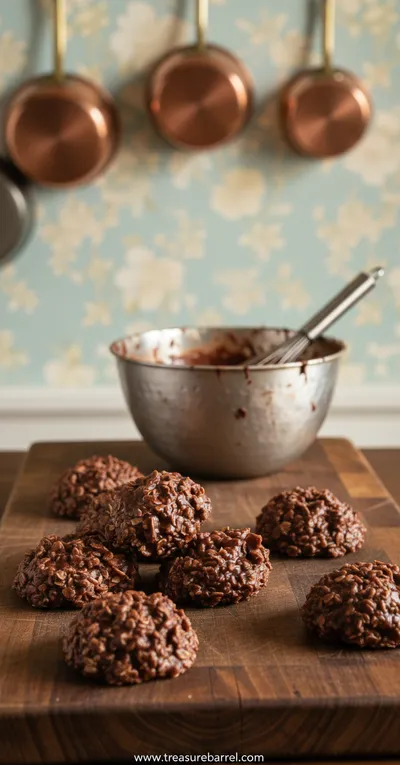
Vintage No-Bake Cookies
Enjoy sweet, chewy Vintage No-Bake Cookies made with simple pantry staples—no oven needed. The buttery caramel meets deep chocolate for a nostalgic bite that feels like a warm hug from the past.
Timing
Prep Time
10 Minutes
Cook Time
10 Minutes
Total Time
20 Minutes
Recipe Details
Ingredients
Main Ingredients
-
01
2 cups rolled oats
-
02
1/2 cup unsalted butter
-
03
1 cup granulated sugar
-
04
1/4 cup milk
-
05
1/4 cup cocoa powder
-
06
1 teaspoon vanilla extract
-
07
Pinch of salt
Instructions
In a medium saucepan, melt the butter over medium heat. Add the sugar and milk, stirring until the mixture comes to a gentle boil.
Continue to boil for about 2 minutes, allowing the mixture to thicken and turn a light amber color.
Remove the pan from heat and whisk in the cocoa powder until fully incorporated.
Stir in the oats, vanilla, and a pinch of salt. Mix quickly until every oat is coated.
Drop rounded spoonfuls onto a parchment‑lined tray. Let cool for 10‑15 minutes until set.
Notes & Tips
-
1
Work quickly after adding oats; the batter thickens fast.
-
2
If the cookies are too soft, let the caramel cook a few seconds longer.
-
3
For a chewier texture, increase the oats by ¼ cup.
 Sweet Treats
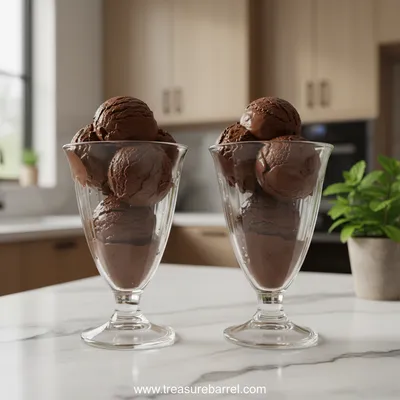
Duo of Chocolate Ice Cream Glasses
Elegant chocolate ice cream duo served in glasses – creamy, refreshing, and utterly satisfying.
Tools You'll Need
-
Medium saucepan
-
Wooden spoon
-
Measuring cups and spoons
-
Parchment paper
-
Cookie scoop or spoon
Must-Know Tips
-
Don’t over‑cook the caramel, it will become bitter.
-
Use a heavy‑bottomed pan to avoid scorching.
-
Cool the tray before placing the batter to prevent sticking.
Professional Secrets
-
Room‑temperature butter blends more evenly.
-
A brief boil creates the glossy caramel needed for a good set.
-
Stirring constantly prevents grainy texture.

Recipe by
Lila GraceLila creates magical desserts 🍫🧁, sprinkles joy 🌈✨, and shares sweet moments 🍬💖. Her kitchen is full of smiles 😄 and sugar-dusted memories 🍪🍯.
Get Delicious Recipes Weekly
Join 25,000+ home cooks getting our best recipes straight to their inbox.
Free forever • No spam • Unsubscribe anytime