
Vintage cooking represents a bridge between generations, preserving flavors and techniques that defined home cooking through decades of change. These recipes emerged during times when ingredients were celebrated for their freshness and simplicity reigned supreme. The 1950s particularly marked a golden era of home cooking where families gathered around tables filled with comforting, made-from-scratch meals that required patience and care. Each dish tells a story of resourcefulness and love, with techniques passed down through handwritten notes and shared kitchen moments. The revival of these classics today speaks to our longing for authenticity and connection to culinary traditions that nourished families for generations.
Why You'll Love These Vintage Recipes
-
They connect you to culinary traditions and family memories
-
Simple ingredients with amazing depth of flavor
-
Time-tested techniques that really work
-
Comfort food that feels like a warm hug
"My grandmother's recipes are the ones my family requests most - they have that special something you just can't find in modern cooking."
Essential Ingredient Guide
- Butter: Real butter was the foundation of vintage cooking - it adds richness and that authentic flavor you can't get with substitutes
- Fresh herbs: Grandma grew hers in the garden - they add brightness and life to simple dishes
- Seasonal vegetables: Vintage recipes work with what's in season - they're meant to be adaptable and resourceful
- Spices: Simple spice blends were common - think paprika, thyme, bay leaves rather than complex mixes
- Citrus: A squeeze of lemon was often the secret to balancing rich flavors
- Sugar: Used sparingly to enhance natural sweetness rather than overwhelm
 Warm Meals
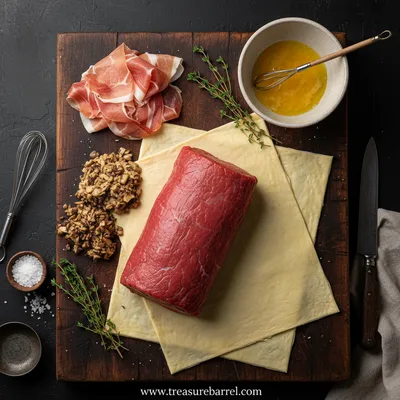
Garlic Steak Tortellini – A Warm Classic
Steak meets garlic‑kissed tortellini in a creamy, herb‑filled sauce for a cozy night in.
Complete Cooking Process
-
Ingredient Readiness:
Vintage recipes often start with room temperature ingredients - butter softened just right, eggs that aren't cold from the fridge. It makes everything blend together so smoothly.
-
Flavor Development:
This happens slowly, with patience. Onions cooked until they're translucent, spices bloomed in warm oil, sauces reduced until they coat the back of a spoon.
-
Texture Control:
The careful balance between tender and firm - vegetables cooked but still with some bite, meats that are fall-apart tender but not mushy.
-
Finishing Touches:
A sprinkle of fresh herbs, a pat of butter melted over hot vegetables, a quick broil to crisp the top - those last moments make all the difference.
-
Serving Timing:
Vintage dishes are best served family-style, straight from the pot or baking dish while everything is still warm and fragrant.
-
Read through the whole recipe first - vintage recipes often have little tricks hidden in the steps
-
Don't rush the sautéing - that's where the foundation flavors develop
-
Taste as you go - your palate is your best guide
-
Let resting time do its work - many dishes improve as they sit
Pro Tips
I remember my grandmother moving around her kitchen with such calm purpose. There was no rushing, no stress - just the steady rhythm of cooking. She'd taste a sauce, add a pinch of salt, stir something simmering on the back burner. It was like watching a dance she'd performed a thousand times.
And you know, the best part about these recipes is how they adapt. If you don't have exactly what's called for, you make do. That's the vintage way - resourceful, practical, never fussy. The ingredients might change with the seasons, but the heart of the dish remains the same.
 Cozy Classics
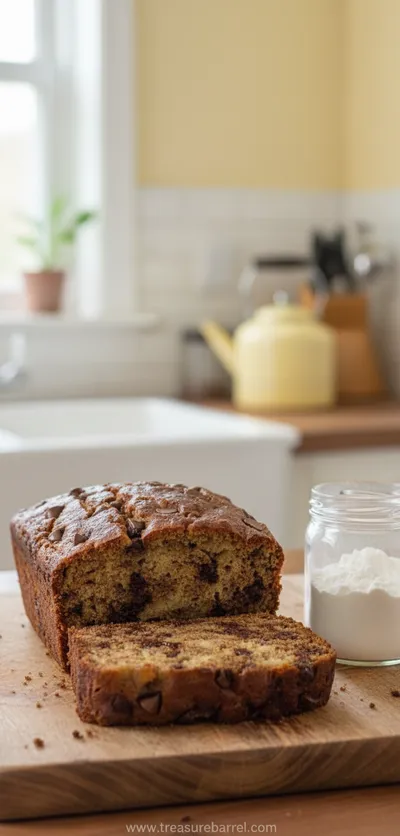
Easy Chocolate Chip Banana Bread
Moist chocolate chip banana bread, quick to bake, perfect for cozy breakfasts.
The essence of vintage cooking
It's about simplicity and heart. These recipes weren't created to impress - they were made to nourish, to comfort, to bring people together around the table. There's a honesty to them that modern cooking sometimes loses.
A fun fact about vintage recipes
Many classic recipes from the 1950s were developed during a time when convenience foods were becoming popular, but home cooks still preferred from-scratch cooking for special meals.
What you'll notice most
The deep, developed flavors that only come from patient cooking and quality ingredients. These dishes have layers of taste that quick recipes can't replicate.
You Must Know
-
Vintage recipes often use more fat than modern ones - that's part of what makes them so flavorful
-
Cooking times may need adjustment for modern ovens and stoves
-
Many vintage dishes improve when made ahead and reheated
-
Don't skip the resting time - it's crucial for flavor development
Frequently Asked Questions
→ Can I use modern kitchen tools with vintage recipes?
Absolutely! While vintage recipes were developed for the tools of their time, modern equipment often makes them easier. A food processor can chop vegetables quickly, but the cooking methods remain the same. The key is understanding the technique rather than sticking strictly to the tools mentioned.
→ How do I adjust vintage recipes for today's ingredients?
Today's ingredients are often different - flour may be more refined, tomatoes might be less acidic. The best approach is to trust your senses. If a sauce seems too thin, let it reduce longer. If a dough feels dry, add a bit more liquid. Vintage recipes were meant to be adapted.
→ Why do vintage recipes sometimes seem bland?
They're not bland - they're subtle. Vintage cooking relies on the natural flavors of quality ingredients rather than heavy seasoning. Give your taste buds time to adjust, and you'll discover layers of flavor you might miss at first.
→ Can I make vintage recipes healthier?
You can certainly lighten them up - use less butter or oil, increase vegetables, reduce sugar. But remember that the charm of these recipes often lies in their authenticity. Maybe try them as written first, then adjust to your preferences.
→ How do I know if a vintage recipe will work with modern cooking times?
Trust the visual and sensory cues rather than the clock. When a recipe says 'cook until golden brown' or 'simmer until tender,' those are your guides. Oven temperatures have changed, but doneness indicators remain reliable.
→ What's the best way to store and organize vintage recipes?
I still love my recipe box, but digital photos work too. The important thing is noting any adjustments you make - your future self will thank you. Include little notes about who loved it, what you served it with, any special occasions.
Nutrition Facts
per serving
420
Calories
32g
Protein
32g
Carbs
18g
Fat
Taste Profile
Rich, savory depth with herbaceous notes and subtle sweetness from vegetables
Ingredient Substitutions
Don't have an ingredient? Try these alternatives
Adjust cooking time based on the cut - tougher cuts need longer cooking
Butter adds richness but other fats work well too
Recipe Variations
Try these delicious twists on the original
Chicken Version
Use bone-in chicken thighs instead of beef and chicken broth instead of beef broth for a lighter alternative
Vegetable Stew
Omit the meat and add more root vegetables like parsnips, turnips, and additional potatoes
Common Mistakes to Avoid
Learn from others' mistakes for perfect results
- Overcrowding the pot when browning meat - results in steaming rather than browning
- Adding salt too early to raw meat - can draw out moisture
- Cooking at too high a temperature - tough meat results
- Skipping the resting time - flavors need time to meld
Meal Prep & Storage
Make Ahead Tips
You can brown the meat and prepare vegetables up to a day ahead. Store separately in the refrigerator. The stew can be made completely ahead and reheated - it actually improves in flavor.
Leftover Ideas
Reheat gently in a covered pot on the stove over low heat. Add a splash of broth if it seems too thick. The crust is best fresh, but you can make a quick biscuit topping for leftovers.
Perfect Pairings
Serve this with...
Cooking Timeline
Prep all ingredients - cut meat, chop vegetables, measure seasonings
Brown meat in batches, sauté onions and garlic
Combine everything in pot, bring to simmer
Bake covered in oven until meat is tender
Prepare and add herb crust, bake uncovered
Rest before serving
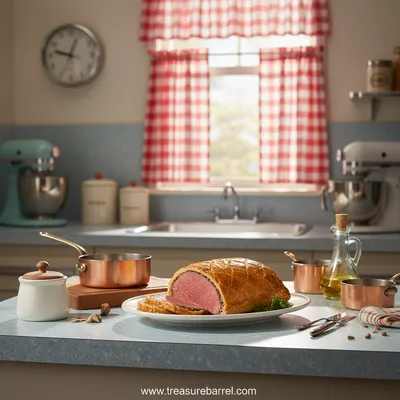
27 Timeless Vintage Recipes Too Good to Leave Behind
Rediscover the comforting flavors of generations past with this collection of 27 vintage recipes that have stood the test of time. From classic Sunday roasts to forgotten dessert gems, these dishes bring back the warmth and simplicity of grandmothers' kitchens.
Timing
Prep Time
30 Minutes
Cook Time
45 Minutes
Total Time
1 Hour 15 Minutes
Recipe Details
Ingredients
For the Main Dish
-
01
2 lbs beef chuck roast, cut into chunks
-
02
3 tbsp butter
-
03
2 onions, sliced thin
-
04
4 carrots, peeled and cut into coins
-
05
3 potatoes, peeled and cubed
-
06
2 cloves garlic, minced
-
07
1 bay leaf
-
08
1 tsp thyme leaves
-
09
4 cups beef broth
-
10
Salt and pepper to taste
For the Herb Crust
-
01
1 cup flour
-
02
1 tsp paprika
-
03
1/2 tsp salt
-
04
1/4 cup cold butter, cubed
-
05
2 tbsp fresh parsley, chopped
Instructions
Preheat your oven to 325°F. Pat the beef dry with paper towels and season generously with salt and pepper. In a large Dutch oven, melt the butter over medium-high heat. Brown the beef in batches, getting a good crust on all sides. Don't rush this - it builds flavor.
Remove the beef and set aside. In the same pot, add the onions and cook until they start to soften and turn golden, about 5 minutes. Add the garlic and cook for another minute until fragrant.
Return the beef to the pot along with any accumulated juices. Add the carrots, potatoes, bay leaf, and thyme. Pour in the beef broth - it should come about halfway up the ingredients. Bring to a gentle simmer.
Cover and transfer to the oven. Bake for 2 hours, or until the beef is fork-tender. Check occasionally to make sure there's still liquid - add a bit more broth if needed.
While the stew cooks, make the herb crust. In a bowl, combine flour, paprika, and salt. Cut in the cold butter until the mixture resembles coarse crumbs. Stir in the parsley.
Remove the stew from oven and increase temperature to 400°F. Drop spoonfuls of the crust mixture over the top of the stew. Return to oven, uncovered, and bake for 20-25 minutes until the crust is golden and cooked through.
Let rest for 10 minutes before serving. The resting time allows the flavors to settle and the stew to thicken slightly. Serve hot in bowls with the herb crust broken over the top.
Notes & Tips
-
1
This stew tastes even better the next day - the flavors continue to develop as it sits
-
2
You can use lamb instead of beef for a different flavor profile
-
3
Don't skip browning the meat - it creates the foundation of flavor for the whole dish
-
4
The herb crust can be customized with your favorite herbs - rosemary works beautifully
 Warm Meals
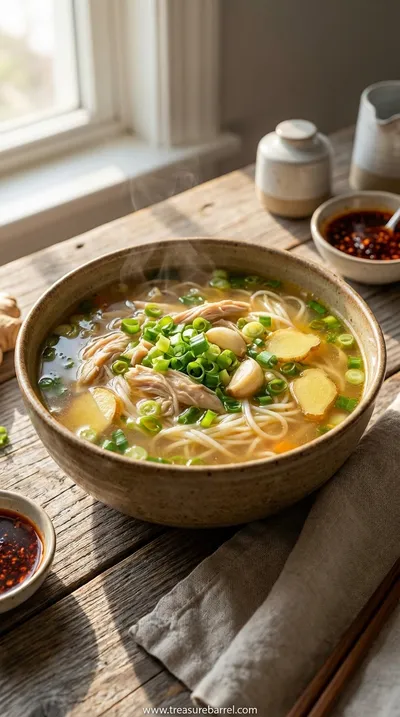
Ginger Garlic Chicken Noodle Soup Recipe
A deeply comforting and aromatic chicken noodle soup, infused with the warmth of fresh ginger and garlic.
Tools You'll Need
-
Large Dutch oven or oven-safe pot with lid
-
Cutting board
-
Sharp knife
-
Measuring cups and spoons
-
Mixing bowls
-
Wooden spoon
Must-Know Tips
-
Pat meat dry before browning for better crust formation
-
Cook vegetables until just tender - they continue cooking in the oven
-
Let the stew rest before serving for optimal flavor and texture
-
Taste and adjust seasoning at the end - flavors concentrate as it cooks
Professional Secrets
-
Brown the meat in batches to avoid steaming
-
Use a mix of root vegetables for complex sweetness
-
Deglaze the pan with a bit of broth after browning
-
The crust adds texture contrast to the tender stew

Recipe by
Evelyn MaeEvelyn celebrates old-school flavors 🕰️🍽️, classic recipes 🥘✨, and timeless nostalgia 💛🕯️. She brings past traditions to modern kitchens 🏡🍳.
Get Delicious Recipes Weekly
Join 25,000+ home cooks getting our best recipes straight to their inbox.
Free forever • No spam • Unsubscribe anytime