
I remember my grandmother’s hands, dusted with flour, as she mashed bananas in her favorite yellow bowl. She never used a mixer, just a fork and a whole lot of love. She’d let me help, my small hands struggling to stir the thick, lumpy batter. She’d always say, 'The secret, my dear, is patience and very, very ripe bananas. The spottier, the better.' That kitchen, with its floral curtains and the lingering scent of cinnamon, is where I fell in love with baking. This recipe is a direct descendant of hers, tweaked just a bit over the years. Every time I bake it, I’m right back in that sunny kitchen, feeling that sense of calm and connection. It has become one of our ultimate family favorites, a tradition I now share with my own children.
Why You'll Adore This Banana Bread
-
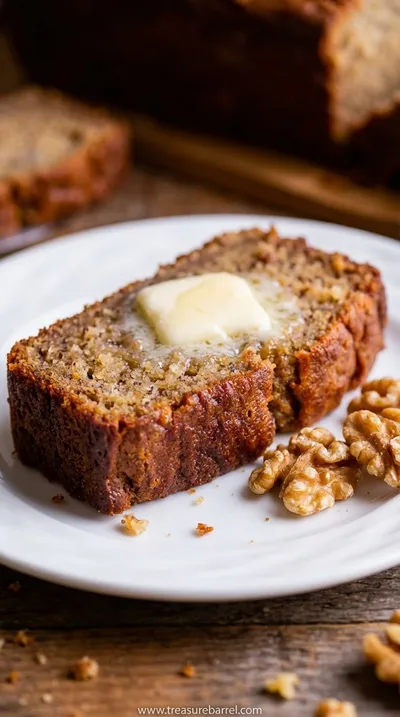
Incredibly Moist Crumb: This isn't a dry, crumbly bread. We use melted butter and just the right amount of banana to create a texture that is so wonderfully tender and moist, it practically melts in your mouth with every single bite.
-
Simple, Wholesome Ingredients: There's nothing complicated here. This recipe relies on pantry staples you likely already have on hand, which I honestly love. It’s a testament to how simple, good-quality ingredients can create something truly spectacular without any fuss.
-
The Perfect Sweetness: It's sweet, but not overpoweringly so. The brown sugar adds a lovely caramel note that complements the natural sweetness of the ripe bananas beautifully. It feels like a treat without being too much, perfect for breakfast or an afternoon snack.
-
A Hug in a Loaf: More than anything, this banana bread is pure comfort. The process of making it is just as soothing as eating it. It’s one of those recipes that feels grounding and nostalgic, a simple pleasure that never gets old.
My kids literally cheer when they smell this baking. It's the only banana bread recipe I'll ever use.
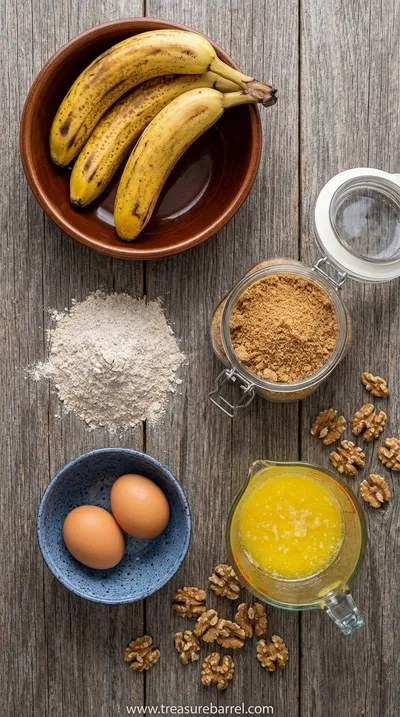
Essential Ingredient Guide
- Overripe Bananas: Look, this is the most important part. You want bananas that are deeply speckled, almost black. This is where all the moisture and intense, sweet banana flavor comes from. Under-ripe, yellow-green bananas just won’t give you the same result. If your bananas aren't ready, you can roast them in their peels to bring out their sugars, but honestly, patience is your best friend here.
- Melted Butter: Many recipes call for softened butter, but I stand by melted. It coats the flour differently, creating a denser, more tender, and incredibly moist crumb that I just love. It also makes the batter so much easier to mix by hand, which is always my preference. Just let it cool slightly so you don't accidentally scramble the eggs. It's a small detail that makes a huge difference in the final texture.
- Brown Sugar: While white sugar works, light brown sugar is what gives this banana bread its soft texture and subtle caramel undertones. The molasses content in the brown sugar reacts with the baking soda to help the bread rise, and it also adds a depth of flavor that is just so warm and comforting. It’s that little something extra that makes it feel homemade and special.
 Warm Meals
Garlic Steak Tortellini – A Warm Classic
Steak meets garlic‑kissed tortellini in a creamy, herb‑filled sauce for a cozy night in.
Complete Cooking Process
-
Preparation: The Gentle Beginning:
This is the quiet part of the process that I love so much. Start by preheating your oven; it's like telling your kitchen something wonderful is about to happen. Then, get your loaf pan ready. I like to grease it and then add a little sling of parchment paper. This little trick is a lifesaver, letting you lift the finished loaf out so easily. Next, gather your ingredients. Mash those super-ripe bananas in a bowl until they're mostly smooth but still have a few little lumps for texture. I find the rhythm of mashing them with a fork so soothing. In another bowl, whisk together your dry ingredients—the flour, baking soda, salt, and a hint of cinnamon. This ensures everything is evenly distributed, so you don't get a surprising pocket of salt.
-
Mixing: Bringing It All Together:
Now for the magic. In the bowl with your mashed bananas, you'll stir in the cooled, melted butter, the brown sugar, the egg, and a splash of pure vanilla extract. Whisk it all together until it’s beautifully combined. The aroma at this stage is just heavenly. Then, gently pour the dry ingredients into the wet. This is where you want to be careful not to overmix. Just fold everything together with a spatula until the flour streaks disappear. A few lumps are perfectly fine; they're the sign of a tender banana bread to come. Overmixing develops the gluten too much and can make the bread tough, which is the last thing we want.
-
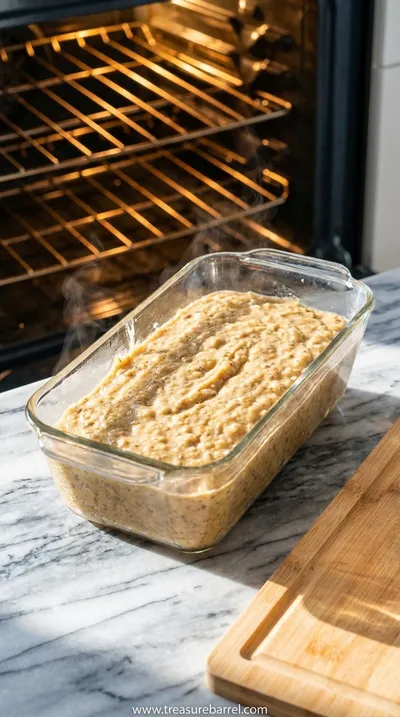
Baking & Cooling: The Patient Wait:
Pour that beautiful, thick batter into your prepared loaf pan and smooth the top. Now it’s time for the oven. Let it bake for about an hour. Your home will slowly fill with the most incredible, comforting scent. Around the 50-minute mark, I like to check on it. A wooden skewer or toothpick inserted into the center should come out with a few moist crumbs attached, but no wet batter. Once it’s done, the hardest part begins: waiting. Let it cool in the pan for about 10-15 minutes before using your parchment sling to lift it onto a wire rack to cool completely. This step is so important for the texture.
-
Don't overmix the batter! A few lumps are your friends. This is the key to a tender crumb.
-
Tent the loaf with foil during the last 15 minutes of baking if the top is browning too quickly.
-
Let the bread cool completely before slicing. I know it's tempting, but this allows the structure to set properly.
Pro Tips for a Perfect Loaf
These little details really elevate the final result from good to absolutely unforgettable. It’s all about a gentle hand and a bit of patience.
 Cozy Classics
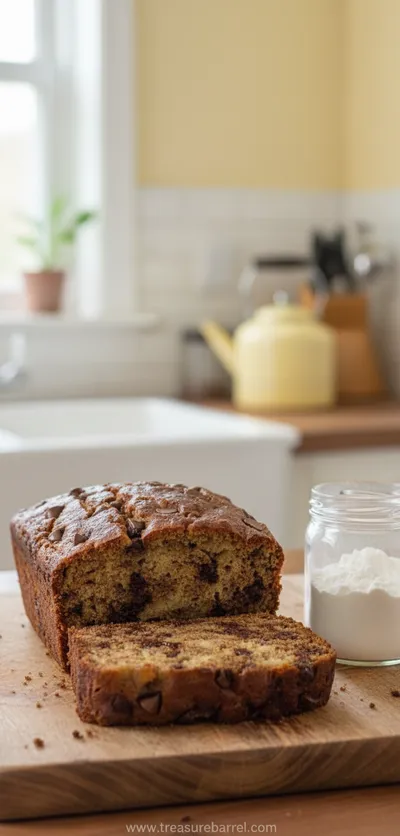
Easy Chocolate Chip Banana Bread
Moist chocolate chip banana bread, quick to bake, perfect for cozy breakfasts.
Frequently Asked Questions
→ Can I use frozen bananas for this recipe?
Absolutely! Using frozen bananas is a fantastic idea. Just make sure to thaw them completely before you use them. I usually just leave them on the counter for a couple of hours. They will release a lot of liquid as they thaw—don't throw that liquid away! It's full of concentrated banana flavor. Just add the bananas and all their juices right into the batter. It will make your bread even more moist and flavorful, I promise.
→ Why did my banana bread turn out dense and gummy?
Oh, that's such a common issue, so don't feel bad. The most likely culprit is overmixing the batter after you've added the flour. When you overwork the flour, you develop too much gluten, which leads to a tough, dense texture instead of a soft, tender one. Mix the wet and dry ingredients only until they are just combined. A few little lumps are perfectly okay and are actually a sign of a well-made quick bread. It’s a gentle touch that makes all the difference.
→ Can I add mix-ins like chocolate chips or nuts?
Yes, of course! This recipe is a wonderful canvas for your creativity. I often toss in about a cup of semi-sweet chocolate chips or toasted walnuts. If you’re adding nuts or chips, I recommend tossing them in a tablespoon of flour before folding them into the batter. This little trick helps prevent them from sinking to the bottom of the loaf while it bakes. It ensures you get a little bit of goodness in every single slice.
→ How do I know for sure when the banana bread is done baking?
The toothpick test is truly the most reliable method. Ovens can vary, so the baking time is always a guideline. About 50-60 minutes in, insert a wooden skewer or a toothpick into the very center of the loaf. If it comes out with wet, gooey batter, it needs more time. If it comes out with a few moist crumbs clinging to it, it’s perfect. If it comes out completely clean, it might be slightly overbaked, but still delicious! That moist crumb test is the sweet spot.
→ My bananas aren't ripe enough. Is there a way to speed up the process?
There is a little trick for this! If you're craving banana bread but your bananas are still yellow, you can ripen them quickly in the oven. Just place the unpeeled bananas on a baking sheet lined with foil and bake them at 300°F (150°C) for about 15-20 minutes, or until the peels are completely blackened and shiny. Let them cool down completely before you peel and mash them. Their insides will be soft, sweet, and perfect for baking.
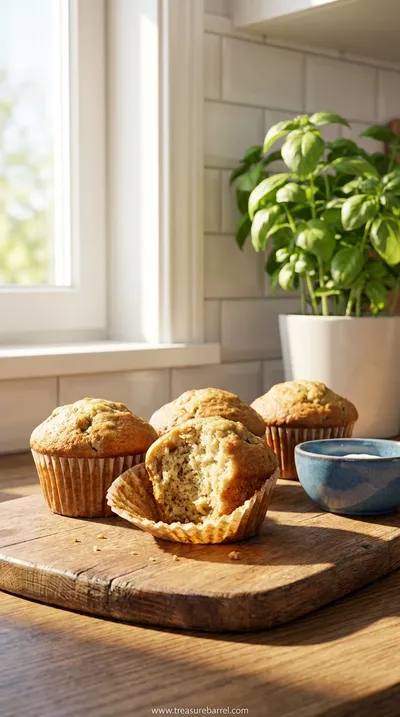
→ Can I make this recipe into muffins?
Definitely! This batter makes wonderful muffins. Just line a muffin tin with paper liners or grease it well. Fill each cup about two-thirds full with batter. The baking time will be much shorter, of course. Start checking them at around 18-20 minutes using the same toothpick test. They are perfect for grab-and-go breakfasts or packing in lunches. It's the same wonderful flavor in a smaller package.
→ What's the best way to store banana bread?
To keep it moist, I recommend storing it at room temperature. Once it's completely cooled, wrap the loaf tightly in plastic wrap or place it in an airtight container. It will stay fresh and delicious for about three to four days. Honestly, I think the flavor gets even better on the second day as the spices and banana meld together. If you're looking for a great savory meal to enjoy before this treat, try this chicken and dumplings recipe.
Nutrition Facts
per serving
220
Calories
3g
Protein
32g
Carbs
9g
Fat
Taste Profile
Sweet, comforting, and rich with deep banana and caramel notes from the brown sugar.
Ingredient Substitutions
Don't have an ingredient? Try these alternatives
This adds a lovely nutty flavor and a bit more fiber. The bread will be slightly denser, but still delicious. I wouldn't recommend using 100% whole wheat as it can be too heavy.
You can substitute the butter 1:1 with melted coconut oil or another neutral oil. This is a great option for making the recipe dairy-free. Coconut oil will add a very subtle coconut flavor.
Coconut sugar can be swapped 1:1 for a similar caramel flavor. If using maple syrup, use about 1/2 cup and reduce the butter by a tablespoon to account for the extra liquid.
Recipe Variations
Try these delicious twists on the original
Chocolate Chip Banana Bread
For the chocolate lovers, gently fold in 1 cup of semi-sweet or dark chocolate chips into the batter at the very end. The melted pockets of chocolate are just divine.
Nutty Banana Bread
Add a wonderful crunch and nutty flavor by folding in 3/4 cup of toasted, chopped walnuts or pecans. Toasting the nuts first really brings out their flavor.
Cinnamon Swirl Banana Bread
Pour half the batter into the pan. Sprinkle with a mixture of 2 tablespoons of brown sugar and 1 teaspoon of cinnamon. Gently top with the remaining batter and bake as directed for a beautiful swirl.
Common Mistakes to Avoid
Learn from others' mistakes for perfect results
- Using under-ripe bananas. This is the number one mistake and results in a less flavorful, drier bread.
- Overmixing the batter. This develops the gluten and leads to a tough, rubbery texture. Mix only until the flour disappears.
- Slicing while warm. I know it's hard to resist, but letting the bread cool completely allows the crumb to set, making for cleaner slices.
- Incorrectly measuring flour. Be sure to spoon your flour into the measuring cup and level it off, rather than scooping directly from the bag, which can compact the flour and lead to a dry loaf.
Meal Prep & Storage
Make Ahead Tips
The batter can be prepared, covered, and refrigerated for up to 4 hours before baking, though for the best rise, I recommend baking it right away. The bread itself is a wonderful make-ahead treat, as the flavor deepens and improves on the second day, making it perfect for preparing the day before you plan to serve it.
Leftover Ideas
Leftover banana bread is a true gift. Store slices in an airtight container at room temperature. They are wonderful gently toasted in a toaster oven and slathered with butter. For a more decadent treat, you can use day-old slices to make a spectacular banana bread French toast. Just dip and fry as you would with regular bread.
Perfect Pairings
Serve this with...
Cooking Timeline
Preheat oven to 350°F and prepare your loaf pan with grease and a parchment sling.
Mash bananas. In a large bowl, whisk together mashed bananas, melted butter, brown sugar, egg, and vanilla.
In a separate bowl, whisk together flour, baking soda, salt, and cinnamon. Add the dry ingredients to the wet and gently fold to combine.
Pour batter into the prepared loaf pan and smooth the top.
Bake for 55-65 minutes, or until a skewer comes out with moist crumbs. Cool in the pan for 10 minutes, then transfer to a wire rack to cool completely.
 Sweet Treats
Salted Caramel Ice Cream Recipe
Silky salted caramel ice cream using the Ninja Creami – sweet, buttery, and perfectly salty.
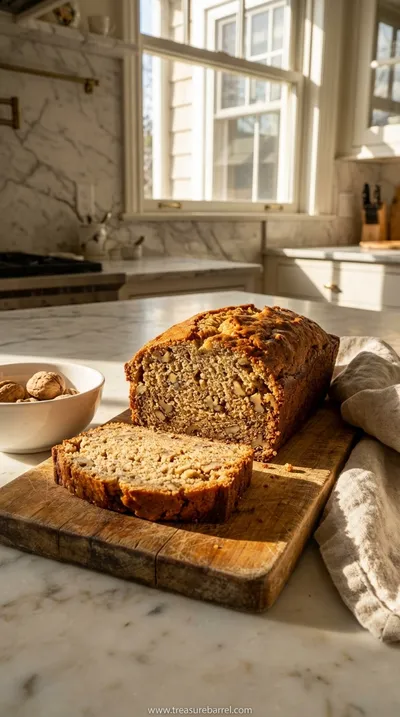
Best Banana Bread Recipe: Moist & Delicious
Make the perfect moist banana bread with this easy, classic homemade recipe everyone will love.
Timing
Prep Time
15 Minutes
Cook Time
60 Minutes
Total Time
1 Hour 15 Minutes
Recipe Details
Ingredients
Dry Ingredients
-
01
1 1/2 cups all-purpose flour
-
02
1 teaspoon baking soda
-
03
1/2 teaspoon salt
-
04
1/2 teaspoon ground cinnamon
Wet Ingredients
-
01
3 very ripe medium bananas, mashed
-
02
1/2 cup unsalted butter, melted and slightly cooled
-
03
3/4 cup packed light brown sugar
-
04
1 large egg, at room temperature
-
05
1 teaspoon pure vanilla extract
Instructions
First, let's create a warm and welcoming space for our bread. Preheat your oven to 350°F (175°C). Take a standard 9x5 inch loaf pan and lightly grease it with butter or non-stick spray. For easy removal later, I love to create a parchment paper 'sling' by lining the pan with a strip of parchment that hangs over the two long sides. This little step feels like such a gift to your future self when the loaf just lifts right out. Set your prepared pan aside for now.
Now for the heart of the recipe. In a large mixing bowl, combine the mashed ripe bananas, the slightly cooled melted butter, the packed brown sugar, your room temperature egg, and that lovely vanilla extract. Use a whisk to stir everything together until it's well combined and looks like a beautiful, fragrant puree. There’s no need to use a mixer here; the gentle motion of whisking by hand is perfect and helps prevent over-working the batter later on.
In a separate, medium-sized bowl, let's get the dry ingredients acquainted. Whisk together the all-purpose flour, baking soda, salt, and that gentle hint of cinnamon. Giving them a good whisk now ensures that the baking soda is evenly distributed, which helps the bread rise beautifully. Now, gently pour this dry mixture into your bowl of wet ingredients. Using a rubber spatula, fold the ingredients together just until you no longer see streaks of flour. Remember, a few lumps are okay—they are the secret to a tender bread.
Carefully pour the thick, fragrant batter into your prepared loaf pan, using your spatula to spread it evenly. Pop it into the preheated oven on the center rack. Let it bake for 55 to 65 minutes. The top will turn a gorgeous golden-brown, and your home will smell incredible. To check for doneness, insert a wooden skewer into the center; it should come out with moist crumbs, but no wet batter. Let the loaf cool in the pan for 10 minutes before lifting it out and placing it on a wire rack to cool completely before slicing. This part requires patience, but it's so worth it.
Notes & Tips
-
1
Feel free to add up to 1 cup of extras like chocolate chips, chopped walnuts, or pecans. Toss them in a tablespoon of flour first to prevent sinking.
-
2
For a crunchy, sparkling top, sprinkle a tablespoon of coarse turbinado sugar over the batter before baking. It adds a lovely texture.
-
3
This bread freezes beautifully. Once completely cool, wrap the whole loaf or individual slices tightly in plastic wrap, then foil, and freeze for up to 3 months.
Tools You'll Need
-
9x5 Inch Loaf Pan: This is the classic vessel for our banana bread. A light-colored metal pan is my favorite as it conducts heat evenly and prevents the crust from getting too dark before the inside is cooked.
-
Large Mixing Bowl: You'll want a bowl that gives you plenty of room to gently fold the ingredients without making a mess. I have a simple ceramic one that I adore; it just feels right for this kind of baking.
-
Rubber Spatula: A flexible rubber or silicone spatula is essential for gently folding the batter and for scraping every last delicious bit out of the bowl. No batter left behind is my motto!
-
Wire Cooling Rack: This is a non-negotiable for me. Allowing the bread to cool on a wire rack lets air circulate all around it, which prevents the bottom from becoming soggy and ensures a perfect texture throughout.

Recipe by
Sofia BelleSofia bakes with love 🧁💛, sweet smells filling her home 🍪🏡, and flour on her hands 🤲✨. She believes every loaf 🍞 and cake 🎂 tells a story of wa ...
Get Delicious Recipes Weekly
Join 25,000+ home cooks getting our best recipes straight to their inbox.
Free forever • No spam • Unsubscribe anytime