
The marriage of chocolate and peanut butter dates back to early 20th‑century American confectionery, where both flavors were prized for their comforting richness. Over the decades, home cooks have blended them into desserts that feel familiar yet exciting. This recipe honors that tradition with a straightforward, no‑churn method that anyone can master.
Why You'll Love It
-
- No‑churn, no‑ice‑cream‑maker needed
-
- Rich chocolate depth balanced by peanut butter silk
-
- Ready in under an hour, perfect for spontaneous cravings
-
- Simple pantry staples, no fancy equipment
"I never knew ice cream could be so easy and luxurious—my family asks for seconds every time!"
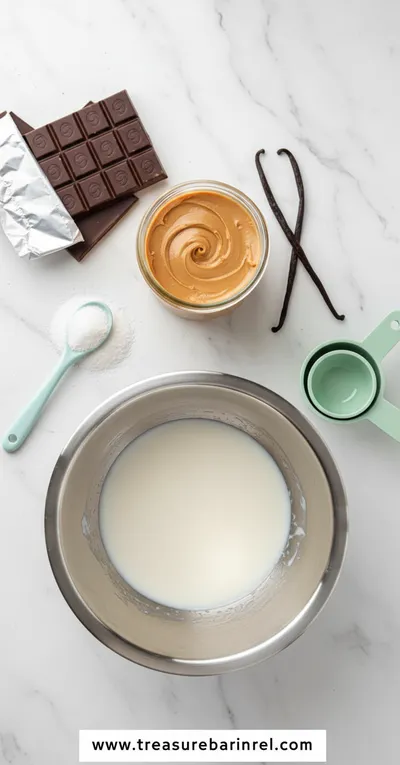
Essential Ingredient Guide
- Cocoa Powder: Choose a Dutch‑process cocoa for a smoother, less acidic flavor; sift to avoid lumps.
- Peanut Butter: Natural creamy peanut butter provides pure nutty richness without added sugars.
- Heavy Cream: The cream adds the luxurious mouthfeel that makes ice cream feel indulgent.
- Sweetener: Maple syrup or honey lends a gentle, floral sweetness that complements the chocolate.
- Vanilla Extract: A splash brightens the overall flavor and ties the chocolate and nut notes together.
- Salt: A pinch enhances depth and balances the sweetness.
Complete Cooking Process
-
Ingredient Readiness:
Gather all components, whisk cocoa with a little warm milk to form a smooth slurry before adding to the cold base.
-
Flavor Development:
Blend peanut butter and sweetener into the chilled cream, letting the aromas mingle slowly.
-
Texture Control:
Whisk the mixture until light and airy, then fold in the cocoa slurry to keep the texture silky.
-
Finishing Touches:
Add a pinch of salt and a drizzle of melted chocolate just before freezing for extra depth.
-
Serving Timing:
Allow the ice cream to sit at room temperature for 5‑10 minutes before scooping to achieve a creamy glide.
-
Use chilled mixing bowls for quicker thickening.
-
Freeze the container upright to avoid ice crystals.
-
Stir the mixture once after 20 minutes for extra smoothness.
-
Top with crunchy peanut pieces for texture contrast.
Pro Tips
I find that a brief pause while the ice cream sets is a perfect moment to reflect on the simple pleasure of a homemade dessert. The quiet anticipation, a soft sigh of the freezer door opening, and the gentle clink of the spoon all become part of the experience.
 Warm Meals
Garlic Steak Tortellini – A Warm Classic
Steak meets garlic‑kissed tortellini in a creamy, herb‑filled sauce for a cozy night in.
The essence of the dish:
A harmonious blend of deep cocoa richness and mellow peanut butter silk, each bite delivering a cool, creamy sigh.
A fun fact or historical angle:
Peanut butter first appeared in US cookbooks in the 1890s, while chocolate ice cream gained popularity at the 1904 St. Louis World's Fair.
Flavor or sensory focus:
The nose first catches a faint roasted nut perfume, followed by the smooth bitterness of chocolate that settles into a buttery finish.
You Must Know
-
Keep everything cold for best texture
-
Avoid over‑mixing once frozen
-
Taste before freezing to adjust sweetness
Frequently Asked Questions
→ Can I use almond milk instead of dairy?
Yes, substitute an equal amount of almond milk, but add a touch more cream or coconut milk for richness.
→ How long can I store the ice cream?
It keeps well sealed for up to 2 weeks in the freezer; let it soften slightly before serving.
→ Is this recipe suitable for vegans?
Swap heavy cream with coconut cream and choose a plant‑based peanut butter; the texture remains silky.
→ Do I need an ice‑cream maker?
No, the recipe is designed for a no‑churn method using a freezer‑safe container.
→ Can I add mix‑ins like chocolate chips?
Feel free to fold in a handful of dark chocolate chips or toasted peanuts after the final whisk.
→ Will the ice cream be grainy?
Stirring gently midway through freezing helps keep the texture smooth and prevents ice crystals.
Nutrition Facts
per serving
380
Calories
6g
Protein
30g
Carbs
28g
Fat
Taste Profile
Rich, chocolate‑nutty harmony
Ingredient Substitutions
Don't have an ingredient? Try these alternatives
Provides similar richness; may add a faint coconut aroma.
Delivers a slightly milder nut flavor; keep the same amount.
Recipe Variations
Try these delicious twists on the original
Spicy Version
Add a pinch of cayenne pepper and a drizzle of sriracha for a subtle kick.
Mediterranean Style
Swirl in chopped pistachios and a hint of orange zest for a bright twist.
Common Mistakes to Avoid
Learn from others' mistakes for perfect results
- Over‑mixing after the final freeze can make it grainy.
- Using warm ingredients slows thickening.
- Not covering the container tightly leads to freezer burn.
Meal Prep & Storage
Make Ahead Tips
You can mix the base up to 24 hours ahead and keep it chilled; freeze when ready to serve.
Leftover Ideas
Transfer to a shallow container and stir gently before serving; add a splash of milk if needed.
Perfect Pairings
Serve this with...
Cooking Timeline
Gather and measure all ingredients; sift cocoa.
Whisk cocoa with milk and sweetener until smooth.
Add cream, vanilla, salt; whisk gently.
Stir in peanut butter; ensure even swirl.
Freeze, stirring every 20 minutes for a silky texture.
 Cozy Classics
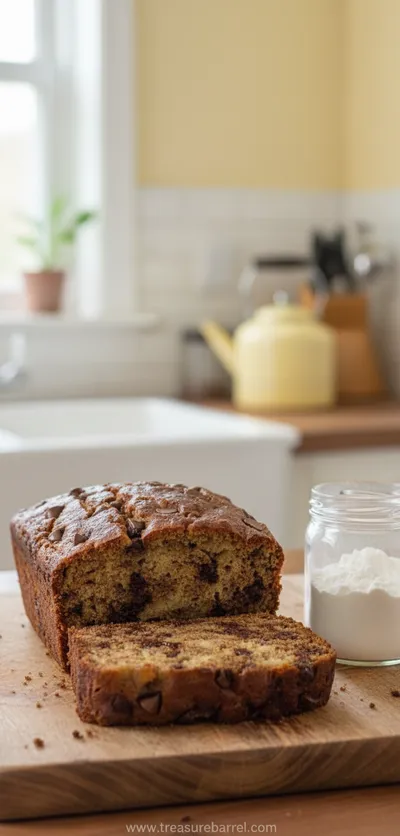
Easy Chocolate Chip Banana Bread
Moist chocolate chip banana bread, quick to bake, perfect for cozy breakfasts.
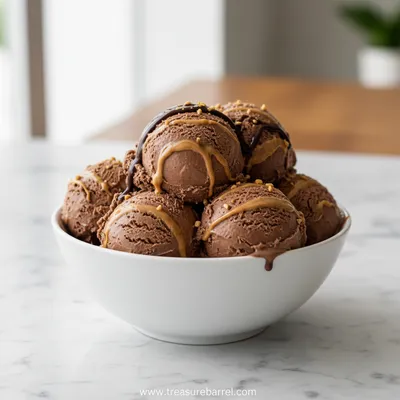
Chocolate Peanut Butter Ice Cream
Indulge in a velvety swirl of chocolate and peanut butter that feels like a quiet hug on a warm afternoon. This peanut butter ice cream base is softened by cocoa, creating a gentle, home‑baked treat that whispers of comfort.
Timing
Prep Time
15 Minutes
Cook Time
0 Minutes
Total Time
1 Hour 15 Minutes
Recipe Details
Ingredients
Base
-
01
2 cups heavy cream
-
02
1 cup whole milk
-
03
1/2 cup maple syrup
-
04
1/4 cup natural creamy peanut butter
-
05
1/4 cup Dutch‑process cocoa powder
-
06
1 tsp vanilla extract
-
07
Pinch of sea salt
Optional Toppings
-
01
Crushed peanuts
-
02
Chocolate shavings
-
03
Drizzle of melted chocolate
Instructions
In a large bowl, whisk together milk, maple syrup, and cocoa powder until smooth, letting the chocolate melt completely.
Add heavy cream, vanilla, and a pinch of salt; whisk gently until the mixture thickens slightly.
Stir in the peanut butter until fully incorporated, watching the swirl of nutty amber blend with dark chocolate.
Cover the bowl and place it in the freezer. After 20 minutes, stir briskly with a spatula to break any forming crystals.
Return to freezer and repeat the stir every 20‑30 minutes for the next hour, until the texture is creamy and firm.
When ready, scoop into bowls, garnish with crushed peanuts or chocolate shavings, and enjoy.
Notes & Tips
-
1
Make sure all dairy is well‑chilled before mixing; it speeds up thickening.
-
2
If you prefer a sweeter finish, add an extra tablespoon of maple syrup after the final stir.
-
3
For a lighter version, replace half the cream with Greek yogurt.
 Sweet Treats
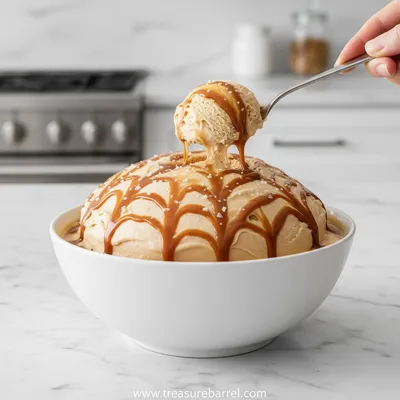
Salted Caramel Ice Cream Recipe
Silky salted caramel ice cream using the Ninja Creami – sweet, buttery, and perfectly salty.
Tools You'll Need
-
Large mixing bowl
-
Whisk
-
Spatula
-
Freezer‑safe container
-
Measuring cups and spoons
Must-Know Tips
-
Don't forget to stir periodically; it prevents icy texture.
-
Cover tightly to avoid freezer burn.
-
Taste before the final freeze; adjust sweetness if needed.
Professional Secrets
-
Chill the mixing bowl for a smoother blend.
-
Fold gently to keep air in the mixture.
-
Use a metal spatula to scrape the sides for even freezing.

Recipe by
Sofia BelleSofia bakes with love 🧁💛, sweet smells filling her home 🍪🏡, and flour on her hands 🤲✨. She believes every loaf 🍞 and cake 🎂 tells a story of wa ...
Get Delicious Recipes Weekly
Join 25,000+ home cooks getting our best recipes straight to their inbox.
Free forever • No spam • Unsubscribe anytime