
I remember my grandmother’s kitchen, always dimly lit and smelling of cinnamon and yeast. Her banana bread was legendary, a dense, moist loaf she’d make with bananas that were almost black. When a dear friend of mine had to switch to a gluten-free diet, I felt this pang of sadness that she might miss out on simple comforts like that. So, I went on a mission. There were some… well, let's call them 'learning experiences.' A few crumbly, dry loaves. But then, this recipe happened. The first time I pulled this golden-brown loaf from the oven and it was just as fragrant and tender as I remembered, wow, it was a moment. It's more than just a recipe; it’s proof that with a little care, no one has to miss out on the good stuff, like a really moist banana bread.
Why You'll Adore This Banana Bread
-
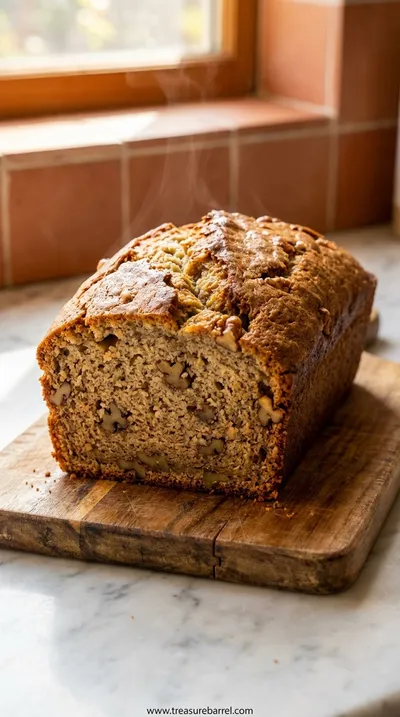
Incredibly Moist & Tender: Seriously, the biggest challenge with gluten-free baking can be dryness, but this loaf is the complete opposite. It has this wonderfully soft, tender crumb that melts in your mouth. The secret is the combination of super ripe bananas and coconut oil, which work together to create a texture that’s just, ugh, so perfect and lush.
-
Deep, Authentic Banana Flavor: This isn’t one of those breads with just a hint of banana. We’re using three whole, very ripe bananas, so the flavor is deep, sweet, and caramelized. It tastes like pure comfort. It reminds me of the classic banana bread I grew up with, just without the gluten.
-
So Simple to Make: Life is complicated enough, right? This recipe is beautifully straightforward. Everything comes together in one main bowl, so you’re not left with a mountain of dishes. It’s a gentle, calming process of mashing, mixing, and pouring, which I find so therapeutic on a quiet afternoon.
-
A Treat for Everyone: It feels so good to bake something that everyone at the table can enjoy without worry. Whether you have guests with dietary needs or you’re just looking for a wholesome treat, this bread is so welcoming. It’s a simple act of love, making something delicious that includes everyone.
“Honestly, you’d never know this was gluten-free. It’s the most tender, perfect banana bread I’ve ever had!”
Essential Ingredient Guide
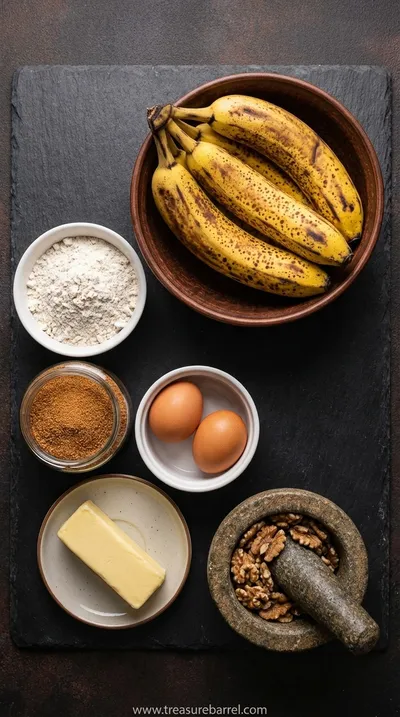
- Overripe Bananas: Look, when I say overripe, I mean it. The skins should be deeply speckled with brown, or even mostly black. These bananas are not just softer and easier to mash; their starches have converted to sugars, which means they bring an incredible natural sweetness and so much moisture to the loaf. This is non-negotiable for that perfect, gooey-in-a-good-way texture.
- Gluten-Free All-Purpose Flour (with Xanthan Gum): This is the cornerstone of the recipe's success. Don't just use a single gluten-free flour like almond or coconut. You need a good quality all-purpose blend specifically designed for baking. Make sure the one you choose contains xanthan gum—it's the magic ingredient that mimics gluten, providing the structure and elasticity the bread needs to hold together and have a beautiful crumb.
- Melted Coconut Oil: While many banana breads use butter, I’ve fallen in love with what melted coconut oil does here. It creates a uniquely moist and tender texture that stays soft for days. It also adds a very subtle, clean richness that lets the banana and vanilla flavors really shine through without being overpowered. Just be sure to let it cool slightly so it doesn't scramble the eggs!
 Warm Meals
Garlic Steak Tortellini – A Warm Classic
Steak meets garlic‑kissed tortellini in a creamy, herb‑filled sauce for a cozy night in.
Complete Cooking Process
-
The Gentle Art of Preparation:
This is the quiet start, the gathering of things. I love this part. Preheating the oven begins to warm the kitchen, sending out that first signal that something good is about to happen. You’ll line your loaf pan with parchment paper, letting the edges hang over like little handles—a simple trick that feels so clever later. Mashing the bananas is wonderfully satisfying; it’s a moment to slow down and just be with the ingredients.
-
Mindful Mixing:
The beauty of this recipe is its gentleness. You’ll whisk together the wet ingredients—the mashed banana, the eggs, the fragrant oil, the sweet sugar—until they form a smooth, pale mixture. Then, the dry ingredients are gently folded in. The goal is to mix just until you no longer see streaks of flour. Overmixing is the enemy of tenderness, so this step is a little dance of restraint. This is what makes it such a great one-bowl banana bread—so simple and graceful.
-
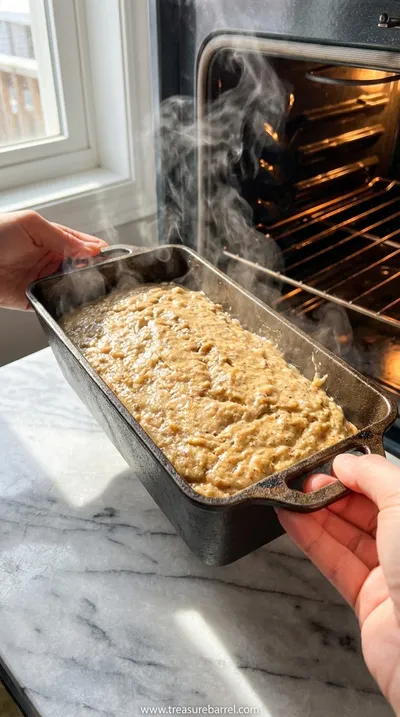
The Magic of Baking:
This is where the magic really happens. As the loaf bakes, your home will fill with the most incredible, sweet, and comforting scent. It’s pure nostalgia. You'll watch it rise and turn a beautiful deep golden brown. The hardest part, honestly, is waiting for it to cool. Letting it rest in the pan for a few minutes before moving it to a wire rack is so important for it to set up properly. Patience here is rewarded with perfect, sliceable bread.
 Cozy Classics
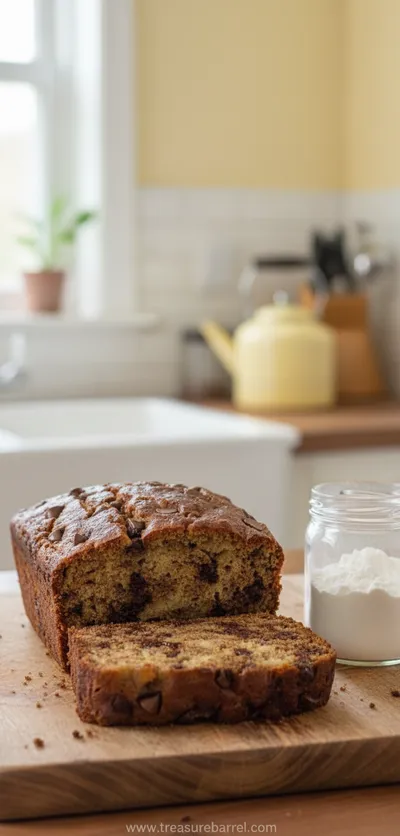
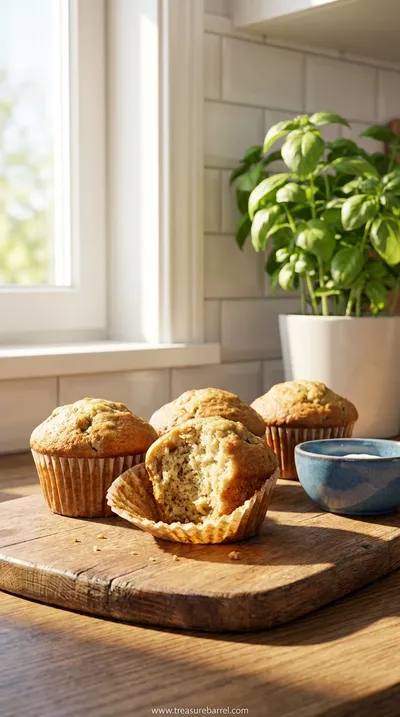
Easy Chocolate Chip Banana Bread
Moist chocolate chip banana bread, quick to bake, perfect for cozy breakfasts.
Your Questions, Answered
→ Can I use regular all-purpose flour instead of gluten-free?
Oh, I wouldn't recommend it for this specific recipe. It was developed and balanced perfectly for the properties of a gluten-free flour blend, which absorbs liquid differently. Using regular flour would likely result in a dense, gummy texture. If you're looking for a traditional recipe, there are many wonderful options out there, but this one is truly special for being gluten-free.
→ Why did my banana bread turn out dense and heavy?
That can be so frustrating, can't it? A few things could be at play. The most common reason is overmixing the batter after adding the dry ingredients. You want to fold it together just until you don't see any more flour streaks. Another possibility is the type of gluten-free flour blend used—some are heavier than others. Lastly, an inaccurate oven temperature can cause issues, so an oven thermometer is always a helpful little tool to have.
→ How do I know if my bananas are ripe enough?
This is such a great question because it's so important! You're looking for bananas that have gone well past the point of just being yellow. They should be covered in large, brown or black spots. The peel should be thin, and the banana itself should feel quite soft to the touch. When you peel it, it will be very fragrant and almost syrupy. These bananas provide the best flavor and moisture.
→ Is this recipe dairy-free as well?
Yes, it is! That's one of the things I love about it. By using melted coconut oil instead of butter, this recipe is naturally dairy-free. It’s a wonderful bonus that makes it accessible to even more people. Just be sure, as always, to double-check the labels on all your ingredients, like chocolate chips if you add them, to ensure they don't contain any hidden dairy.
→ Can I reduce the amount of sugar in the recipe?
You certainly can, but it's good to know how it might change things. Sugar does more than just add sweetness; it also contributes to the bread's moisture and tender texture. If you reduce the sugar, the loaf might be a little less moist and have a slightly denser crumb. I'd suggest starting by reducing it by just a quarter cup and seeing how you like the result. The overripe bananas already add a lot of natural sweetness!
→ Why did the top of my loaf crack? Did I do something wrong?
Not at all! A crack down the center of a quick bread like this is actually a wonderful sign. It means the bread had a great 'oven spring'—it rose quickly and beautifully when the heat hit it. That crack is a hallmark of a well-baked loaf, so see it as a sign of success! It gives the bread that lovely, rustic look. So, this truly is a foolproof banana bread.
Nutrition Facts
per serving
220
Calories
3g
Protein
34g
Carbs
9g
Fat
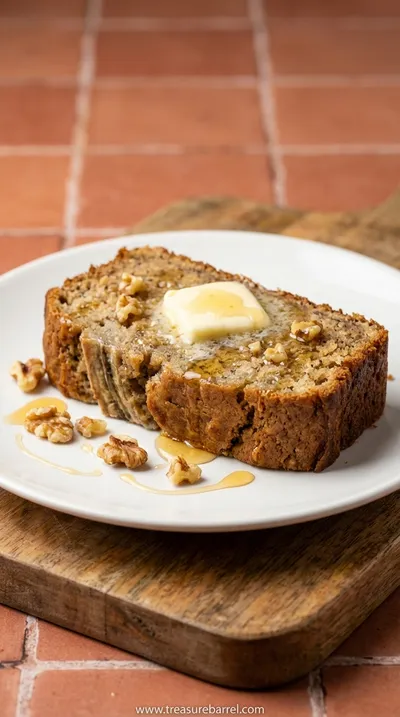
Taste Profile
A beautifully sweet, banana-forward flavor with hints of vanilla and a rich, comforting finish.
Gluten Free Banana Bread: Easy Recipe For Sweet Treats
Make delicious gluten free banana bread with this easy recipe. Perfect moist bread that's a sweet treat for any time of day.
Timing
Prep Time
15 Minutes
Cook Time
55 Minutes
Total Time
1 Hour 10 Minutes
Recipe Details
Ingredients
Banana Bread Ingredients
-
01
1 3/4 cups (245g) gluten-free all-purpose flour blend (with xanthan gum)
-
02
1 teaspoon baking soda
-
03
1/2 teaspoon salt
-
04
3 large, very ripe bananas, mashed
-
05
3/4 cup (150g) granulated sugar
-
06
1 large egg, lightly beaten
-
07
1/3 cup (75g) melted coconut oil, cooled
-
08
1 teaspoon vanilla extract
Optional Add-ins
-
01
1/2 cup chopped walnuts or pecans
-
02
1/2 cup chocolate chips
Instructions
First, let's get the kitchen ready. It’s like setting the stage. Go ahead and preheat your oven to 350°F (175°C). There’s something so hopeful about that quiet hum. Take your 9x5 inch loaf pan and lightly grease it, then line it with parchment paper, allowing some to hang over the sides. These little 'wings' will be your best friend later for lifting the loaf out perfectly. In a separate, smaller bowl, whisk together your gluten-free flour, baking soda, and salt. Just give it a quick stir to make sure everything is nicely acquainted.
Now for the heart of the recipe. In a large mixing bowl, add your beautifully overripe bananas. Using a fork or a potato masher, mash them up until they’re mostly smooth but still have a few little lumps for texture—I love that. Add the granulated sugar, the lightly beaten egg, the vanilla extract, and the cooled melted coconut oil. Whisk everything together until it’s beautifully combined and looks like a pale, fragrant puddle. This is the base of all that lovely moisture.
It’s time to bring it all together. Gently pour the dry ingredients from the small bowl into the large bowl with the wet ingredients. Using a rubber spatula, carefully fold the flour mixture in. Be so gentle here. The key is to mix only until the flour streaks disappear. A few lumps are totally okay! Overmixing develops a tough texture, and we are aiming for soft and tender. This is why this is such an easy banana bread, it requires a light touch, not a lot of work.
Pour the thick, lovely batter into your prepared loaf pan and use your spatula to smooth the top. It already looks promising, doesn't it? If you're using any add-ins, this is the moment to gently stir them in before pouring. Place it in the center of your preheated oven and bake for 50-60 minutes. Around the 50-minute mark, check it by inserting a wooden skewer or toothpick into the center. If it comes out clean or with a few moist crumbs, it’s done. Let the bread cool in the pan for about 10 minutes before using those parchment handles to lift it onto a wire rack to cool completely. I know it’s hard, but waiting is crucial!
Notes & Tips
-
1
Please, please don't overmix the batter. Once you add the dry ingredients, you want to use a light hand. Fold everything together gently with a spatula just until you can no longer see streaks of flour. A lumpy batter is a happy batter when it comes to quick breads, and this restraint is what will give you that coveted tender, soft crumb instead of a tough one.
-
2
The type of gluten-free flour you use really matters. I recommend a high-quality all-purpose blend that specifically states it contains xanthan gum. Xanthan gum is crucial for providing structure and preventing the bread from being crumbly. Different blends can have slightly different results, so feel free to find a brand you love.
-
3
Feel free to make this bread your own with add-ins! About a half cup of chopped walnuts or pecans adds a lovely crunch, and chocolate chips make it extra decadent. I especially love the combination for an easy chocolate chip banana bread. Gently fold them in at the very end, just before you pour the batter into the pan.
Tools You'll Need
-
9x5 inch Loaf Pan: This is the classic vessel for banana bread, giving it that familiar, comforting shape. A light-colored metal pan is my preference as it conducts heat evenly, helping the bread bake beautifully without getting too dark on the edges.
-
Large Mixing Bowl: A generous bowl gives you plenty of room to mash, whisk, and fold without making a mess. I find that using one main bowl for mixing makes the whole process feel calmer and the cleanup is, well, a breeze.
-
Whisk and Rubber Spatula: These two are a team. The whisk is perfect for combining the wet ingredients into a smooth, airy mixture. Then, the rubber spatula takes over for the gentle work of folding in the flour, ensuring you don't overmix and can scrape every last bit of batter from the bowl.
-
Parchment Paper: Honestly, this is my secret weapon for stress-free baking. Lining the pan with parchment paper not only prevents sticking but also allows you to lift the entire loaf out of the hot pan with ease. It makes the whole process feel so much more graceful.

Recipe by
Lila GraceLila creates magical desserts 🍫🧁, sprinkles joy 🌈✨, and shares sweet moments 🍬💖. Her kitchen is full of smiles 😄 and sugar-dusted memories 🍪🍯.
Get Delicious Recipes Weekly
Join 25,000+ home cooks getting our best recipes straight to their inbox.
Free forever • No spam • Unsubscribe anytime