
I remember my grandmother’s kitchen, a small, sunny room that always smelled faintly of cinnamon and vanilla. She had a knack for turning simple ingredients into something magical, and her banana bread was legendary. She never used a mixer, just a wooden spoon and a big yellow bowl. I’d sit at her table, watching her mash the bananas with a fork, her hands moving with a quiet, confident grace. This recipe is my little homage to hers. It’s one of those cozy classics that instantly transports me back to that kitchen. Making it now, I feel that same sense of calm and contentment, the gentle rhythm of measuring and mixing. It's more than just a recipe; it’s a thread connecting generations, a sweet piece of my past that I get to share with my own family. It’s become one of our own family's beloved traditions.
Why You'll Love This Banana Bread
-
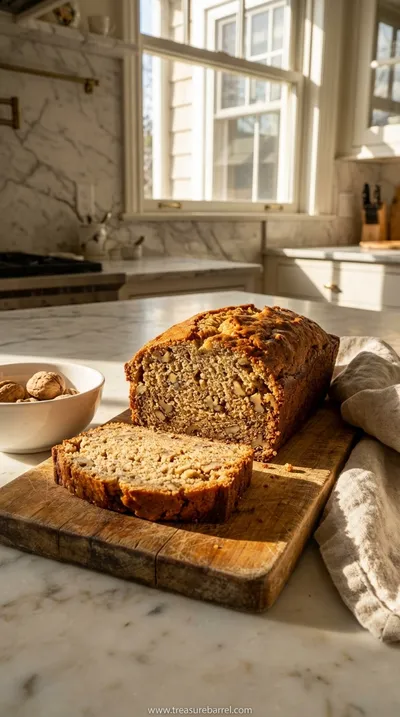
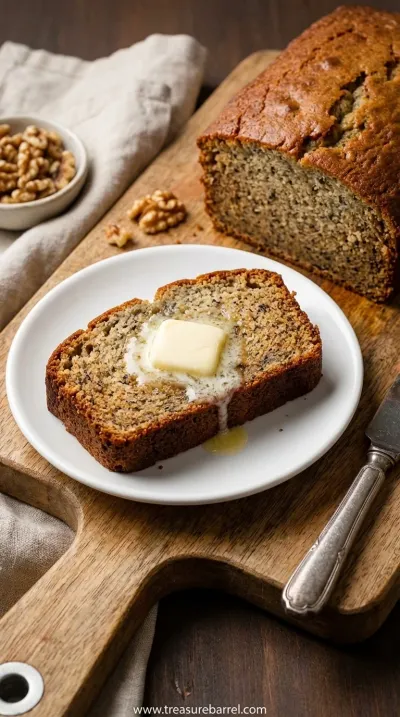
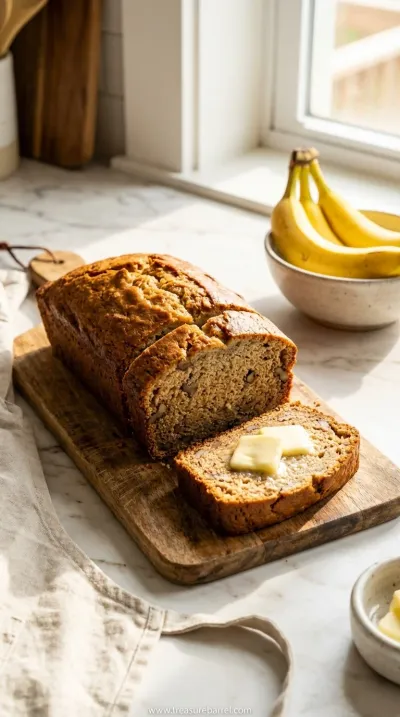
Impossibly Moist: The combination of very ripe bananas and melted butter creates a tender, moist crumb that stays soft for days. Honestly, it’s the secret to a perfect loaf every single time.
-
So Simple to Make: You don’t need any fancy equipment for this one. Just a couple of bowls and a whisk will do! It's one of those recipes that makes you feel like a baking pro without any of the stress, a true gem in the world of home baking.
-
Uses Basic Ingredients: This recipe relies on pantry staples you likely already have. It’s the perfect way to use up those overripe bananas you’ve been ignoring on the counter. No last-minute trips to the store needed!
-
That Incredible Aroma: Wow, the smell. As it bakes, your home will fill with the most comforting, nostalgic aroma of sweet bananas and warm cinnamon. It’s worth making for the scent alone, a true sensory delight.
“Honestly, the best banana bread I’ve ever made. My family devoured it in one evening!”
Essential Ingredient Guide
- Overripe Bananas: This is truly the non-negotiable ingredient. You want bananas that are heavily speckled, almost black. The uglier, the better! This is because as they ripen, their starches convert to sugar, making them sweeter and adding so much moisture to the bread. Don't be tempted to use yellow bananas; the flavor and texture just won’t be the same.
- Melted Butter: While some recipes use oil or softened butter, I find that melted butter gives this bread a richer flavor and a beautifully tender texture. It incorporates so easily into the batter, ensuring you don't over-mix, which is key to a soft crumb. Just let it cool slightly before you add it to the egg and sugar mixture.
- Brown Sugar: I love using brown sugar in this recipe. Its molasses content adds another layer of flavor and contributes to the incredible moisture of the final loaf. It gives the bread a slightly caramel-like depth that you just don't get from white sugar alone. Light or dark brown sugar will work beautifully here.
 Home Baking
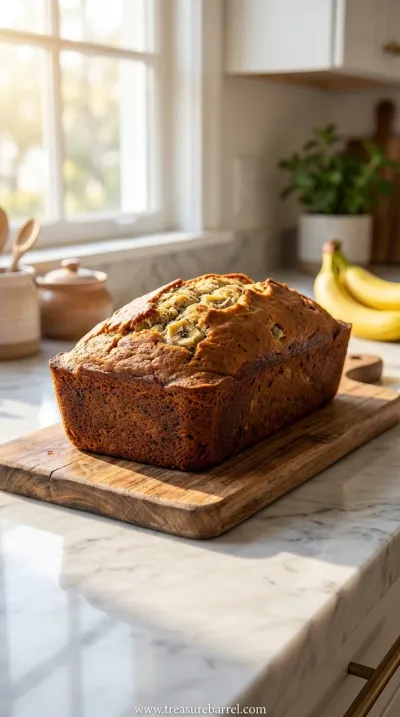
Best Banana Bread Recipe: Moist & Delicious
A classic, incredibly moist homemade banana bread. The perfect easy treat for any day.

Complete Cooking Process
-
Preparation:
First, take a deep breath and let the calm of baking settle in. I like to start by preheating my oven and preparing my loaf pan. It feels like setting the stage. Then, I gather all my ingredients, laying them out on the counter. This little ritual, this 'mise en place,' helps me slow down and enjoy the process. Mashing the bananas is such a satisfying, tactile step. You can leave them a little chunky if you like finding little pockets of banana in the finished bread. This initial phase is all about gentle, quiet preparation for the magic to come.
-
Mixing:
This is where everything starts coming together. First, you'll whisk the dry ingredients in one bowl—the flour, baking soda, salt, and that lovely, warm cinnamon. In another, larger bowl, you'll combine the wet ingredients. The sound of the whisk against the bowl as you mix the melted butter and sugar, then the egg and vanilla, is so rhythmic and soothing. Then, you gently fold the dry ingredients into the wet. The key here is not to overdo it; just mix until you no longer see streaks of flour. A few lumps are perfectly okay; they’re a sign of a tender bread to come.
-
Baking to Perfection:
Now for the patient part. Pour that beautiful, thick batter into your prepared loaf pan and smooth the top. Sliding it into the hot oven feels like tucking it in. For the next hour, your home will transform, filling with the most incredible, comforting scent. I usually set a timer for about 50 minutes and then start checking. A wooden skewer or toothpick inserted into the center should come out with a few moist crumbs attached, but not wet batter. Letting it cool in the pan for a bit before turning it out onto a wire rack is crucial for it to set up properly.
-
Don't over-mix the batter! This is the most common mistake. Over-mixing develops gluten and results in a tough, dense bread.
-
Tent the loaf with foil if the top is browning too quickly before the inside is cooked through. This happens sometimes around the 40-minute mark.
-
Let the bread cool completely before slicing. I know it’s tempting, but this allows the crumb to set, and you'll get much cleaner slices.
Pro Tips for the Best Bake
Following these small tips really makes a difference. It’s these little details that elevate a good banana bread to a great one.
Frequently Asked Questions
→ How ripe should my bananas be?
Honestly, the riper, the better! You're looking for bananas with lots of brown and black spots on the peel. They should be very soft to the touch. These bananas are much sweeter and have a stronger banana flavor, which translates into a more delicious and moist bread. Green or perfectly yellow bananas just won't give you the same amazing result.
→ Can I use frozen bananas?
Absolutely! Using frozen bananas is a fantastic idea. I often toss my overripe bananas into the freezer for later. Just make sure to thaw them completely at room temperature before using. They will look a bit watery and mushy, but that's perfectly fine. Just pour the bananas and all their liquid right into the batter for extra moisture.
→ Can I add nuts or chocolate chips?
Yes, please do! This recipe is a wonderful canvas for additions. About a cup of chopped walnuts or pecans, or a cup of semi-sweet chocolate chips would be delicious. Gently fold them in at the very end, right before you pour the batter into the pan. I recommend tossing them in a tablespoon of flour first to prevent them from sinking to the bottom.
→ Why is my banana bread dense or tough?
The most likely culprit for a dense or tough banana bread is over-mixing the batter. Once you combine the wet and dry ingredients, you want to mix them only until they are just combined. A few lumps are totally fine! Over-mixing develops the gluten in the flour, leading to a chewy, dense texture instead of a soft, tender one. Also, be sure your baking soda is fresh!
→ Can I make this recipe into muffins?
You certainly can. To make muffins, just divide the batter evenly among a lined 12-cup muffin tin. The baking time will be much shorter, so start checking them around 18-20 minutes. A toothpick inserted into the center of a muffin should come out clean. They make for such a wonderful grab-and-go treat.
→ How do I know when the banana bread is perfectly baked?
The best way to check for doneness is the toothpick test. Insert a wooden skewer or toothpick into the very center of the loaf. If it comes out with wet batter on it, it needs more time. If it comes out with a few moist crumbs attached, it's perfect! If it's completely clean, it might be slightly over-baked, so take it out right away. The top should be a deep golden brown and feel springy to the touch.
→ What’s the best way to store it to keep it moist?
To maintain that wonderful moisture, let the bread cool completely first. If you wrap it while it's still warm, condensation will form and can make the top a bit soggy. Once cool, I like to wrap it tightly in plastic wrap or store it in an airtight container at room temperature. It should stay perfectly moist for about 3 to 4 days.
Nutrition Facts
per serving
230
Calories
3g
Protein
35g
Carbs
9g
Fat
Taste Profile
A beautifully sweet, banana-forward flavor with warm notes of cinnamon and a hint of rich butter.
Ingredient Substitutions
Don't have an ingredient? Try these alternatives
You can substitute the melted butter with an equal amount of oil. This will create an even moister bread, though you will lose some of that rich, buttery flavor.
For a heartier, slightly denser loaf, you can substitute up to half of the all-purpose flour with whole wheat flour. It will add a nutty flavor and extra fiber.
You can use an equal amount of coconut sugar. If using maple syrup, you might want to reduce it slightly to 1/2 cup as it's a liquid sweetener.
Recipe Variations
Try these delicious twists on the original
Chocolate Chip Banana Bread
Fold in 1 cup of semi-sweet or dark chocolate chips with the dry ingredients for a decadent, melty addition.
Nutty Banana Bread
Add 3/4 cup of toasted, chopped walnuts or pecans for a lovely crunch and nutty flavor that complements the banana perfectly.
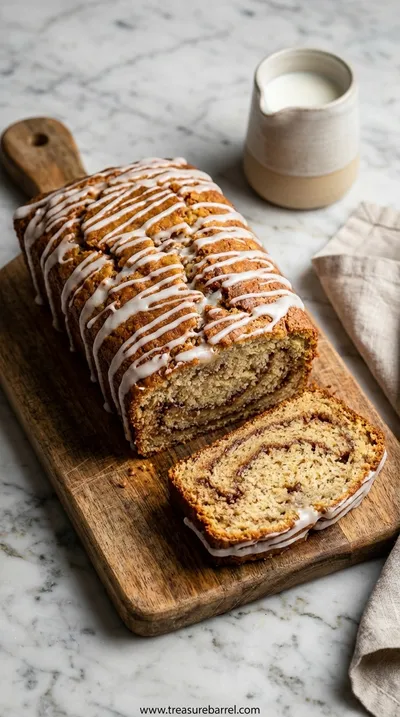
Cinnamon Swirl Banana Bread
Mix 1/4 cup of brown sugar with 1 1/2 teaspoons of cinnamon. Pour half the batter into the pan, sprinkle the cinnamon mixture over top, then add the remaining batter and swirl gently with a knife before baking.
Common Mistakes to Avoid
Learn from others' mistakes for perfect results
- Using under-ripe bananas. This is the biggest mistake! Yellow or green-tinged bananas lack the sugar and moisture needed for this recipe.
- Over-mixing the batter. This develops gluten and creates a tough, rubbery texture. Mix only until the flour disappears.
- Slicing the bread while it's still warm. It's tempting, but it will be crumbly and gummy. Let it cool completely for clean slices.
- Not checking for doneness correctly. Rely on the skewer test, not just the color of the crust, to ensure the center is fully baked.
- Forgetting to let the melted butter cool slightly. If it's too hot, it can start to cook the egg when you mix them together.
Meal Prep & Storage
Make Ahead Tips
While the batter is best made right before baking, you can definitely prepare parts of it ahead of time. Whisk together all your dry ingredients (flour, baking soda, salt, cinnamon) and store them in an airtight container at room temperature. This saves a step and makes the final assembly even quicker when you're ready to bake. I wouldn’t recommend mixing the full batter ahead of time, as the baking soda will activate prematurely.
Leftover Ideas
Leftover banana bread is such a gift! Simply reheat a slice in the microwave for 10-15 seconds to make it soft and warm again. For a truly special treat, you can turn leftover slices into banana bread French toast! Just dip thick slices in an egg and milk mixture and pan-fry in butter until golden. It’s absolutely divine served with a drizzle of maple syrup.
Perfect Pairings
Serve this with...
Cooking Timeline
Preheat the oven and prepare your loaf pan. Gather and measure all ingredients.
Whisk the dry ingredients in one bowl. In a separate bowl, mash the bananas and whisk in the other wet ingredients.
Gently fold the dry ingredients into the wet until just combined. Pour the batter into the prepared pan.
Bake for 55-65 minutes, or until a skewer comes out with moist crumbs. Let the oven do its work.
Cool in the pan for 10-15 minutes, then turn out onto a wire rack to cool completely before slicing and enjoying.
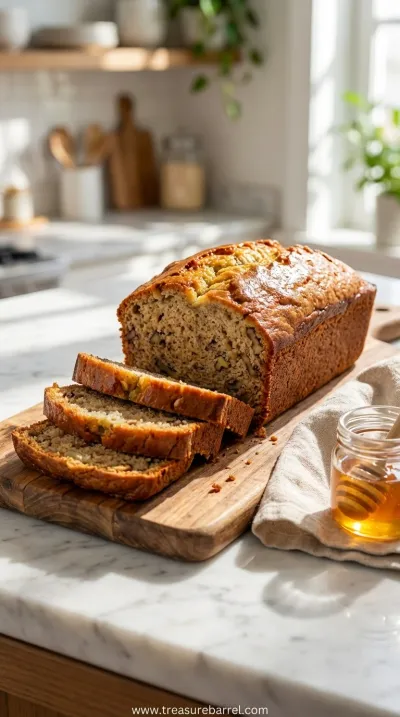
Moist Banana Bread Recipe: Super Easy & Delicious
Very easy banana bread recipe that's incredibly moist. Perfect comfort food for home baking and family favorites.
Timing
Prep Time
15 Minutes
Cook Time
60 Minutes
Total Time
1 Hour 15 Minutes
Recipe Details
Ingredients
Dry Ingredients
-
01
1 1/2 cups all-purpose flour
-
02
1 teaspoon baking soda
-
03
1/2 teaspoon salt
-
04
1/2 teaspoon ground cinnamon
Wet Ingredients
-
01
3 large, very ripe bananas, mashed
-
02
1/2 cup unsalted butter, melted and cooled
-
03
3/4 cup packed light brown sugar
-
04
1 large egg, at room temperature
-
05
1 teaspoon pure vanilla extract
Instructions
First, let's get everything ready. Preheat your oven to 350°F (175°C). It’s so important to have your oven at the right temperature from the start. Grease and flour a 9x5-inch loaf pan, or line it with parchment paper for easy removal later. In a medium bowl, whisk together the flour, baking soda, salt, and cinnamon. The scent of the cinnamon is already so promising, isn't it? Set this bowl aside for now. This recipe is a perfect example of how delightful sweet treats can be with simple steps.
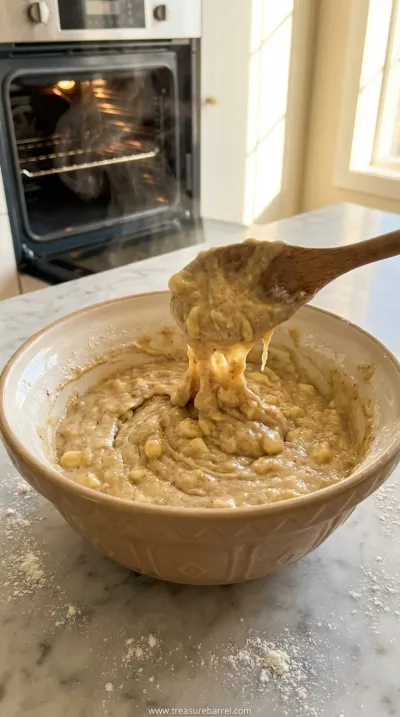
In a separate, larger bowl, it’s time for the wet ingredients. Start by mashing your very ripe bananas with a fork. I like to leave a few small lumps for texture, but you can make it as smooth as you like. To the mashed bananas, add the slightly cooled melted butter, the packed brown sugar, the room temperature egg, and the vanilla extract. Whisk everything together until it's well combined and looks like a beautiful, fragrant, caramel-colored mixture.
Now, let’s bring it all together. Gently pour the dry ingredients into the bowl with the wet ingredients. Using a spatula or a wooden spoon, fold the mixture together until you just barely see the last streaks of flour disappear. Please, please be careful not to over-mix! A few little lumps in the batter are a good thing. Over-mixing is the fastest way to a tough loaf, and we want this to be tender and perfect. This simple process is why this recipe is one of our family favorites.
Carefully pour the batter into your prepared loaf pan and use your spatula to gently spread it into an even layer. Pop it into the preheated oven and let the magic happen. Bake for 55 to 65 minutes. Around the 50-minute mark, check on it. A wooden skewer inserted into the center should come out with moist crumbs clinging to it. Let the bread cool in the pan on a wire rack for about 10-15 minutes before carefully turning it out to cool completely. Patience is key here, I promise it's worth the wait!
Notes & Tips
-
1
The riper the bananas, the better. Seriously. They should be very soft with dark, speckled peels. This adds natural sweetness and moisture that is essential for the recipe's success.
-
2
Be gentle when you combine the wet and dry ingredients. The goal is to mix until just combined. Over-mixing will develop the gluten in the flour, resulting in a dense and heavy bread rather than a light and moist one.
-
3
Allow the banana bread to cool completely on a wire rack before you slice into it. This is so important because it allows the crumb to set. Slicing it while it's hot can make it fall apart and seem gummy.
Tools You'll Need
-
9x5-inch Loaf Pan: This is the standard size for most quick breads. A metal pan will give you crisper edges, while a glass or ceramic one might require a slightly longer baking time.
-
Large Mixing Bowl: You'll need a nice, big bowl to comfortably mix your wet ingredients and then fold in the dry without making a mess. I love using my big ceramic one for this.
-
Whisk and Spatula: A whisk is perfect for combining the wet ingredients and the dry ingredients separately. A flexible silicone spatula is essential for folding the batter together and scraping every last bit from the bowl.
-
Measuring Cups and Spoons: Accurate measurements are key in baking! Having a good set ensures your bread turns out perfectly every time. It’s a small detail that makes a big difference.
Must-Know Tips
-
Use Room Temperature Ingredients: Especially the egg. Room temperature ingredients emulsify better, creating a more uniform batter and a lighter, more tender final product. It's a small step that yields professional results.
-
Measure Flour Correctly: Instead of scooping flour directly from the bag with your measuring cup, which compacts it, spoon the flour into the cup and then level it off with a knife. This prevents you from accidentally adding too much flour, which can make the bread dry.
-
Don't Open the Oven Door Too Early: Let the bread bake undisturbed for at least the first 45 minutes. Opening the oven door can cause a sudden drop in temperature, which might make the center of your beautiful loaf sink.
Professional Secrets
-
A Sprinkle of Sugar on Top: Just before baking, sprinkle a tablespoon of granulated or turbinado sugar over the top of the batter. This creates a wonderfully crisp, crackly crust that provides a lovely textural contrast to the moist interior.
-
Let the Batter Rest: If you have time, let the batter rest in the pan for about 15-20 minutes before baking. This allows the flour to fully hydrate, which can result in an even more tender and moist crumb.
-
Add a Pinch of Nutmeg: While cinnamon is classic, adding just a tiny pinch of freshly grated nutmeg alongside it adds a subtle warmth and complexity to the flavor profile. It's that little something extra that makes people ask for your secret.

Recipe by
Sofia BelleSofia bakes with love 🧁💛, sweet smells filling her home 🍪🏡, and flour on her hands 🤲✨. She believes every loaf 🍞 and cake 🎂 tells a story of wa ...
Get Delicious Recipes Weekly
Join 25,000+ home cooks getting our best recipes straight to their inbox.
Free forever • No spam • Unsubscribe anytime