
Vanilla ice cream traces its roots to 18th‑century Europe, where the frozen dessert was a symbol of refinement and innovation. Over time, the humble bean evolved into a global favorite, celebrated for its simple elegance and ability to showcase the pure flavor of vanilla. Today, home cooks enjoy a quick, no‑heat method that honors that legacy while fitting modern kitchens.
Why You'll Love It
-
- No stove needed, perfect for summer evenings
-
- Creamy texture without an ice‑cream maker
-
- Simple ingredients you already have
-
- Quick turnaround, satisfy cravings fast
"The most effortless vanilla ice cream I've ever made – pure, creamy, and ready in a flash!"
Essential Ingredient Guide
- Heavy cream: Provides the luscious body; choose a brand with at least 35% fat for best mouthfeel.
- Whole milk: Balances richness; chilled milk helps the mixture set faster.
- Granulated sugar: Sweetens and aids in a smooth texture; dissolve completely.
- Vanilla bean or extract: The star flavor; split beans and scrape seeds for depth.
- Salt: A pinch enhances vanilla’s natural sweetness.
- Optional: Sweetened condensed milk: Adds extra creaminess and a caramel whisper if you like.

Complete Cooking Process
-
Ingredient Readiness:
Gather chilled cream, milk, and vanilla; measure sugar and a pinch of salt. If using a bean, split and scrape now so the seeds are ready to meld.
-
Flavor Development:
Whisk sugar into the milk until fully dissolved, then stir in cream, vanilla, and salt. Let the mixture sit for a few minutes to let the vanilla perfume the base.
-
Texture Control:
Transfer the blend to a shallow metal pan; cover and place in the freezer. Every 30 minutes, stir vigorously with a fork to break up ice crystals, creating a smooth texture.
-
Finishing Touches:
After about 2–3 hours of intermittent stirring, the ice cream should be thick and creamy. Fold in any optional swirl, then let it firm for another half hour.
-
Serving Timing:
Serve within a day for the best texture, scooping into chilled bowls. A drizzle of fresh fruit or a crumble of shortbread adds a lovely contrast.
-
Use a shallow pan; a larger surface speeds freezing.
-
Stir with a fork, not a whisk, for gentle ice crystal breakage.
-
Add a splash of vanilla extract after the first stir for extra aroma.
-
Cover with parchment to prevent freezer burn.
Pro Tips
Well, I’ve found that the simple act of stirring every half hour feels like a quiet ritual, a pause in the day. It lets the flavor settle, and the texture becomes that buttery smoothness you remember from a boutique shop. So, take your time, enjoy the process, and let the kitchen fill with the sweet scent of vanilla.
Ugh, there’s something comforting about watching the mixture thicken, a gentle reminder that good things often need a little patience.
The essence of the dish:
It’s the simplicity of cream and vanilla, balanced by just enough sugar to let the natural notes shine, creating a silky, melt‑in‑your‑mouth experience.
A fun fact or historical angle:
The first frozen desserts were made with ice and salt, an early form of refrigeration that inspired modern ice‑cream makers.
Flavor or sensory focus:
You’ll notice the fragrant vanilla speckles, a buttery richness on the palate, and a cool, velvety finish that lingers.
You Must Know
-
Keep all dairy chilled before mixing
-
Stir consistently to avoid icy granules
-
Taste before freezing; adjust sweetness if needed
Frequently Asked Questions
→ Can I use almond milk instead of dairy?
Yes, but the texture will be lighter. Adding a tablespoon of coconut cream helps retain richness.
→ Do I need an ice‑cream maker?
No, the no‑cook method uses a shallow pan and periodic stirring to achieve a smooth result.
→ How long can I store the ice cream?
Keep it sealed in the freezer for up to a week; stir once before serving to refresh the texture.
→ What if I don’t have a vanilla bean?
Pure vanilla extract works well; use 2 teaspoons for a comparable flavor.
→ Can I add mix‑ins like chocolate chips?
Add them after the final stir, just before the ice cream firms, so they stay crunchy.
→ Is this recipe suitable for kids?
Absolutely – it’s free of raw eggs and uses familiar, mild flavors.
Nutrition Facts
per serving
210
Calories
3g
Protein
18g
Carbs
14g
Fat
Taste Profile
Creamy vanilla sweetness with subtle richness
Ingredient Substitutions
Don't have an ingredient? Try these alternatives
Provides similar richness; may add a faint coconut aroma.
Adds subtle caramel notes; reduce slightly as syrup is sweeter.
Recipe Variations
Try these delicious twists on the original
Spicy Version
Add a pinch of ground cinnamon and a dash of cayenne for a warm kick.
Mediterranean Style
Swirl in a spoonful of honey and top with toasted pistachios.
Common Mistakes to Avoid
Learn from others' mistakes for perfect results
- Skipping the regular stirring leads to a grainy texture.
- Leaving the mixture uncovered creates ice crystals on top.
- Using warm dairy slows the freezing process dramatically.
Meal Prep & Storage
Make Ahead Tips
Mix the base and chill for up to 24 hours; stir as directed when ready to freeze.
Leftover Ideas
Re‑stir the frozen ice cream with a spoon to restore creaminess before serving.
Perfect Pairings
Serve this with...
Cooking Timeline
Gather and measure all ingredients; whisk sugar into milk.
Place mixture in freezer; stir every 30 minutes to break ice crystals.
Final thickening stage; fold in optional condensed milk.
Allow ice cream to firm; scoop and serve with desired toppings.
 Home Baking
High Protein Beef Pepperoni Pizza Rolls
Crispy, cheesy, protein‑rich pizza rolls made with beef pepperoni and a tender homemade dough.

Homemede Vanilla Ice Cream – No‑Cook Recipe
A silky, no‑cook vanilla ice cream that melts in your mouth, perfect for any season and ready in minutes without turning on the stove.
Timing
Prep Time
10 Minutes
Cook Time
0 Minutes
Total Time
2 Hours 30 Minutes
Recipe Details
Ingredients
Base
-
01
2 cups heavy cream
-
02
1 cup whole milk
-
03
½ cup granulated sugar
-
04
1 vanilla bean, split and seeds scraped (or 2 tsp vanilla extract)
-
05
Pinch of sea salt
Optional Add‑Ins
-
01
¼ cup sweetened condensed milk for extra richness
-
02
Fresh berries for serving
Instructions
In a medium bowl, whisk the sugar into the milk until fully dissolved, then stir in the cream, vanilla seeds (or extract), and a pinch of salt.
Cover the bowl with plastic wrap and place it in the freezer. Every 30 minutes, stir the mixture with a fork, scraping the sides to break up ice crystals.
After about 2 hours of stirring, the mixture should be thick and velvety. If using, fold in the condensed milk now for added creaminess.
Let the ice cream sit undisturbed for another 30 minutes to firm up, then scoop into bowls and garnish with fresh berries or a drizzle of honey.
Notes & Tips
-
1
If the mixture becomes too hard, let it sit at room temperature for 5 minutes before scooping.
-
2
For a richer flavor, toast the vanilla bean before scraping the seeds.
-
3
Experiment with a splash of chocolate cake topping for a mocha twist.
 Warm Meals
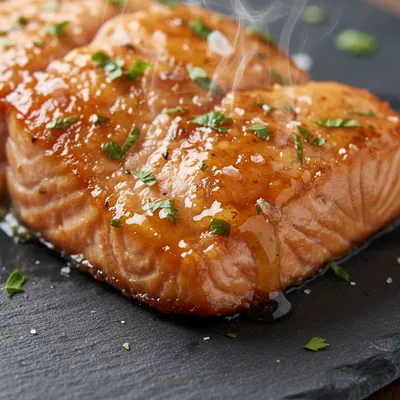
Honey Baked Salmon - Sweet & Savory
Sweet honey glaze meets buttery salmon for a comforting dinner.
Tools You'll Need
-
Medium mixing bowl
-
Fork
-
Plastic wrap
-
Shallow metal pan
-
Measuring cups
-
Whisk
Must-Know Tips
-
Stir consistently to keep crystals small, ensuring a smooth texture.
-
Cover the surface with plastic wrap to prevent ice crystals on top.
-
Taste before the final freeze; adjust sweetness if needed.
Professional Secrets
-
Use chilled cream and milk; cold ingredients freeze faster and more evenly.
-
A shallow pan maximizes surface area, speeding up the freezing process.
-
Gentle stirring rather than vigorous beating preserves a creamy mouthfeel.

Recipe by
Sofia BelleSofia bakes with love 🧁💛, sweet smells filling her home 🍪🏡, and flour on her hands 🤲✨. She believes every loaf 🍞 and cake 🎂 tells a story of wa ...
Get Delicious Recipes Weekly
Join 25,000+ home cooks getting our best recipes straight to their inbox.
Free forever • No spam • Unsubscribe anytime