
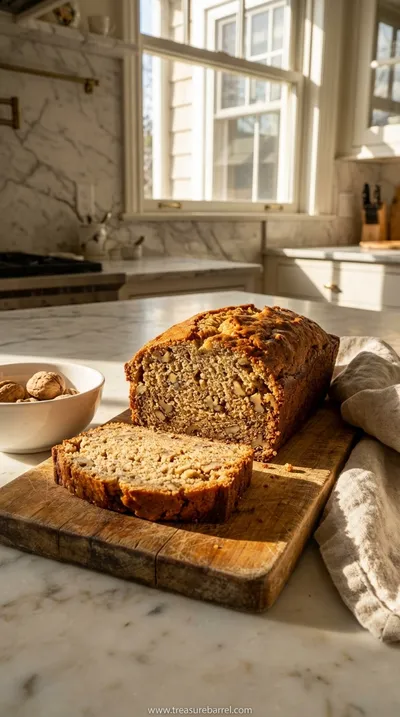
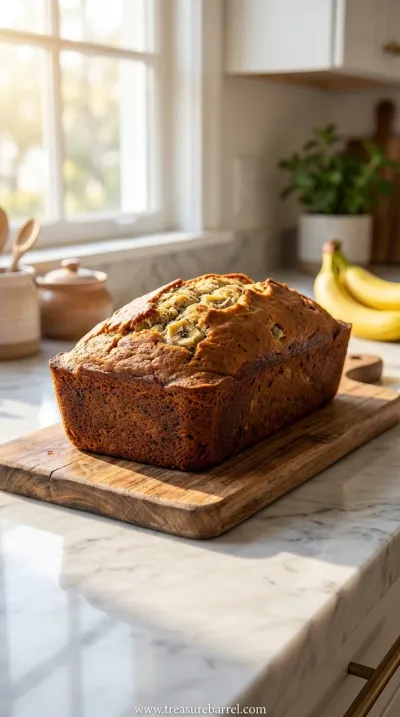
I remember my grandmother's kitchen, the way the late afternoon sun would stream through the window and catch the little motes of flour dancing in the air. She had this old, beat-up sifter, and the sound it made—a soft, rhythmic shush-shush—is something I can still hear if I close my eyes. This cake is born from those memories. It's not her exact recipe, as hers was tucked away in her head, but it's the spirit of it. It's the feeling of being small and watching loving hands create something magical from simple ingredients. Every time I make it, I feel that connection to her, to the quiet joy of creating something beautiful and delicious to share. It's a true staple in our collection of family favorites, right up there with our favorite banana bread.
Why You'll Love This Cake
-
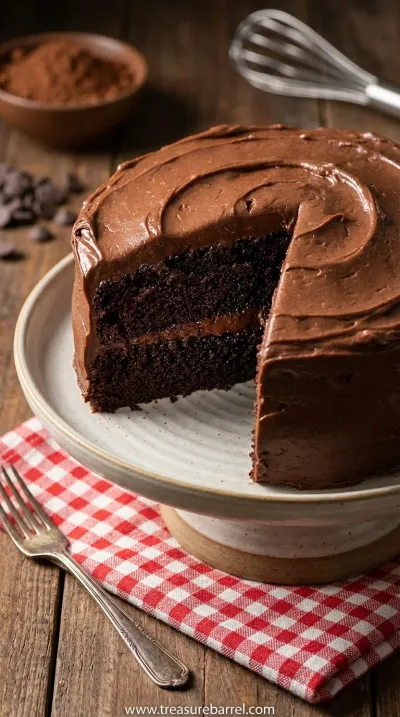
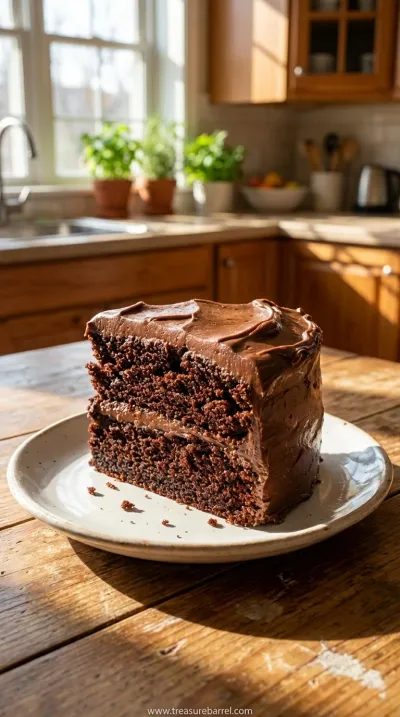
Impossibly Moist Crumb: This isn't one of those dry, crumbly cakes. Thanks to the buttermilk and hot coffee, the texture is so tender and moist it practically melts in your mouth. It stays that way for days, honestly, if it even lasts that long.
-
Deep, Rich Chocolate Flavor: We use both cocoa powder and hot coffee here, and wow, what a combination. The coffee doesn't make the cake taste like coffee; it just deepens and intensifies the chocolate notes, making it taste more chocolaty than you can imagine.
-
Simple, No-Fuss Method: Look, I love an elaborate baking project, but sometimes you just need a straightforward, reliable recipe. This cake comes together in one bowl, and the frosting is just as easy. It’s perfect for when you want impressive results without a whole lot of stress. It feels like a triumph of home baking.
-
The Dreamiest Frosting: The frosting is everything. It’s a classic American buttercream, but it’s so smooth, creamy, and deeply flavorful. It spreads like a dream and has that perfect balance of sweetness and rich cocoa. It's the perfect finishing touch.
This is the only chocolate cake recipe I'll ever need. It's pure comfort in every single bite.
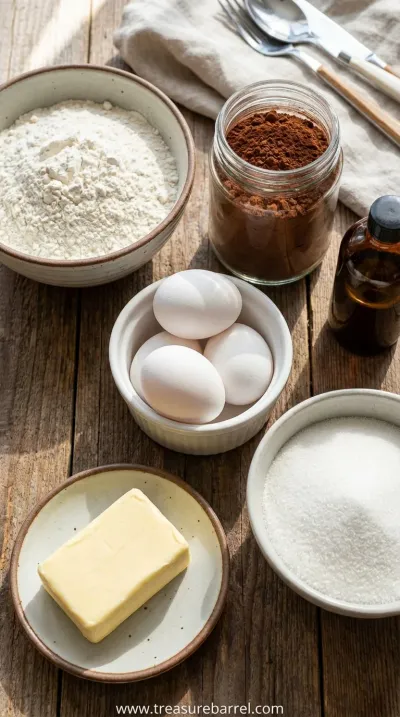
Essential Ingredient Guide
- Good-Quality Unsweetened Cocoa Powder: This is where so much of your flavor comes from, so it's worth getting the good stuff. I prefer Dutch-processed cocoa for its darker color and smoother, less acidic flavor, but natural cocoa powder works beautifully too, giving it a slightly tangier, classic chocolate cake taste. Don't skimp here; a quality cocoa powder makes all the difference between a good cake and a truly unforgettable one.
- Buttermilk: Oh, buttermilk is just magic in baking. The acid in it reacts with the baking soda to create a super tender, soft crumb. It also adds a very subtle, pleasant tang that balances the sweetness and richness of the chocolate. If you don't have any on hand, you can make a quick substitute by adding a tablespoon of lemon juice or white vinegar to a cup of regular milk and letting it sit for about 5-10 minutes.
- Hot Brewed Coffee: This is my not-so-secret secret ingredient. You won't taste the coffee, I promise. What it does is 'bloom' the cocoa powder, which means it helps release all those deep, rich flavor compounds. It also adds moisture and depth, making the cake taste intensely chocolaty. If you're really against using coffee, you can use hot water instead, but the flavor won't be quite as complex and wonderful.
 Home Baking
Best Banana Bread Recipe: Moist & Delicious
A classic, incredibly moist homemade banana bread. The perfect easy treat for any day.
Complete Cooking Process
-
Preparation:
First, just breathe. Baking should feel calm. I like to start by gently gathering all my ingredients, laying them out on the counter. It feels like setting a stage. Preheat your oven and prepare your pans; I always trace the bottoms onto parchment paper—it’s a small, meditative step that guarantees your cakes will release perfectly later. Whisking together the dry ingredients feels so satisfying, watching the cocoa powder, flour, sugar, and leaveners become one unified, fragrant cloud. This is the foundation of your beautiful cake.
-
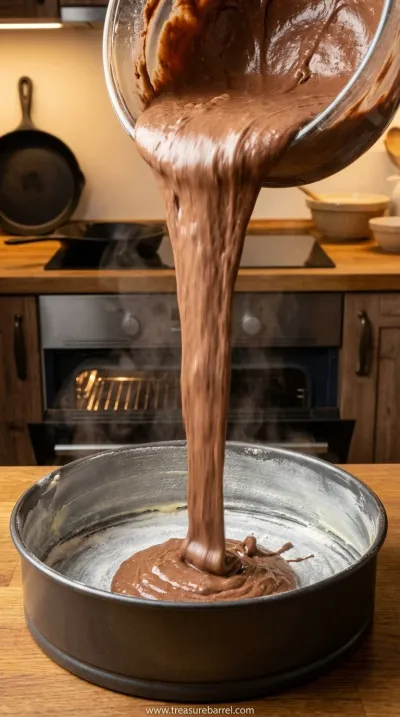
Mixing the Batter:
This is where the magic starts to happen. In a separate bowl, you’ll combine your wet ingredients. I love the moment the eggs, buttermilk, oil, and vanilla are whisked together; it's a beautiful, pale yellow emulsion full of promise. Then, you pour it into the dry ingredients. Mix just until you don't see any more dry streaks—over-mixing is the enemy of a tender cake. Finally, and this is the important part, you’ll slowly stream in the hot coffee. The batter will seem very thin, almost watery. Don't panic! This is exactly what you want. It's this thin batter that bakes up into the most wonderfully moist cake.
-
Baking and Cooling:
Divide your thin, beautiful batter between the prepared pans. The smell will already be incredible. Slide them into the preheated oven and try to resist opening the door for at least the first 25 minutes. Let the heat do its work. When a toothpick comes out with a few moist crumbs attached, they’re ready. Let them cool in the pans for just about 15 minutes before gently turning them out onto a wire rack. This cooling step is so crucial. You must let them cool completely—and I mean completely—before you even think about frosting. A warm cake will just melt your beautiful frosting into a soupy mess.
-
Making the Frosting and Assembling:
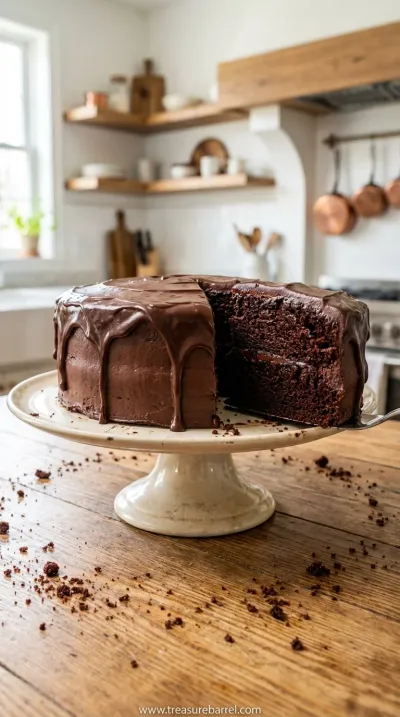
While the cakes cool, it's time for the crowning glory: the frosting. Be sure your butter is at room temperature; it should be soft but not melty. Beat it until it's light and fluffy, like a cloud. Then, you'll gradually add the powdered sugar and cocoa powder. It will get thick and crumbly, but don't worry. The milk and vanilla will transform it into a silky, spreadable dream. Once the cakes are cool, place one layer on your serving plate, spread a generous layer of frosting, then top with the second layer. Use the rest of the frosting to cover the top and sides. Don't aim for perfection; some gentle swoops and swirls from your spatula look beautiful and homemade.
Frequently Asked Questions
→ Can I make this cake in a different size pan?
Yes, absolutely! This recipe is quite versatile. You can bake it in a 9x13-inch rectangular pan; just start checking for doneness around the 35-40 minute mark. It also works for cupcakes! You should get about 24 cupcakes, and they'll need to bake for about 18-22 minutes. Just remember to adjust your baking time accordingly and keep an eye on them, as smaller cakes and cupcakes bake much faster.
→ My cake turned out dry. What did I do wrong?
Oh, that's the saddest thing! A few things could be happening here. The most common culprit is over-baking. Even an extra minute or two can dry out a cake, so be sure to check it on the early side. Another possibility is accidentally adding too much flour. I always recommend spooning the flour into your measuring cup and leveling it off, rather than scooping directly from the bag, which can compact it. Finally, make sure all your leavening agents (baking soda and powder) are fresh!
→ Do I really have to use coffee?
Honestly, I think it makes a huge difference in the depth of the chocolate flavor. It doesn't make the cake taste like coffee at all, just more intensely chocolatey. However, if you're completely opposed to it or don't have any, you can substitute it with an equal amount of hot water. The cake will still be delicious and moist, just with a slightly milder chocolate flavor. It’s still one of my favorite sweet treats either way.
→ How should I store the cake?
This cake stores beautifully! You can keep it at room temperature in an airtight container or under a cake dome for up to 4 days. The frosting actually helps to lock in the moisture. I find it gets even better on the second day as the flavors meld together. If your kitchen is very warm, you might want to store it in the refrigerator, but be sure to let it come to room temperature before serving for the best texture.
→ Can I make this recipe ahead of time?
Definitely! This is a great recipe to prep in stages. You can bake the cake layers a day ahead, let them cool completely, then wrap them tightly in plastic wrap and store them at room temperature. The frosting can also be made up to three days in advance and stored in an airtight container in the refrigerator. Just let it come to room temperature and give it a good whip with your mixer to fluff it up again before frosting the cake.
→ Can I use all-purpose flour instead of cake flour?
This recipe was developed specifically with all-purpose flour to keep it simple and accessible for everyone. So yes, all-purpose flour is what you should use! It provides enough structure for the cake while still yielding a wonderfully tender crumb. It's a forgiving recipe, much like my favorite moist banana bread, designed for easy success.
→ What's the best way to get clean slices?
For those beautiful, clean slices, the trick is to use a long, sharp knife. Heat the knife by running it under hot water, then wipe it completely dry before making each cut. The warm blade will glide through the cake and frosting without dragging. It's also helpful to wipe the knife clean between each slice. It sounds a little fussy, but it makes for such a pretty presentation, especially if you're serving it for a special occasion.
Nutrition Facts
per serving
480
Calories
6g
Protein
65g
Carbs
25g
Fat
Taste Profile
Deeply rich and chocolaty with a balanced, pronounced sweetness. The slight tang from the buttermilk is a subtle background note that brightens the overall flavor.
Ingredient Substitutions
Don't have an ingredient? Try these alternatives
If you don't have buttermilk, you can make your own! For every 1 cup of milk, stir in 1 tablespoon of white vinegar or lemon juice. Let it stand for 5-10 minutes until it looks slightly curdled. It works perfectly.
Any neutral-flavored oil will work here. Melted and cooled coconut oil is a great option. I would avoid olive oil as its flavor can be too strong for this delicate cake.
Recipe Variations
Try these delicious twists on the original
Mocha Chocolate Cake
For a more pronounced coffee flavor, add 1-2 teaspoons of instant espresso powder to the dry ingredients of the cake and another teaspoon to the frosting. It creates a beautiful, sophisticated mocha twist.
Mint Chocolate Cake
Add 1/2 teaspoon of peppermint extract to the frosting along with the vanilla. Garnish with chocolate shavings or crushed peppermint candies for a refreshing and festive variation.
Mexican Chocolate Cake
Add 1 teaspoon of cinnamon and a pinch of cayenne pepper to the dry ingredients of the cake batter for a warm, spiced version with a tiny, surprising kick of heat.
Common Mistakes to Avoid
Learn from others' mistakes for perfect results
- Frosting a warm cake. This is the most common mistake and will always result in a melted mess. Patience is key!
- Over-baking the cake layers. This leads to a dry cake. Start checking for doneness a few minutes before the recipe suggests.
- Not measuring flour correctly. Scooping flour directly from the bag packs it in, resulting in too much flour and a dense cake.
- Over-mixing the batter. This develops the gluten in the flour and can make your cake tough instead of tender.
Meal Prep & Storage
Make Ahead Tips
This is a fantastic cake to make ahead. The cake layers can be baked, cooled, and wrapped tightly in plastic wrap at room temperature for up to two days. The frosting can be made and stored in an airtight container in the fridge for up to a week. Just let it come to room temperature and re-whip it for a few minutes before using to restore its fluffy texture.
Leftover Ideas
Leftover cake, if there is any, is a true treasure. Store it in an airtight container at room temperature for up to 4 days. A slice is a perfect afternoon pick-me-up. I sometimes find that the flavor is even better on the second day. You can also gently warm a slice in the microwave for about 10 seconds to soften the frosting just a little—it's divine.
Perfect Pairings
Serve this with...
Cooking Timeline
Preheat oven, prepare pans, and whisk together all dry ingredients.
Whisk wet ingredients, combine with dry, and stir in hot coffee.
Pour batter into pans and bake for 30-35 minutes, until a toothpick comes out clean.
Cool cakes in pans for 15 mins, then turn out onto a wire rack to cool completely. This can take up to an hour.
While cakes cool, prepare the chocolate frosting by beating butter, cocoa, sugar, and milk until fluffy.
Once cakes are completely cool, assemble and frost the layer cake.
Homemade Chocolate Cake with Chocolate Frosting Recipe
Easy homemade chocolate cake recipe with rich chocolate frosting. Perfect moist cake from scratch for any occasion.
Timing
Prep Time
20 Minutes
Cook Time
35 Minutes
Total Time
55 Minutes
Recipe Details
Ingredients
For the Chocolate Cake
-
01
2 cups all-purpose flour
-
02
2 cups granulated sugar
-
03
3/4 cup unsweetened cocoa powder
-
04
2 teaspoons baking soda
-
05
1 teaspoon baking powder
-
06
1 teaspoon salt
-
07
1 cup buttermilk, room temperature
-
08
1/2 cup vegetable oil
-
09
2 large eggs, room temperature
-
10
1 teaspoon vanilla extract
-
11
1 cup freshly brewed hot coffee
For the Chocolate Frosting
-
01
1 cup unsalted butter, softened
-
02
3/4 cup unsweetened cocoa powder
-
03
4 cups powdered sugar, sifted
-
04
1/2 cup milk or heavy cream
-
05
1 teaspoon vanilla extract
-
06
A pinch of salt
Instructions
Let's begin. First, preheat your oven to 350°F (175°C). Gently grease and flour two 9-inch round cake pans. I also like to line the bottom of each pan with a circle of parchment paper; it’s a little promise to yourself that the cakes will release flawlessly later. In a large bowl, or the bowl of your stand mixer, sift together the flour, sugar, cocoa powder, baking soda, baking powder, and salt. Whisk them together for a moment to make sure everything is evenly distributed. This is your foundation.
Now for the wet ingredients. In a separate medium bowl, whisk together the buttermilk, oil, eggs, and vanilla extract until they are beautifully combined and smooth. Pour this mixture into the dry ingredients. Mix on low speed, or gently by hand, just until the batter comes together. You don't want to over-mix here; a few little lumps are perfectly okay. We’re aiming for tenderness, and over-mixing can make the cake tough.
This next step is key. With the mixer on low, or while stirring gently, very carefully pour the hot coffee into the batter. The batter will become quite thin, almost like a soup. Please don't be alarmed! This is exactly right. This thin batter is what creates that incredibly moist and tender crumb we're looking for. Once the coffee is incorporated, stop mixing. Divide the batter evenly between your two prepared cake pans.
Time to bake. Place the pans in the preheated oven and bake for 30-35 minutes. The cakes are done when a wooden skewer or toothpick inserted into the center comes out with a few moist crumbs clinging to it, but no wet batter. Let the cakes cool in the pans on a wire rack for about 15 minutes before carefully inverting them onto the rack to cool completely. And I mean completely! This is so important for frosting.
While your cakes are cooling, let's make the heavenly frosting. In a large bowl, use a hand mixer or stand mixer to beat the softened butter until it's creamy and light, about 2 minutes. Sift in the cocoa powder and powdered sugar, alternating with the milk, and mix on low speed until just combined. Add the vanilla extract and a pinch of salt, then increase the speed to medium-high and beat for 3-5 minutes until the frosting is light, fluffy, and utterly luscious.
Once the cakes are completely cool, it's time to assemble your masterpiece. Place one cake layer on your serving plate or cake stand. Spread a generous amount of frosting over the top, right to the edges. Gently place the second layer on top. Use the remaining frosting to cover the top and sides of the cake. I like to use an offset spatula to create soft, beautiful swirls. It doesn't have to be perfect; the charm is in the homemade touch. Let it sit for a little while before slicing, if you can resist.
Notes & Tips
-
1
Room temperature ingredients are your best friend here, especially for the cake batter. The eggs and buttermilk will incorporate much more smoothly and create a more uniform texture. It’s a small detail that yields a big reward in the final crumb of your cake.
-
2
Don't rush the cooling process. I know it's tempting to frost a warm cake, but it will only lead to a melted, soupy frosting mess. Patience is a key ingredient in baking. Let them cool completely on a wire rack to ensure the air circulates all around them.
-
3
When making the frosting, sifting the powdered sugar and cocoa powder is a step I never skip. It seems fussy, but it guarantees a silky-smooth, lump-free frosting. It takes an extra minute but makes the texture so much more luxurious and professional-feeling.
Tools You'll Need
-
These are essential for creating the classic layer cake shape. I prefer light-colored metal pans, as they conduct heat more evenly and help prevent the edges from getting too dark before the center is cooked.
-
While you can technically make this cake by hand, an electric mixer makes the process so much easier, especially for the frosting. It helps incorporate air, resulting in a lighter cake crumb and a super fluffy, creamy frosting.
-
This is a non-negotiable tool for me. Placing hot cakes on a wire rack allows air to circulate underneath, preventing them from getting soggy as they cool. It's crucial for achieving the perfect texture and preparing them for frosting.
-
This is my favorite tool for frosting a cake. The angled blade makes it so much easier to spread the frosting smoothly and create beautiful swirls without getting your knuckles in the way. It gives your finished cake that lovely, graceful look.
Must-Know Tips
-
Don't Over-mix the Batter: Once you combine the wet and dry ingredients, mix only until you no longer see streaks of flour. Over-mixing develops gluten, which can lead to a tough, dense cake.
-
Use Hot Coffee: The heat of the coffee blooms the cocoa powder, which means it unlocks a deeper, more intense chocolate flavor. It also adds to the cake's signature moisture.
-
Cool Cakes Completely: I can't stress this enough. Frosting a even slightly warm cake will result in melted, runny frosting. Be patient; it's worth the wait for a beautifully finished cake.
Professional Secrets
-
Sift Your Dry Ingredients: Sifting the flour, cocoa powder, and leaveners together aerates them and removes any lumps. This leads to a finer, more tender crumb and ensures everything is evenly incorporated.
-
Bring Ingredients to Room Temperature: Room temperature eggs and buttermilk emulsify better into the batter, creating a smoother, more uniform texture and a better rise. It’s a small step that makes a professional difference.
-
A Pinch of Salt in the Frosting: Don't skip the salt in your frosting! It might seem counterintuitive in something so sweet, but a tiny pinch of salt actually balances the sweetness and enhances the chocolate flavor, making it taste richer.

Recipe by
Sofia BelleSofia bakes with love 🧁💛, sweet smells filling her home 🍪🏡, and flour on her hands 🤲✨. She believes every loaf 🍞 and cake 🎂 tells a story of wa ...
Get Delicious Recipes Weekly
Join 25,000+ home cooks getting our best recipes straight to their inbox.
Free forever • No spam • Unsubscribe anytime