
I remember watching that movie for the first time, curled up on the sofa on a rainy Saturday. The whole world outside was grey, but on screen, there was this monument of a cake. I think that’s when my love for home baking really took root—the idea that you could create something so comforting and joyful right in your own kitchen. Years later, when my own kids discovered the movie, I knew I had to recreate that magic for them. The first time I pulled this cake from the oven, the whole house smelled like a hug. We ate slices of it while they were still a little warm, with big glasses of milk, and it instantly became one of our family favorites. It's more than a recipe; it’s a tradition.
Why You'll Love This Matilda Cake
-
Insanely Decadent Flavor: This isn't your average chocolate cake. The combination of rich cocoa and hot coffee creates a flavor that is deep, dark, and intensely satisfying. It’s the kind of chocolate taste that lingers lovingly on your palate, making you close your eyes for just a second.
-
Unbelievably Moist Crumb: Seriously, the texture is just heavenly. Thanks to the buttermilk and oil, this cake stays moist for days. It has a tender, velvety crumb that feels so luxurious, much like my best banana bread recipe which taught me the magic of moisture.
-
A Dose of Sweet Nostalgia: Making and eating this cake feels like stepping back in time. It brings back all the cozy feelings of childhood and watching a favorite movie. It's a true comfort bake, one of those cozy classics that warms the soul.
-
Surprisingly Simple to Make: For a cake that looks and tastes this epic, you’d think it would be complicated. But honestly, it’s a straightforward, no-fuss recipe. The batter comes together in one bowl, and the frosting is a dream to whip up. It’s pure joy without the stress.
This is the chocolate cake of my dreams—so rich and moist, just like Bruce Bogtrotter's! Absolutely unforgettable.
Essential Ingredient Guide
- Dutch-processed Cocoa Powder: This is the secret to that deep, dark, almost black color and smooth, rich chocolate flavor. Unlike natural cocoa, Dutch-processed cocoa has been treated to neutralize its acidity, resulting in a milder, less bitter taste. It makes the cake feel so much more luxurious and is absolutely worth seeking out. It's the same ingredient that makes my other chocolate cake so special.
- Hot Coffee: Don’t worry, your cake won’t taste like a latte! The coffee’s job here is purely to enhance the chocolate. Hot liquid helps to 'bloom' the cocoa powder, which just means it dissolves the cocoa and brings out its richest flavor notes. You can use hot water, but coffee adds a subtle depth that really makes the chocolate sing. It’s a tiny step that makes a world of difference.
- Buttermilk: Oh, buttermilk, how I love you in baking. The slight acidity in buttermilk works wonders on the texture of this cake. It reacts with the baking soda to create a super light, tender crumb, and it adds a subtle tang that balances the sweetness beautifully. It’s the key to making the cake incredibly moist and keeping it that way for days.
 Sweet Treats
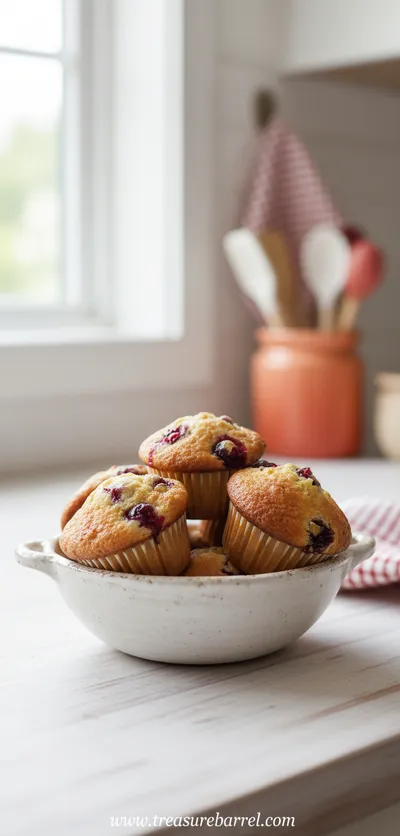
Cranberry Orange Muffins
Tender muffins bursting with orange zest and tart cranberries, ideal for a comforting morning treat.

Complete Cooking Process
-
Gathering and Preparing:
The first step in any baking ritual is the calm gathering of ingredients. I love this part; laying everything out on the counter feels like setting a stage. You’ll measure out your dry ingredients into one bowl—the flour, sugar, cocoa, and leaveners—and the wet into another. This moment of organization is so peaceful and ensures a smooth process. Preparing your pans by greasing and flouring them is another small act of care that promises a perfect release later. It’s these quiet beginnings that make the final product feel so rewarding.
-
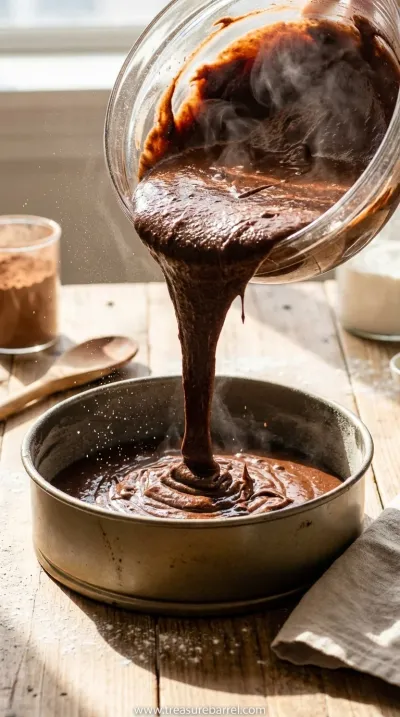
Mixing the Perfect Batter:
This is where the magic starts to happen. You'll combine your wet and dry ingredients, and the batter will seem thick and fudgy. Then comes the secret: slowly streaming in hot coffee. The batter will transform right before your eyes into something thin and liquidy, which can feel a little surprising! But you have to trust it. This is what guarantees that unbelievably moist crumb. The air will fill with the most incredible aroma of deep, rich chocolate and a hint of coffee—it's honestly one of the best smells in the world.
-
Baking and Frosting:
Once baked and cooled, the real fun begins. Whipping up the frosting is so satisfying. Watching the butter, powdered sugar, and cocoa powder transform into a fluffy, glossy, decadent cloud is just pure joy. And, of course, a little taste from the spatula is mandatory! The final assembly, spreading that luscious frosting over the cooled cake layers, is the grand finale. It’s a creative, beautiful process that results in a stunning, completely irresistible cake that looks like it came straight from the movie.
-
Don't Overmix the Batter: Once you combine the wet and dry ingredients, mix only until they're just incorporated. Overmixing develops the gluten in the flour and can make the cake tough.
-
Cool Cakes Completely: I know it's tempting, but please wait until the cake layers are totally cool before frosting. Warm cake will melt the frosting into a soupy mess.
-
Use Room Temperature Ingredients: For the best results, especially with the frosting, make sure your butter, eggs, and buttermilk are at room temperature. This helps them combine seamlessly for a smoother texture.
Pro Tips for Success
These little details make a big difference, transforming a good cake into a truly great one.
 Sweet Treats
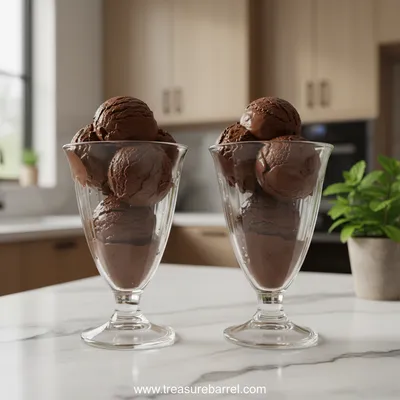
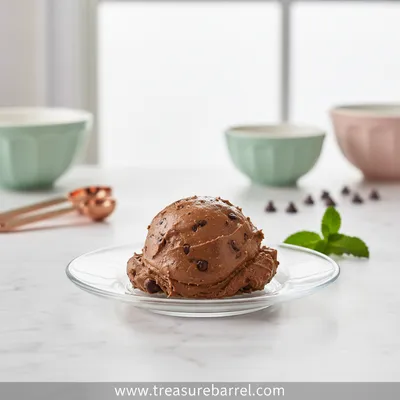
Duo of Chocolate Ice Cream Glasses
Elegant chocolate ice cream duo served in glasses – creamy, refreshing, and utterly satisfying.
Frequently Asked Questions
→ Can I use natural cocoa powder instead of Dutch-processed?
You can, but it will change the cake a bit! Natural cocoa powder is more acidic, so the cake will have a slightly tangier flavor and a lighter, reddish-brown color. Dutch-processed cocoa gives it that classic, deep-dark look and a smoother chocolate taste that I think really makes this cake special. If you do substitute, the texture might be slightly different, but it will still be a delicious chocolate cake.
→ Why coffee? Will my cake taste like coffee?
This is such a great question! The coffee is purely there to be a supportive friend to the chocolate. It doesn't make the cake taste like coffee at all; instead, its dark, roasted notes amplify the cocoa, making the chocolate flavor richer and more complex. If you're really hesitant, you can use hot water instead, and the cake will still be wonderful, but the coffee adds that extra 'wow' factor.
→ Can I make this recipe into cupcakes?
Absolutely! This batter makes wonderful cupcakes. You'll want to line a muffin tin with paper liners and fill them about two-thirds full. The baking time will be much shorter, probably around 18-22 minutes. Just keep an eye on them and use the wooden skewer test to check for doneness. They’re perfect for parties or when you don't want to commit to a whole slice of cake.
→ How do I know when the cake is perfectly baked?
The best way is the toothpick or wooden skewer test. When you insert it into the center of the cake, it should come out with a few moist, sticky crumbs clinging to it. If it comes out completely clean, the cake might be slightly overbaked. If it has wet batter on it, it needs a few more minutes. Also, the sides of the cake will start to gently pull away from the pan, which is another good sign.
→ Is it possible to make this cake ahead of time?
Yes, it’s a great make-ahead cake! You can bake the cake layers a day in advance. Once they are completely cool, wrap them tightly in plastic wrap and store them at room temperature. The frosting can also be made ahead and stored in an airtight container in the refrigerator for up to a week. Just let it come to room temperature and give it a quick whip before frosting the cake.
→ My frosting seems too thin or too thick. How can I fix it?
Frosting consistency can be a little tricky, but it's super easy to adjust! If your frosting is too thin, add more powdered sugar, a tablespoon at a time, until it reaches the desired thickness. If it's too thick, add a little more milk or cream, just a teaspoon at a time, until it’s smooth and spreadable. It's all about finding that perfect, creamy balance.
→ I don't have buttermilk. Can I use something else?
Yes, you can easily make a substitute! For every 1 cup of buttermilk, you can use 1 cup of regular milk mixed with 1 tablespoon of lemon juice or white vinegar. Let it sit for about 5-10 minutes until it looks slightly curdled, and then use it as you would buttermilk. This homemade version provides the necessary acidity to keep the cake tender and moist. For more baking inspiration, check out our full collection of recipes.
Nutrition Facts
per serving
550
Calories
6g
Protein
75g
Carbs
28g
Fat
Taste Profile
Intensely rich and deeply chocolatey with a balanced, satisfying sweetness.
Ingredient Substitutions
Don't have an ingredient? Try these alternatives
Let the milk and acid mixture sit for 5-10 minutes before using. It will curdle slightly and mimic the acidity of buttermilk, which is crucial for the cake's tender texture.
Any neutral-flavored oil will work well to keep the cake moist. I wouldn't recommend olive oil as its flavor can be too strong for this cake.
Recipe Variations
Try these delicious twists on the original
Mexican Chocolate Variation
Add 1 teaspoon of cinnamon and a pinch of cayenne pepper to the dry ingredients for the cake. This adds a lovely warmth and a subtle, surprising kick that pairs beautifully with the deep chocolate flavor.
Mint Chocolate Variation
Add 1 teaspoon of peppermint extract to the frosting along with the vanilla. It creates a classic, refreshing mint-chocolate combination that is absolutely delightful, especially around the holidays. A different kind of treat from my strawberry chocolate cake.
Common Mistakes to Avoid
Learn from others' mistakes for perfect results
- Frosting a warm cake. This is the most common mistake! It will melt your beautiful frosting. Patience is key; wait until the layers are completely cool to the touch.
- Using cold ingredients. Cold buttermilk and eggs don't incorporate as smoothly into the batter, which can affect the final texture. Let them sit out on the counter for a bit first.
- Overbaking the cake. An overbaked chocolate cake can be dry and crumbly. Start checking for doneness a few minutes before the recipe says, as all ovens are a little different.
Meal Prep & Storage
Make Ahead Tips
This cake is perfect for making ahead. The cake layers can be baked, cooled completely, and stored tightly wrapped in plastic wrap at room temperature for up to two days. The frosting can be made and stored in an airtight container in the refrigerator for up to a week. Just let the frosting come to room temperature and give it a good whip with your mixer to make it fluffy again before assembling the cake.
Leftover Ideas
Leftover cake is one of life's simple pleasures. Store it in an airtight container or under a cake dome at room temperature for up to 3 days. I find it’s even more moist and flavorful the next day! You can also crumble leftover slices and layer them with whipped cream and berries for a quick and beautiful trifle. It's a great way to give it a second life, much like how I use up leftover banana bread.
Perfect Pairings
Serve this with...
Cooking Timeline
Preheat oven and prepare cake pans. Whisk together all dry ingredients in a large bowl.
In a separate bowl, whisk wet ingredients (except coffee). Combine wet and dry, then slowly stream in the hot coffee.
Pour batter into pans and bake for 30-35 minutes. Let cool.
While cakes cool, prepare the chocolate frosting by beating butter, cocoa, sugar, milk, and vanilla until fluffy.
Once cakes are completely cool, assemble the layer cake and frost generously.
 Sweet Treats
Edible Cookie Dough: Easy No‑Bake Dessert
Safe, sweet edible cookie dough ready in minutes—no oven needed.
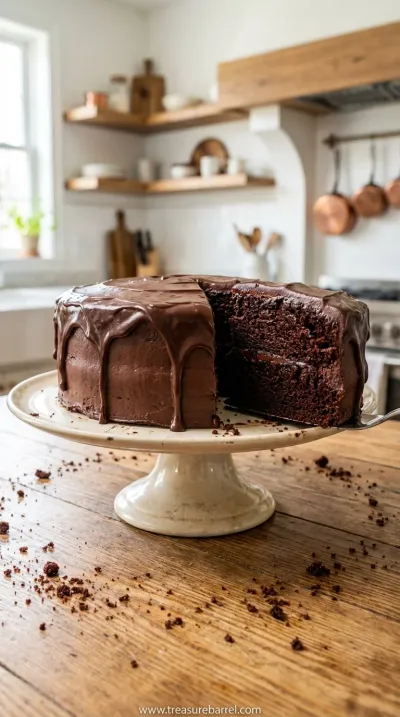
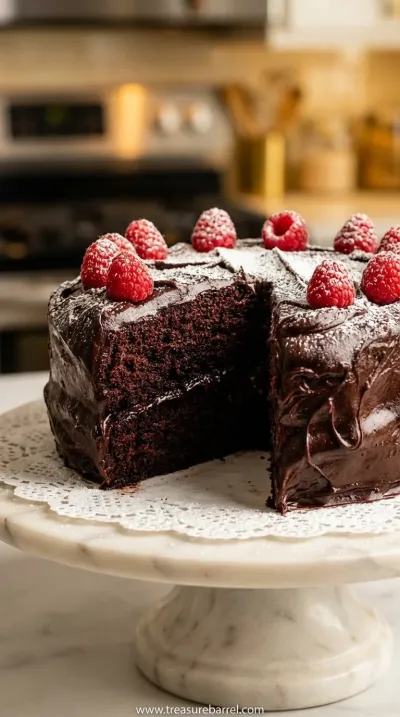
Matilda's Chocolate Cake: Moist & Easy Recipe
Make the famous moist chocolate cake from Matilda! This easy recipe creates a rich, decadent dessert perfect for any occasion.
Timing
Prep Time
20 Minutes
Cook Time
35 Minutes
Total Time
55 Minutes
Recipe Details
Ingredients
For the Chocolate Cake
-
01
2 cups all-purpose flour
-
02
2 cups granulated sugar
-
03
3/4 cup Dutch-processed cocoa powder
-
04
2 teaspoons baking soda
-
05
1 teaspoon baking powder
-
06
1 teaspoon salt
-
07
2 large eggs, at room temperature
-
08
1 cup buttermilk, at room temperature
-
09
1/2 cup vegetable oil
-
10
2 teaspoons vanilla extract
-
11
1 cup freshly brewed hot coffee
For the Rich Chocolate Frosting
-
01
1 cup unsalted butter, softened
-
02
1 1/4 cups Dutch-processed cocoa powder
-
03
4-5 cups powdered sugar, sifted
-
04
1/2 cup milk or heavy cream
-
05
2 teaspoons vanilla extract
-
06
1/4 teaspoon salt
Instructions
First things first, let's create our cozy baking space. Preheat your oven to 350°F (175°C) and get your pans ready. I love the gentle ritual of greasing and flouring two 9-inch round pans; it's like preparing a canvas. In a large bowl, whisk together the flour, sugar, cocoa powder, baking soda, baking powder, and salt. I love this part—the whisper of the whisk and watching the different shades of brown and white swirl together into a uniform, dusty mixture. It smells faintly sweet and full of promise.
Now for the wet ingredients. In a separate bowl, gently whisk together the eggs, buttermilk, oil, and that lovely vanilla extract. The mixture will turn a pale, creamy yellow. I always take a moment to admire how smooth it looks. It's important not to over-mix here, just bring everything together until it's combined. This simple combination is the heart of the cake's moistness, creating a foundation for that tender crumb we're aiming for. It’s a calm, quiet step before the magic really happens.
It's time to bring it all together. Pour the wet ingredients into the bowl with the dry ingredients. Mix on low speed, just until the batter starts to come together—it will be quite thick at this point. Now, with the mixer still on low, slowly and carefully stream in the hot coffee. Oh, be careful, it can splash! The batter will transform into this beautiful, thin, liquidy consistency. It might seem too thin, but trust the process. This is what makes the cake so incredibly moist. The aroma of coffee and chocolate filling the air is just divine.
Carefully divide the gorgeous, dark batter evenly between your prepared pans. I like to use a measuring cup to make sure they're level. Pop them into the preheated oven and bake for about 30-35 minutes. You'll know they're ready when a wooden skewer inserted into the center comes out with a few moist crumbs attached. Let the cakes cool in their pans for about 15 minutes before you gently turn them out onto a wire rack to cool completely. Ugh, the waiting is the hardest part, but it's so important for a cake that doesn't fall apart!
While the cakes are cooling, let's whip up that glorious frosting. In a large bowl, beat the softened butter until it’s creamy and pale. Sift in the cocoa powder and powdered sugar, alternating with the milk, and mix on low speed until it’s all incorporated. Add the vanilla and a tiny pinch of salt, then turn the mixer up to medium-high and beat for a few minutes until the frosting is light, fluffy, and completely irresistible. I mean, you have to taste it, right? Just a little swipe from the spatula.
This is the final, beautiful moment of assembly. Place one cooled cake layer on your serving plate. Scoop a generous amount of frosting on top and spread it evenly, almost to the edges. Gently place the second layer on top. Then, cover the entire cake—top and sides—with the remaining frosting. I like to make soft swirls with the back of a spoon for a rustic, inviting look. Let it set for a bit before slicing into it. Wow, just look at it. It's a masterpiece of chocolatey goodness.
Notes & Tips
-
1
For an extra rich flavor, you can add a cup of dark chocolate chips to the batter before baking. Just toss them in a little flour first so they don't all sink to the bottom. It adds little pockets of melted chocolate that are just heavenly.
-
2
If your frosting gets too warm while you're working with it, just pop the bowl in the refrigerator for 10-15 minutes to help it firm up a bit. This is especially helpful on a warm day!
-
3
This cake is amazing on its own, but a scoop of vanilla bean ice cream or a dollop of fresh whipped cream on the side takes it to a whole new level of indulgence. Sometimes I even add a few fresh berries for a pop of color and freshness.
Tools You'll Need
-
Two 9-inch Round Cake Pans: These are essential for creating the classic layer cake shape. A good quality, heavy-bottomed pan will ensure your cake bakes evenly without the edges getting too dark before the center is cooked.
-
Stand Mixer or Hand Mixer: While you can mix this by hand, an electric mixer makes the process so much easier, especially for the frosting. It helps to incorporate air, making the frosting light and fluffy and ensuring the cake batter is perfectly smooth.
-
Wire Cooling Rack: This is a non-negotiable for me. A wire rack allows air to circulate all around the cakes as they cool, which prevents them from getting soggy on the bottom. It’s a simple tool that makes a huge difference.
-
Offset Spatula: This is my favorite tool for frosting a cake. The angled blade makes it so much easier to get a smooth, even layer of frosting on the top and sides without getting your knuckles in the way. It makes you feel like a professional pastry chef!
Must-Know Tips
-
Sift Your Dry Ingredients: Sifting the flour, cocoa powder, and powdered sugar might feel like an extra step, but it's worth it. It removes lumps and aerates the ingredients, resulting in a smoother batter and a lighter cake crumb.
-
Don't Open the Oven Door: While the cake is baking, resist the urge to peek! Opening the oven door lets heat escape and can cause your cake to sink in the middle. Wait until you're near the end of the baking time to check for doneness.
-
A 'Crumb Coat' is Your Best Friend: For a perfectly polished cake, apply a thin layer of frosting all over the cake first (this is the crumb coat) and then chill it for 20-30 minutes. This traps any loose crumbs so your final layer of frosting will be pristine.

Recipe by
Lila GraceLila creates magical desserts 🍫🧁, sprinkles joy 🌈✨, and shares sweet moments 🍬💖. Her kitchen is full of smiles 😄 and sugar-dusted memories 🍪🍯.
Get Delicious Recipes Weekly
Join 25,000+ home cooks getting our best recipes straight to their inbox.
Free forever • No spam • Unsubscribe anytime