
I remember the first time I made this cake. It was for my daughter’s little garden tea party, one of those sun-drenched Saturday afternoons where everything just felt… perfect. The light was streaming through the kitchen windows, catching the dust motes dancing in the air, and I had a big bowl of ruby-red strawberries from the market. The smell of the chocolate cake baking was mingling with the scent of freshly cut grass from outside. I wanted to make something that looked as magical as the day felt. Seeing her little face, and all her friends' faces, light up when I brought it out—wow, that’s a memory I hold so dear. It’s become one of our family favorites, a cake we turn to for birthdays, for good news, or just because we need a little dose of happiness.
Why You'll Love This Cake
-
Perfect Flavor Pairing: The deep, rich flavor of the dark chocolate cake is the perfect canvas for the bright, sweet, and slightly tart fresh strawberry frosting. It's a classic combination for a reason, and this recipe really lets both flavors shine without one overpowering the other. It’s just this beautiful, elegant balance that feels so satisfying.
-
Unbelievably Moist Texture: This isn't a dry, crumbly cake. Ugh, no. Thanks to a few little secrets, like using buttermilk and oil, the chocolate cake layers are so incredibly tender and moist they practically melt in your mouth. Every bite is just decadent and lush.
-
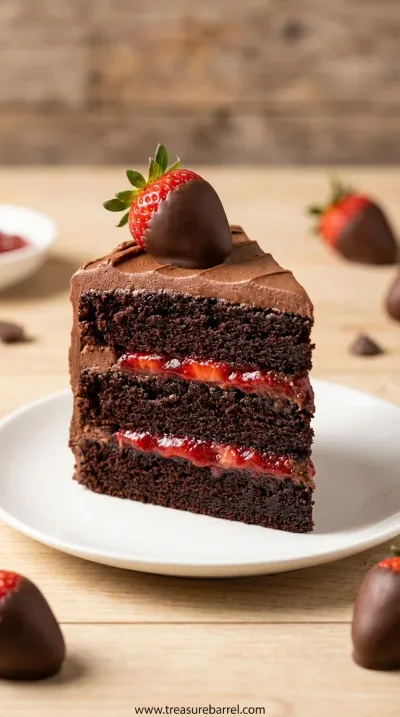
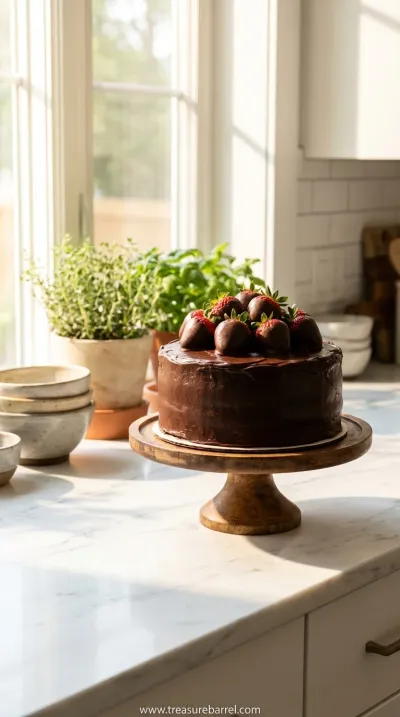
Stunningly Beautiful: Let’s be honest, we eat with our eyes first! The contrast between the dark chocolate cake, the pale pink frosting, and the glossy, chocolate-dipped strawberries on top makes for a truly show-stopping dessert. It looks like it came from a fancy bakery, but honestly, it’s so achievable in your own kitchen.
-
A Joyful Baking Experience: From whisking the batter to smelling the cocoa in the oven and piping the fluffy frosting, this cake is just a joy to make. It’s a wonderful project for a quiet afternoon, a perfect example of the simple pleasures of home baking that can fill your space with warmth and delicious smells.
"This cake is pure magic. The chocolate is so rich and the strawberry frosting is like a cloud. It's my go-to for every special occasion now!"
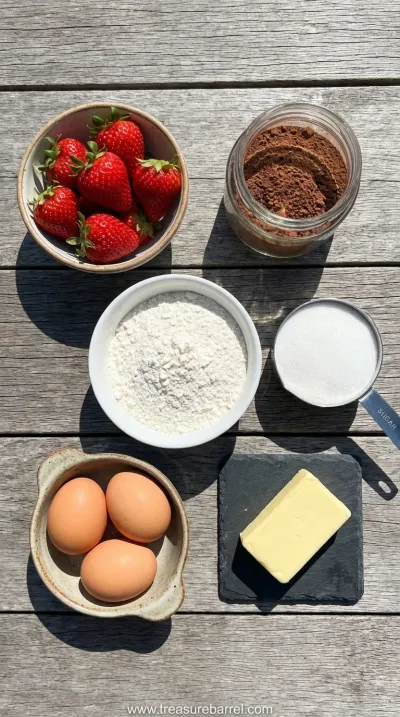
Essential Ingredient Guide
- Good-Quality Cocoa Powder: This is where the deep chocolate flavor comes from, so please, please use the good stuff! I prefer Dutch-processed cocoa powder because it has a smoother, less acidic flavor and gives the cake that beautiful dark color. It really makes a world of difference compared to the standard baking cocoa. When you open the container, it should smell rich and intense, almost like a dark chocolate bar.
- Fresh Strawberries: The star of the frosting! Look for strawberries that are bright red all the way to the top, fragrant, and firm. Avoid any that look bruised or mushy. The flavor of your frosting is completely dependent on the quality of your berries, so taste one before you start! You'll use them both puréed in the frosting and whole for the beautiful garnish on top.
- Bittersweet Chocolate: For dipping the strawberries, you want a chocolate that melts beautifully and has a nice, glossy finish. I recommend a bittersweet or semi-sweet chocolate with around 60-70% cacao. It provides a lovely contrast to the sweetness of the berry and the frosting. Using high-quality chocolate chips or a chopped baking bar will give you a much better result than candy melts, honestly.
 Sweet Treats
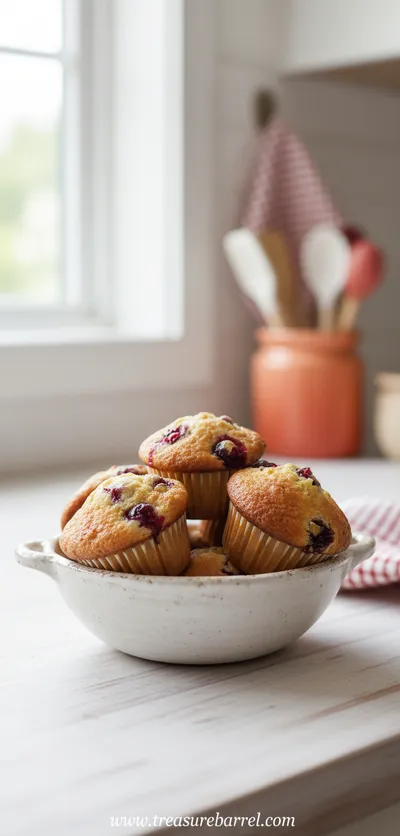
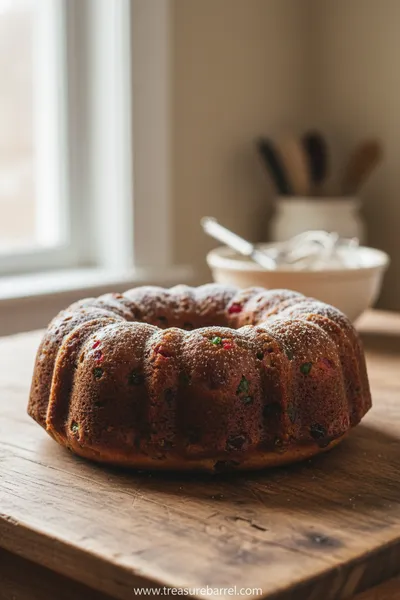
Cranberry Orange Muffins
Tender muffins bursting with orange zest and tart cranberries, ideal for a comforting morning treat.
Complete Cooking Process
-
Preparation:
The first stage is all about gentle preparation and setting the mood. I like to put on some soft music, pull out all my bowls and ingredients, and just take a quiet moment. This is where you'll measure your dry ingredients, whisking them together so they're light and airy. You'll also prepare your strawberries, puréeing some for the frosting and setting aside the prettiest ones for the garnish. It's a calm, methodical process that lays the foundation for a beautiful cake.
-
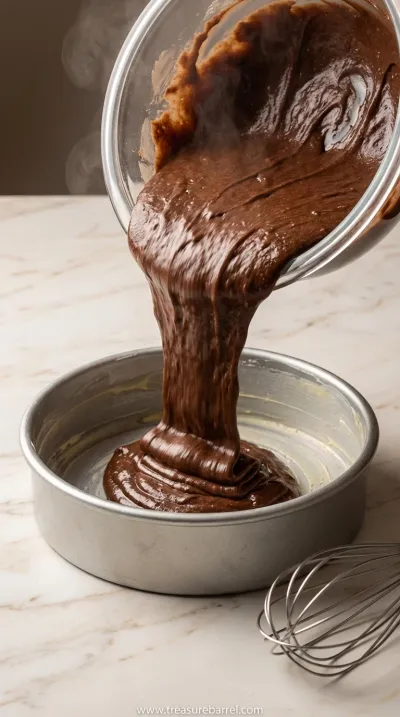
Baking the Chocolate Cake:
Now for the magic. Mixing the wet and dry ingredients for the cake batter is so satisfying—watching it transform into a silky, dark, liquid chocolate. The key here is not to overmix! Then comes the best part: the smell. As the cakes bake, your kitchen will fill with the most incredible, comforting aroma of deep, rich chocolate. It’s honestly one of my favorite parts of the entire process. You're baking not just a cake, but a feeling.
-
Frosting and Assembly:
This is where your inner artist gets to play. Whipping up the strawberry frosting is so fun; you'll watch it turn the most delicate shade of pink as you add the strawberry purée. Once the cakes are completely cool (and this is important!), you'll layer them with generous clouds of that beautiful frosting. The final touch, arranging the chocolate-dipped strawberries on top, is what turns it from a simple cake into a masterpiece. It's a moment of pure creative joy.
-
Make sure all your cold ingredients (eggs, buttermilk) are at room temperature. This helps the batter come together smoothly and bake evenly.
-
Don't overmix the cake batter once you combine the wet and dry ingredients. Mix just until you no longer see streaks of flour.
-
Let your cake layers cool completely before you even think about frosting them. A warm cake will melt your beautiful frosting into a soupy mess. Patience is key!
-
When dipping strawberries, make sure they are completely dry. Water will cause the melted chocolate to seize and become grainy.
Pro Tips
These little details, honestly, are what separate a good cake from a truly great one. It's about the care you put in at every step.
 Sweet Treats
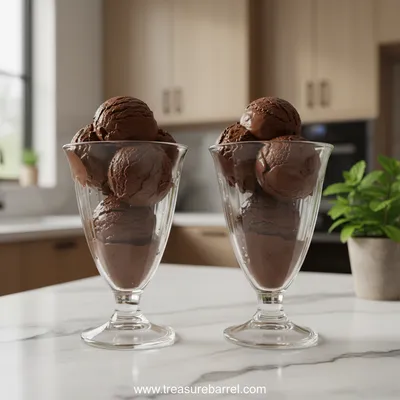
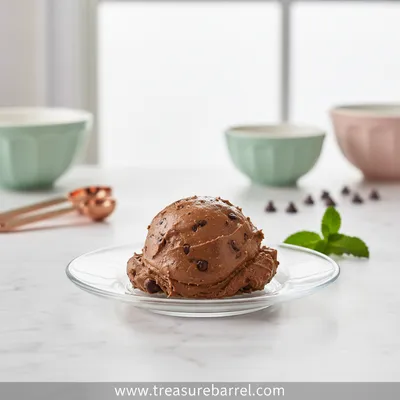
Duo of Chocolate Ice Cream Glasses
Elegant chocolate ice cream duo served in glasses – creamy, refreshing, and utterly satisfying.
Frequently Asked Questions
→ Can I use frozen strawberries for the frosting?
You absolutely can, which makes this cake wonderful year-round! Just make sure to thaw them completely and pat them very, very dry with paper towels to remove as much excess water as possible. You might need to add a little less purée to the frosting to maintain the right consistency, or add a bit more powdered sugar to compensate for the extra moisture. Just add the purée a tablespoon at a time until you reach that perfect fluffy, pipeable texture.
→ How do I prevent my cake from being dry?
Oh, the dreaded dry cake! I have a few tricks up my sleeve. First, using oil instead of butter in the cake batter adds a ton of moisture that lasts for days. Second, buttermilk is a miracle worker; its acidity helps to tenderize the gluten, resulting in a much softer crumb. Lastly, and this is crucial, do not overbake it. Check for doneness with a toothpick a minute or two before the timer goes off. You want moist crumbs to cling to it, not for it to come out bone dry.
→ Can I make this cake ahead of time?
Yes, this cake is perfect for making in stages. You can bake the chocolate cake layers up to two days in advance. Once they've cooled completely, wrap them tightly in plastic wrap and store them at room temperature. The frosting can be made a day ahead and kept in an airtight container in the refrigerator. Just be sure to let it sit out for about 20-30 minutes and give it a good whip to bring it back to a fluffy, spreadable consistency before you assemble the cake.
→ My chocolate seized when I was melting it! What did I do wrong?
Ugh, that is the most frustrating feeling! Seizing usually happens when even a tiny drop of water gets into the melting chocolate. This is why it's so important that your bowl, spatula, and especially your strawberries are bone dry. If it does seize, you can sometimes save it for other uses (though it won't be great for dipping) by stirring in a teaspoon of neutral oil or shortening to smooth it out a bit, but for dipping, it's best to start over, unfortunately.
→ What's the best way to get clean slices of cake?
This is a great question, especially for such a pretty layered cake! For the cleanest slices, I recommend chilling the assembled cake in the refrigerator for at least 30 minutes to an hour. This helps the frosting firm up. Then, use a long, sharp knife. Dip the knife in hot water and wipe it clean with a towel before each and every cut. I know it sounds a little fussy, but it makes a huge difference and gives you those picture-perfect slices.
→ Is there a good substitute for buttermilk?
Definitely! If you don't have buttermilk on hand, it's so easy to make a substitute. For every one cup of buttermilk the recipe calls for, just measure out one cup of regular milk and stir in one tablespoon of either lemon juice or white vinegar. Let it sit on the counter for about 5-10 minutes. It will start to look a little curdled, and that's exactly what you want! It will work perfectly in the cake batter.
→ Could I use a different fruit for the frosting?
Of course! While strawberries and chocolate are a classic, this recipe is wonderfully adaptable. Raspberries would be absolutely divine and would give the frosting an even more vibrant pink color and a lovely tartness. Blackberries or even cherries would also be delicious. Just follow the same process of puréeing the fruit and adding it to the buttercream. It's a fun way to change it up based on what's in season. For other ideas, you can always browse my other recipes for inspiration!
Nutrition Facts
per serving
480
Calories
6g
Protein
60g
Carbs
25g
Fat
Taste Profile
Rich, deep chocolate flavor balanced by sweet, bright, and slightly tart fresh strawberry frosting.
Ingredient Substitutions
Don't have an ingredient? Try these alternatives
For an even lighter, more tender crumb, you can substitute the all-purpose flour with cake flour. Use 2 and 1/4 cups of sifted cake flour in place of the 2 cups of all-purpose flour.
If you don't have buttermilk, you can easily make your own. Just add 1 tablespoon of white vinegar or lemon juice to 1 cup of regular milk, stir, and let it sit for 5-10 minutes before using.
Any neutral-flavored oil will work well here. Melted and slightly cooled coconut oil is a great substitute, as is canola or grapeseed oil. Avoid strong-flavored oils like extra virgin olive oil.
Recipe Variations
Try these delicious twists on the original
White Chocolate Version
For a different kind of decadence, substitute the bittersweet chocolate with good-quality white chocolate for dipping the strawberries and add white chocolate shavings on top of the cake.
Chocolate Strawberry Ganache Drip
Instead of just frosting the sides, leave them semi-naked and pour a rich chocolate ganache over the top, letting it drip artfully down the sides before arranging the strawberries.
Filled Layer Cake
Add a surprise inside by creating a small well in the center of the bottom layer and filling it with finely diced fresh strawberries before placing the top layer on. This is great if you want to make something creative.
Common Mistakes to Avoid
Learn from others' mistakes for perfect results
- Frosting a warm cake. It's the number one cause of frosting disasters. The cake layers must be completely, 100% cool to the touch.
- Overmixing the cake batter after adding the flour. This develops too much gluten and can lead to a tough, dense cake instead of a tender one.
- Not drying the strawberries enough before dipping them in chocolate. Even a tiny bit of moisture will make the chocolate seize up and become a clumpy mess.
- Opening the oven door too often while the cakes are baking. This can cause the temperature to fluctuate and may lead to the cakes sinking in the middle.
Meal Prep & Storage
Make Ahead Tips
This cake is fantastic for planning ahead. The cake layers can be baked, cooled, and wrapped tightly in plastic wrap up to 2 days in advance and stored at room temperature. The strawberry frosting can also be made a day ahead, stored in an airtight container in the fridge. Just let it soften on the counter and re-whip it before using. I'd recommend dipping the strawberries the day you plan to serve for the best look and texture.
Leftover Ideas
Leftover slices are a true gift! Store them in an airtight container in the refrigerator for up to 5 days. I find the cake is almost better the next day as the flavors meld together. Enjoy it cold straight from the fridge or let a slice sit on the counter for 20 minutes to take the chill off. It’s a wonderful treat with morning coffee. You can find more useful information in our articles.
Perfect Pairings
Serve this with...
Cooking Timeline
Preheat oven, prepare pans, and whisk together all dry cake ingredients.
Whisk wet ingredients, combine with dry, and stir in the boiling water.
Pour batter into pans and bake for 30-35 minutes.
While cakes cool, prepare the strawberry frosting and dip the strawberries in melted chocolate.
Once cakes are completely cool, assemble the layers, frost the cake, and decorate with strawberries.
 Sweet Treats
Edible Cookie Dough: Easy No‑Bake Dessert
Safe, sweet edible cookie dough ready in minutes—no oven needed.
Strawberry Chocolate Cake Recipe: Sweet Baking Treat
Learn to make a delicious strawberry chocolate cake with chocolate-covered berries. Perfect sweet treat for any occasion.
Timing
Prep Time
30 Minutes
Cook Time
35 Minutes
Total Time
1 Hour 5 Minutes
Recipe Details
Ingredients
For the Chocolate Cake
-
01
2 cups all-purpose flour
-
02
2 cups granulated sugar
-
03
3/4 cup unsweetened Dutch-processed cocoa powder
-
04
2 teaspoons baking soda
-
05
1 teaspoon baking powder
-
06
1 teaspoon salt
-
07
1 cup buttermilk, room temperature
-
08
1/2 cup vegetable oil
-
09
2 large eggs, room temperature
-
10
1 teaspoon vanilla extract
-
11
1 cup boiling water
For the Fresh Strawberry Frosting
-
01
1 cup unsalted butter, softened
-
02
4-5 cups powdered sugar
-
03
1/2 cup fresh strawberry purée (from about 1 cup of strawberries)
-
04
1 teaspoon vanilla extract
-
05
Pinch of salt
For the Chocolate-Dipped Strawberries
-
01
12 large, beautiful strawberries, washed and dried
-
02
1 cup bittersweet or semi-sweet chocolate chips
Instructions
First, let's get the oven ready and prep our dry ingredients. Preheat your oven to 350°F (175°C) and grease and flour two 9-inch round cake pans. I also like to line the bottoms with parchment paper just to be extra sure nothing sticks. In a large bowl, whisk together the flour, sugar, cocoa powder, baking soda, baking powder, and salt. Whisking is important here; it acts like sifting and makes everything light and airy, preventing dense spots in your cake. Just take a moment to breathe in that lovely cocoa smell.
Now for the wet ingredients. In a separate medium bowl, whisk together the buttermilk, oil, eggs, and vanilla extract until they're nicely combined. Pour the wet mixture into the dry ingredients and mix on low speed with an electric mixer, or by hand with a whisk, just until everything is combined. Be careful not to overdo it! Then, with the mixer on low or while stirring gently, very carefully pour in the cup of boiling water. The batter will be quite thin, but don't worry, that's the secret to a super moist cake. It's what makes this almost as good as my favorite chocolate cake recipe.
Pour the batter evenly between your two prepared pans. I like to use a kitchen scale for this to make sure my layers are perfectly even, but you can just eyeball it. Bake for 30-35 minutes, or until a wooden skewer or toothpick inserted into the center comes out with moist crumbs attached. Let the cakes cool in the pans for about 15 minutes before you carefully turn them out onto a wire rack to cool completely. This part requires a little patience, but it's so important for the frosting stage.
While the cakes cool, let's make the beautiful frosting and garnish. In a large bowl, beat the softened butter until it's creamy and smooth. Gradually add the powdered sugar, one cup at a time, mixing on low until it's incorporated. Then add the strawberry purée, vanilla, and salt, and beat on medium-high speed for a few minutes until it’s light, fluffy, and a beautiful pale pink. For the garnish, melt your chocolate chips and dip your dry strawberries, placing them on a parchment-lined plate to set. Once the cakes are cool, frost the first layer, add the second, and frost the entire cake before arranging your chocolate-dipped strawberries on top. Voila!
Notes & Tips
-
1
Room temperature ingredients are truly key for a smooth batter and an even bake. I usually set my eggs and buttermilk on the counter about an hour before I plan to start baking. It feels like a small thing, but it makes a huge difference in the final texture of the cake.
-
2
Be so, so careful when adding the boiling water to the cake batter. It can splash, so pour it in a slow, steady stream. This technique is called a 'hot water bloom' for the cocoa, and it's what creates that incredibly rich, deep chocolate flavor. It's a little trick that elevates the whole cake.
-
3
When you're making the strawberry purée, you can either use a blender or a small food processor. I sometimes just mash them really well with a fork if I want a slightly more rustic texture in the frosting with tiny bits of berry. It’s all about the mood you’re in!
Tools You'll Need
-
Two 9-inch Round Cake Pans: These are essential for creating the classic layered cake shape. I prefer light-colored metal pans, as they conduct heat more evenly and help prevent the edges from getting too dark before the center is cooked.
-
Electric Mixer (Stand or Handheld): While you can mix the cake batter by hand, an electric mixer is a lifesaver for making the frosting. It helps whip enough air into the butter and sugar to create that light, fluffy texture we're looking for.
-
Wire Cooling Rack: This is non-negotiable for cooling cakes properly. It allows air to circulate all around the cake layers, which prevents them from getting soggy on the bottom as they release steam. It’s a simple tool that makes a big impact.
-
Offset Spatula: An offset spatula is your best friend when it comes to frosting a cake. The angled blade makes it so much easier to get a smooth, even layer of frosting on the top and sides without getting your knuckles in it. It just makes the whole process feel more graceful.
Must-Know Tips
-
Don't skip the parchment paper! Lining the bottom of your cake pans makes it foolproof to remove your cake layers without any heartbreaking sticking or tearing.
-
Let your cakes cool COMPLETELY. I know I've said it before, but it bears repeating! Frosting a warm cake will lead to a melted, sliding mess. It's worth the wait, I promise.
-
Taste your frosting as you go. The sweetness of strawberries can vary. Start with less powdered sugar and add more as needed to get the perfect balance of sweetness and strawberry flavor.
Professional Secrets
-
Use a 'cake strip' for even layers. If you often get domed cakes, you can buy or make cake strips. Just soak strips of fabric in water, wring them out, and wrap them around the outside of your cake pans. This insulates the sides, forcing the cake to rise more evenly.
-
Do a 'crumb coat'. For a perfectly smooth, professional-looking finish, apply a very thin layer of frosting all over the cake first. This traps all the loose crumbs. Chill the cake for 20-30 minutes, and then apply your final, beautiful layer of frosting. No crumbs in sight!
-
Use a kitchen scale. For perfectly even cake layers, weigh your batter as you divide it between the pans. It’s a small step that makes your final cake look so much more polished and professional.

Recipe by
Lila GraceLila creates magical desserts 🍫🧁, sprinkles joy 🌈✨, and shares sweet moments 🍬💖. Her kitchen is full of smiles 😄 and sugar-dusted memories 🍪🍯.
Get Delicious Recipes Weekly
Join 25,000+ home cooks getting our best recipes straight to their inbox.
Free forever • No spam • Unsubscribe anytime