
I remember the first time I attempted tiramisu - I was maybe 22, fresh out of college, trying to impress my then-boyfriend's Italian family. Ugh, what a mess I made! The ladyfingers were mushier than overcooked pasta, and I swear I used enough coffee to wake a bear from hibernation. But his nonna smiled gently and taught me her secret - patting them just lightly enough to absorb the coffee without turning to paste.
Over the years, I've made this recipe for birthdays, holidays, and even just because-Tuesdays. There's something deeply satisfying about building those perfect layers - like creating a delicious little architectural masterpiece. My kids now know that when they smell coffee brewing mid-afternoon, dessert is going to be something special.
I've learned that the best tiramisu isn't about fancy techniques or expensive ingredients. It's about that moment when you dive your spoon through the cocoa-dusted surface and hit that perfect balance of creamy, coffee-soaked goodness. So yeah, now I make it my way - imperfectly perfect, just like life.
Why You'll Love It
-
No-bake magic - Honestly, who wants to turn on the oven when you can create something this spectacular without it? I love that I can whip this up while dinner's cooking and have dessert ready without heating up the whole kitchen. It's perfect for those hot summer evenings when you're craving something sweet but don't want to sweat over a stove.
Plus, there's something so satisfying about building those layers - it feels like you're creating a little piece of edible art.
-
Crowd-pleasing perfection - Look, I've served this to everyone from my picky nephew to my gourmet-foodie friend, and honestly? They all come back for seconds. There's something universally comforting about that coffee-and-cream combination that just makes people happy. Even my husband, who claims he doesn't like dessert, always manages to 'sneak' an extra spoonful.
The best part is watching everyone's faces light up when you bring it to the table - it's like you've presented them with a little piece of Italy.
-
Make-ahead magic - Oh my goodness, this is my favorite part. You can make this the day before, stash it in the fridge, and just pull it out when you need it. Actually, it's even better after it's had time to mellow overnight. The flavors just melt into each other and become this incredible harmony of creamy, coffee-kissed goodness.
So yeah, when I'm hosting and feeling stressed, this is my go-to. One less thing to worry about on the actual day.
My family demands this tiramisu at every holiday now! The creamy layers just melt in your mouth.
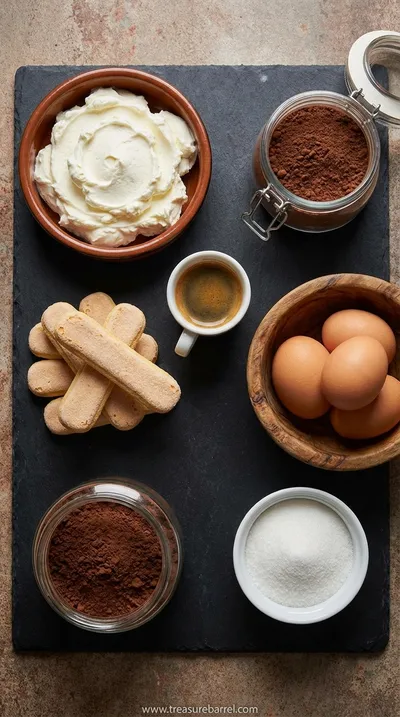
Essential Ingredient Guide
- Mascarpone Cheese: Oh, mascarpone - that glorious Italian cream cheese that makes tiramisu what it is. Here's the thing: you want it at room temperature, but not too warm. If it's cold from the fridge, it won't whip up properly, but if it gets too warm, it can separate. I usually take it out about 30 minutes before I start. And please, don't substitute regular cream cheese - the texture and flavor just won't be the same. Mascarpone has this delicate, slightly sweet creaminess that's absolutely essential to authentic tiramisu.
- Ladyfinger Cookies: These delicate little cookies are the foundation of your tiramisu. You want the dry, crunchy kind - not the soft ones. The beauty is they soak up just the right amount of coffee without turning to mush. When dipping, I use tongs and just give them a quick dunk - literally 1-2 seconds per side. Any longer and they'll absorb too much liquid and become soggy. It's that perfect balance between soft and structured that makes magical layers.
- Espresso Coffee: Freshly brewed espresso makes all the difference here. I know it's tempting to use instant coffee, but honestly? The depth of flavor you get from real espresso is just incomparable. I brew mine strong and let it cool completely before dipping. If you don't have an espresso machine, you can use very strong brewed coffee - just make it about twice as strong as you'd normally drink. The coffee flavor mellows as it chills, so don't worry if it tastes a bit bitter at room temperature.
 Warm Meals
Garlic Steak Tortellini – A Warm Classic
Steak meets garlic‑kissed tortellini in a creamy, herb‑filled sauce for a cozy night in.
Complete Cooking Process
-
Preparation:
Alright, let's get everything ready - this is my favorite part because it feels like gathering little treasures. First, I line up my ingredients: the mascarpone softening on the counter, eggs separated into two bowls, sugar measured out. Honestly, there's something so calming about this organized chaos.
I brew the espresso and let it cool completely - this is crucial because hot coffee will cook the eggs. While that's happening, I whip the egg yolks with sugar until they're pale and ribbon-like. Wow, that transformation is magical - from bright yellow to this creamy, almost-white froth.
Then comes the mascarpone - I fold it in gently, trying to keep as much air as possible. The key is patience here - rushing will deflate all that beautiful fluffiness we worked so hard for.
-
Assembly:
Okay, here's where the magic happens. I take my favorite clear glass dish - I love seeing the beautiful layers. The cooled espresso goes into a shallow bowl, and I start dipping those ladyfingers. Quick dips only - in and out, like they're taking a very brief coffee bath.
I arrange them in a single layer, then spread half the mascarpone mixture over them. Another layer of dipped ladyfingers, then the rest of the cream. Honestly, it's like building a delicious little sandwich of happiness.
The final touch is a generous dusting of cocoa powder. I use a fine-mesh sieve to get that perfect, snowy coating. Then it's off to the fridge for its beauty sleep - at least 6 hours, but overnight is even better.
-
Room temperature is key - Cold mascarpone won't whip properly and can cause the cream to break. I take mine out about 30 minutes before starting.
-
Quick-dip ladyfingers - Seriously, 1-2 seconds per side max! They continue absorbing liquid as they sit.
-
Chill thoroughly - This isn't optional - the flavors need time to meld together beautifully.
Pro Tips
Follow these simple tips and you'll have perfect tiramisu every time!
 Cozy Classics
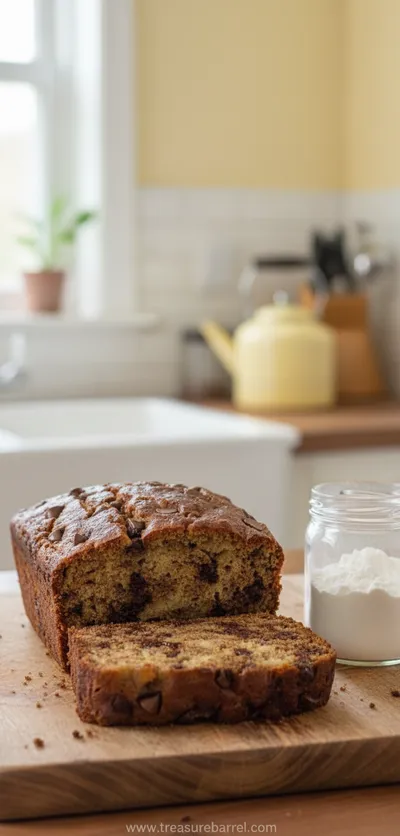
Easy Chocolate Chip Banana Bread
Moist chocolate chip banana bread, quick to bake, perfect for cozy breakfasts.
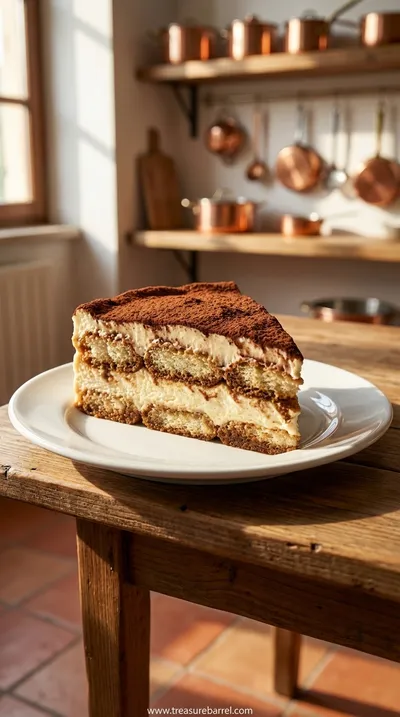
The Secret to Perfect Layers
You know what makes tiramisu truly special? Those distinct, beautiful layers that hold their shape but melt together in your mouth. It's all about balance - the coffee soak, the cream density, the resting time.
I've learned that the first layer of ladyfingers should be arranged snugly but not overcrowded. Leave little gaps - they'll expand as they absorb moisture. And when spreading the cream, use a light touch - don't press down or you'll squeeze out the air we whipped in.
The second layer gets the same treatment, but I like to make it a bit thicker with cream. Then that final cocoa dusting - it's not just for looks. It adds a slight bitterness that cuts through the sweetness perfectly.
You Must Know
-
Use pasteurized eggs for safety if you're concerned about raw eggs
-
Chill for minimum 6 hours - patience is rewarded here
-
Dust cocoa powder right before serving for the freshest look
Frequently Asked Questions
→ Can I make this ahead of time?
Oh my goodness, yes! Actually, tiramisu is one of those rare desserts that's actually better when made ahead. The flavors have time to meld together beautifully, and the texture becomes more cohesive. I typically make mine the day before I plan to serve it.
The minimum chilling time is about 6 hours, but honestly? Overnight is perfect. Just make sure you cover it well with plastic wrap so it doesn't absorb any fridge odors. And wait to dust with cocoa powder until right before serving - that way it stays fresh and doesn't get soggy.
→ What if I can't find mascarpone cheese?
Hmm, this is tricky because mascarpone really is the star of the show. However, in a pinch, you could mix 8 ounces of softened cream cheese with 1/4 cup heavy cream and 2 tablespoons sour cream. It won't be exactly the same - the flavor will be tangier and the texture less delicate - but it'll work.
That said, I really encourage you to seek out real mascarpone. Most larger grocery stores carry it these days, usually in the specialty cheese section. It's worth the extra trip, I promise!
→ How long does tiramisu last in the fridge?
I find it's best within 2-3 days. After that, the ladyfingers can start to get a bit too soft and the texture changes. But honestly? It rarely lasts that long in my house! My family starts hovering around the fridge after day one.
If you do have leftovers, make sure they're tightly covered. The cocoa powder on top might get a little damp, but you can always give it a fresh dusting before serving again. It won't be quite as perfect as day one, but still delicious.
→ Can I make this without raw eggs?
Absolutely! Food safety first, especially if you're serving to young children, elderly folks, or anyone with a compromised immune system. You can gently cook the egg yolks with the sugar over a double boiler until they reach 160°F, then cool completely before proceeding.
Alternatively, many grocery stores now sell pasteurized eggs, which are perfectly safe to use raw. Or you could substitute the egg yolk mixture with stabilized whipped cream - though the flavor will be different, it'll still be creamy and delicious.
→ What's the best way to dip the ladyfingers?
Okay, this is one of those things I learned the hard way! You want to work quickly but gently. I use kitchen tongs to dip each ladyfinger - just a quick in-and-out motion, about 1-2 seconds per side maximum.
The goal is to moisten them without saturating them. They'll continue absorbing liquid as they sit in the dish, so err on the side of too dry rather than too wet. If they get too soggy, your tiramisu layers will be mushy instead of beautifully defined.
→ Can I freeze tiramisu?
Honestly, I don't recommend freezing traditional tiramisu. The texture changes quite a bit when thawed - the cream can separate and become grainy, and the ladyfingers turn unpleasantly soggy. It's really best enjoyed fresh from the fridge.
If you need to make dessert ahead for longer storage, I'd suggest something like banana bread which freezes beautifully. But for tiramisu, it's worth making it closer to when you plan to serve it.
→ What type of cocoa powder should I use?
I prefer Dutch-processed cocoa powder for tiramisu because it has a richer, darker color and smoother flavor. Regular natural cocoa powder can be a bit more acidic and bitter.
Whatever you use, make sure it's unsweetened! And sift it through a fine-mesh sieve for that beautiful, snow-like dusting on top. The visual contrast of dark cocoa against the white cream is part of what makes tiramisu so stunning.
→ Can I add other flavors to my tiramisu?
While traditional tiramisu is perfect as-is, I've seen some lovely variations. A bit of orange zest in the mascarpone cream adds a lovely brightness. Some people like a splash of vanilla extract. Or you could dust with chocolate shavings along with the cocoa.
That said, I'd recommend mastering the classic first before experimenting. There's something so perfect about the simplicity of coffee, cream, and cocoa that you might find you don't want to change a thing!
Nutrition Facts
per serving
380
Calories
7g
Protein
35g
Carbs
24g
Fat
Taste Profile
Creamy coffee sweetness with cocoa balance
Ingredient Substitutions
Don't have an ingredient? Try these alternatives
Mix 8oz cream cheese with 1/4 cup heavy cream and 2 tbsp sour cream
Slice thin and dip lightly - texture will be different but still delicious
Recipe Variations
Try these delicious twists on the original
Chocolate Tiramisu
Add chocolate shavings between layers and use chocolate-covered ladyfingers for extra richness
Berry Tiramisu
Layer fresh berries between the cream and cookie layers for a fruity twist
Common Mistakes to Avoid
Learn from others' mistakes for perfect results
- Over-dipping ladyfingers - leads to mushy layers
- Using cold mascarpone - doesn't incorporate properly
- Not chilling long enough - flavors don't meld properly
- Overmixing the cream - becomes dense instead of light
- Dusting cocoa too early - gets damp and loses freshness
Meal Prep & Storage
Make Ahead Tips
Tiramisu is the ultimate make-ahead dessert! In fact, it's better when made at least 6 hours in advance, and ideally overnight. The flavors need time to meld together and the texture improves with resting. You can assemble it completely up to 24 hours before serving. Just wait to dust with cocoa powder until right before you bring it to the table. This keeps the cocoa fresh and prevents it from getting damp from condensation. If you're really planning ahead, you could even prep the components separately - brew the coffee and make the cream a day early, then assemble the day of serving.
Leftover Ideas
Leftover tiramisu (if you're lucky enough to have any!) keeps well covered in the refrigerator for 2-3 days. The texture will continue to soften, but it remains delicious. You might notice the cocoa powder gets a bit damp - you can always give it a fresh dusting before serving again. The flavors actually deepen over time, making day-two tiramisu a special treat. I don't recommend freezing as the texture changes dramatically. If you have more than you can eat in a few days, consider sharing with neighbors or friends - it makes a wonderful gift!
Perfect Pairings
Serve this with...
Cooking Timeline
Brew coffee and refrigerate to cool completely
Make cream, assemble tiramisu, refrigerate
Dust with cocoa powder, slice, and serve
 Sweet Treats
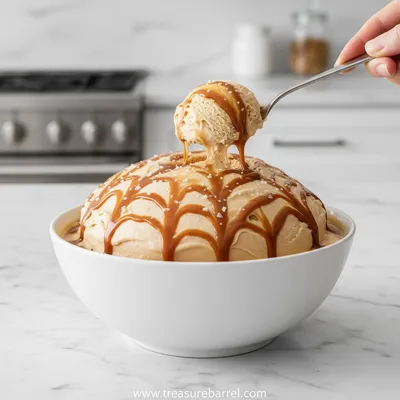
Salted Caramel Ice Cream Recipe
Silky salted caramel ice cream using the Ninja Creami – sweet, buttery, and perfectly salty.
Italian Tiramisu Recipe: Easy Homemade Dessert
Make creamy Italian tiramisu cake at home with this easy recipe.
Timing
Prep Time
30 Minutes
Cook Time
0 Minutes
Total Time
6 Hours 30 Minutes
Recipe Details
Ingredients
For the Cream
-
01
3 large egg yolks, room temperature
-
02
1/2 cup granulated sugar
-
03
1 cup mascarpone cheese, room temperature
-
04
1 cup heavy cream, chilled
-
05
1 teaspoon vanilla extract
For Assembly
-
01
24-30 ladyfinger cookies (savoiardi)
-
02
1 1/2 cups strong brewed espresso or coffee, cooled
-
03
2 tablespoons cocoa powder for dusting
Instructions
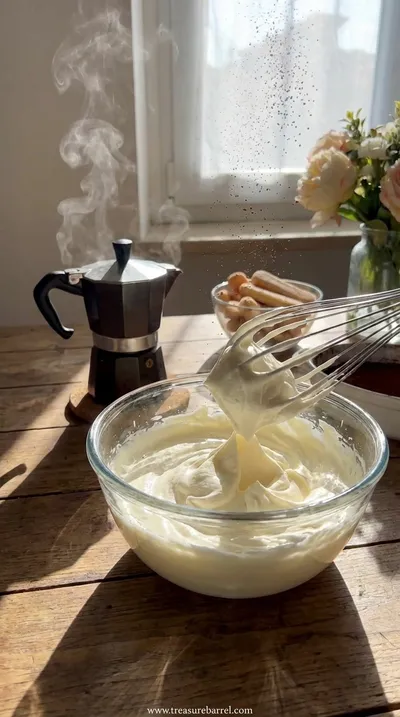
First, let's make that glorious mascarpone cream. In a large bowl, whisk the egg yolks and sugar together until they're pale yellow and thick. I use my hand mixer on medium-high - you'll know it's ready when the mixture forms ribbons that slowly disappear back into the bowl. This usually takes about 5 minutes, and honestly? It's kind of therapeutic watching that transformation happen.
Then add the room-temperature mascarpone and vanilla. Fold it in gently with a spatula - we want to keep as much air as possible. Once it's combined, set it aside while we whip the cream separately. Oh, the anticipation!
Now for the heavy cream - make sure it's nice and cold from the fridge. Whip it in a separate bowl until stiff peaks form. This means when you lift the whisk, the cream stands up straight without drooping. Be careful not to overwhip though, or it'll turn grainy and buttery.
Gently fold the whipped cream into the mascarpone mixture until just combined. Don't overmix! We want to keep that light, airy texture. Honestly, this cream is so dreamy I sometimes have to stop myself from eating it with a spoon right then and there.
Time to assemble! Pour your cooled espresso into a shallow dish. Working quickly, dip each ladyfinger cookie - just 1-2 seconds per side. They should be moist but not dripping. Arrange them in a single layer in your serving dish. I like to use a 9x9 inch dish, but any similar size works.
Spread half the mascarpone cream over the ladyfingers, making sure to cover them completely. Then repeat with another layer of dipped cookies and the remaining cream. Smooth the top with a spatula - it doesn't have to be perfect, just even.
Finally, the grand finale! Cover the dish with plastic wrap and refrigerate for at least 6 hours, but overnight is even better. This waiting period is crucial - it allows the flavors to meld and the ladyfingers to soften perfectly.
Right before serving, dust the top generously with cocoa powder using a fine-mesh sieve. This gives it that classic finished look. Slice and serve cold - each bite should have a little bit of every layer. Wow, just thinking about that first spoonful makes me smile.
Notes & Tips
-
1
Make sure all ingredients are at room temperature except the heavy cream - that should be cold for best whipping results.
-
2
If your mascarpone cream seems too soft after mixing, chill it for 15-20 minutes before assembling - this will help it hold its shape better.
-
3
Use a clear glass dish if possible - seeing those beautiful layers is half the fun of serving tiramisu!
-
4
The ladyfingers will continue absorbing moisture as they chill, so don't worry if they seem a bit firm when you first assemble - they'll soften perfectly.
 Sweet Treats
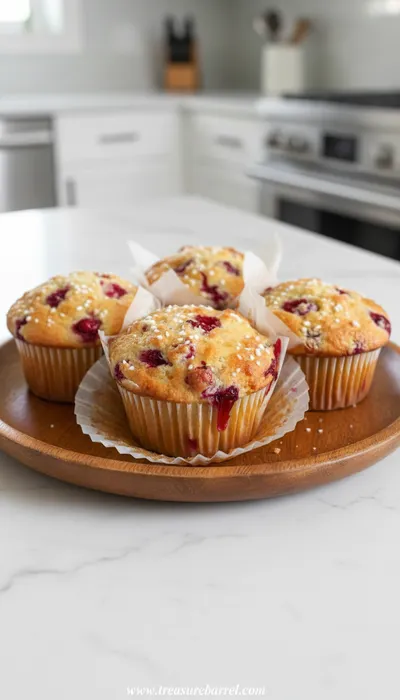
Cranberry and Orange Yogurt Muffins
Bright cranberry‑orange muffins with a soft yogurt crumb and a whisper of citrus.
Tools You'll Need
-
Large mixing bowls - I like to have two ready, one for the egg mixture and one for whipping cream
-
Hand mixer or stand mixer - you could whisk by hand, but it would take forever and your arm would be so tired
-
9x9 inch baking dish or similar - clear glass shows off those beautiful layers
-
Fine-mesh sieve - for that perfect cocoa powder dusting
-
Shallow bowl - for dipping the ladyfingers quickly and evenly
-
Rubber spatula - for gentle folding to keep the cream light and airy
Must-Know Tips
-
Don't over-dip the ladyfingers - Quick dips only! They continue absorbing liquid as they chill
-
Fold gently - Overmixing deflates the cream and makes it dense instead of light
-
Chill thoroughly - This isn't optional - the flavors need time to become friends
Professional Secrets
-
Room temperature mascarpone - Cold mascarpone won't incorporate properly and can cause the cream to break
-
Whip cream separately - This creates more volume and a lighter final texture
-
Use pasteurized eggs - For safety and peace of mind, especially when serving to vulnerable groups

Recipe by
Lila GraceLila creates magical desserts 🍫🧁, sprinkles joy 🌈✨, and shares sweet moments 🍬💖. Her kitchen is full of smiles 😄 and sugar-dusted memories 🍪🍯.
Get Delicious Recipes Weekly
Join 25,000+ home cooks getting our best recipes straight to their inbox.
Free forever • No spam • Unsubscribe anytime