
The concept of a frozen dessert without a churn dates back to early 20th‑century home cooks who relied on simple hand‑whipping techniques. By combining dairy with cold temperatures, they created a treat that was both accessible and indulgent, paving the way for modern no‑cook recipes that delight families today.
Why You'll Love It
-
- No special equipment needed, just a bowl and freezer.
-
- Ready in under 20 minutes, perfect for spontaneous cravings.
-
- Creamy texture achieved through gentle folding, not harsh churn.
-
- Versatile base that welcomes countless flavor twists.
"I tried this and my kids begged for seconds—so simple, yet so satisfying!"
Essential Ingredient Guide
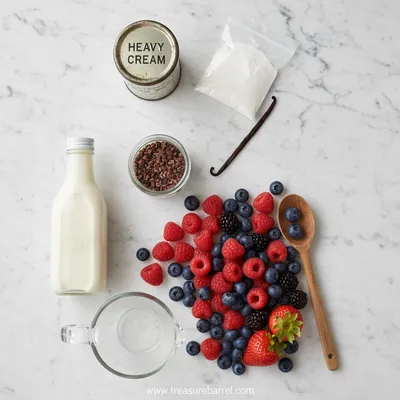
- Heavy Cream: Choose a fresh, high‑fat cream for richness; it carries the flavor and creates a buttery mouthfeel.
- Whole Milk: Adds fluidity; balance with the cream to avoid heaviness while keeping it velvety.
- Granulated Sugar: Dissolves easily; you can adjust sweetness or swap for honey for a floral note.
- Vanilla Extract: A tiny splash adds depth—use real vanilla for aroma that lingers.
- Lemon Juice: Just a teaspoon brightens the mixture, enhancing the perceived sweetness.
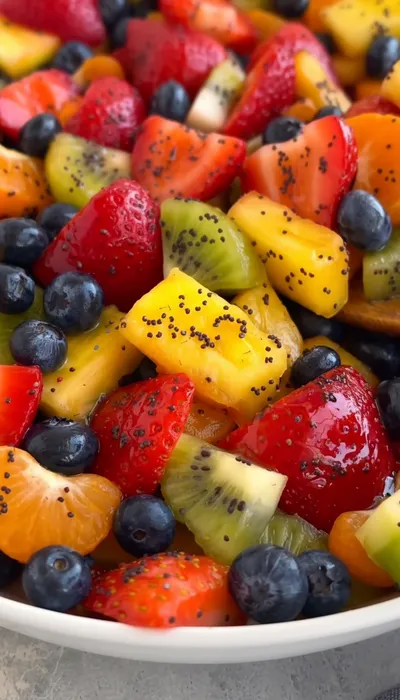
- Optional Mix‑ins (berries, chocolate chips, nuts): Fold in after the base firms; they keep their texture without melting the ice cream.
 Warm Meals
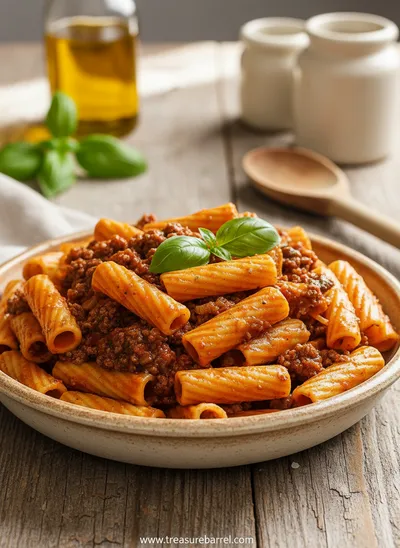
Beef Ragu Pasta Recipe in Tomato Sauce
A rich and hearty pasta dish with slow-cooked beef ragu in a savory tomato sauce.
Complete Cooking Process
-
Ingredient Readiness:
Measure and chill all components; cold ingredients combine more smoothly.
-
Flavor Development:
Whisk cream, milk, sugar, vanilla, and lemon until sugar dissolves, then let sit.
-
Texture Control:
Freeze the mixture, stirring every few minutes to break ice crystals and keep it creamy.
-
Finishing Touches:
Fold in your chosen mix‑ins just before the final freeze for bursts of flavor.
-
Serving Timing:
Serve after 15‑20 minutes in the freezer; the ice cream should be soft‑serve consistency.
-
Cover the bowl with plastic wrap touching the surface to prevent ice crystals.
-
Use a metal bowl for quicker chilling.
-
Stir gently in a figure‑eight motion for even texture.
-
Taste before freezing; adjust sugar or vanilla now.
Pro Tips
Well, these little adjustments make a world of difference. I’ve found that a simple plastic‑wrap lid keeps the mixture from forming a hard crust, and a quick taste before the freeze means you won’t be surprised by the final sweetness. So, go ahead, trust your senses and enjoy the process.
The essence of the dish:
It’s essentially a silky custard turned icy, relying on the natural fats of cream and the gentle chill of a freezer to create a luxurious texture without any churn.
A fun fact or historical angle:
Early home cooks would whisk frozen cream mixtures over ice, a practice that evolved into today’s effortless no‑cook versions.
Flavor or sensory focus:
You’ll notice the buttery smoothness on the palate, a faint vanilla perfume, and a cool, refreshing finish that soothes without being icy.
You Must Know
-
Keep everything cold before mixing.
-
Stir gently, not vigorously.
-
Add mix‑ins after the base firms.
Frequently Asked Questions
→ Can I use dairy‑free milk?
Absolutely—coconut milk or almond milk works, just expect a slightly different mouthfeel.
→ How long can I store it?
Keep it sealed in the freezer for up to a week; let it soften for a few minutes before serving.
→ Do I need an ice cream maker?
Nope, the method relies on manual stirring during the freezing process.
→ What flavors can I try?
Anything you love—try a almond milk base, fresh fruit purées, or a hint of espresso.
→ Can I add alcohol?
We recommend skipping it here; alcohol can prevent proper freezing.
→ Is this recipe kid‑friendly?
Yes, it’s simple, quick, and free from raw eggs, making it safe for little hands.
Nutrition Facts
per serving
250
Calories
3g
Protein
20g
Carbs
18g
Fat
Taste Profile
A smooth, buttery sweetness with a subtle vanilla aroma.
Ingredient Substitutions
Don't have an ingredient? Try these alternatives
Provides a dairy‑free richness; may add a faint coconut flavor.
Adds a subtle caramel note; reduce quantity slightly.
Recipe Variations
Try these delicious twists on the original
Spicy Version
Add a pinch of cayenne and swirl in caramel for a warm‑cool contrast.
Mediterranean Style
Fold in chopped figs, pistachios, and a drizzle of honey for a fragrant twist.
Common Mistakes to Avoid
Learn from others' mistakes for perfect results
- Leaving the mixture uncovered, leading to ice crystals.
- Stirring too aggressively, which can create a grainy texture.
- Adding mix‑ins too early, causing them to become soggy.
Meal Prep & Storage
Make Ahead Tips
You can whisk the base and store it in the refrigerator for up to 24 hours; just give it a good stir before freezing.
Leftover Ideas
Scoop into a saucepan, warm gently over low heat, and serve as a sauce over warm cake.
Perfect Pairings
Serve this with...
Cooking Timeline
Gather and chill all ingredients, whisk until sugar dissolves.
Place mixture in freezer, stir every few minutes to break ice crystals.
Continue stirring until thickened, then fold in optional mix‑ins.
Final freeze for a firmer texture, then serve.
 Warm Meals
Garlic Steak Tortellini – A Warm Classic
Steak meets garlic‑kissed tortellini in a creamy, herb‑filled sauce for a cozy night in.

No-Cook Homemade Ice Cream
A quick, velvety no‑cook homemade ice cream that comes together in minutes, perfect for a warm summer evening or a sudden craving for something sweet and cool.
Timing
Prep Time
10 Minutes
Cook Time
0 Minutes
Total Time
20 Minutes
Recipe Details
Ingredients
Base
-
01
2 cups heavy cream
-
02
1 cup whole milk
-
03
1/3 cup granulated sugar
-
04
1 tsp vanilla extract
-
05
1 tsp fresh lemon juice
Optional Mix‑ins
-
01
1/2 cup fresh berries
-
02
1/4 cup mini chocolate chips
-
03
2 tbsp chopped toasted nuts
Instructions
In a large bowl, whisk together heavy cream, milk, sugar, vanilla, and lemon until the sugar dissolves completely.
Cover the surface of the mixture with a piece of plastic wrap, pressing it directly onto the liquid to stop ice crystals forming.
Place the bowl in the freezer. After 5 minutes, stir gently with a spatula, scraping the edges.
Repeat the stirring every 5‑7 minutes for about 15 minutes, until the mixture thickens and feels creamy.
Fold in any optional mix‑ins, then freeze for another 5 minutes for a firmer texture.
Scoop into bowls, garnish if desired, and enjoy immediately.
Notes & Tips
-
1
If the mixture feels too thick, let it sit at room temperature for a minute before scooping.
-
2
For a richer flavor, use a splash of vanilla ice cream essence.
-
3
Experiment with a handful of paleo vanilla berries for a nut‑free twist.
 Cozy Classics
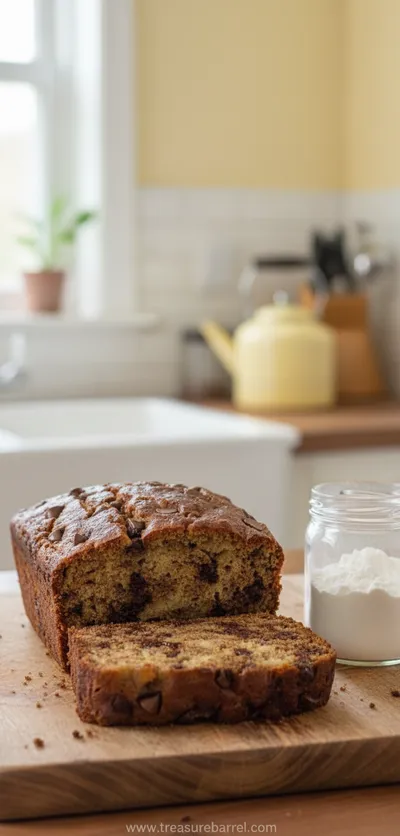
Easy Chocolate Chip Banana Bread
Moist chocolate chip banana bread, quick to bake, perfect for cozy breakfasts.
Tools You'll Need
-
Large mixing bowl
-
Whisk or electric mixer
-
Spatula
-
Plastic wrap
-
Freezer-safe container
Must-Know Tips
-
Keep all ingredients cold before starting; it speeds up the freezing process.
-
Stir gently to avoid creating large ice crystals.
-
Cover the surface with plastic wrap to prevent freezer burn.
Professional Secrets
-
Use a metal bowl for faster heat transfer.
-
Add a pinch of salt to enhance the overall flavor.
-
Stir in a figure‑eight pattern for even texture.

Recipe by
Lila GraceLila creates magical desserts 🍫🧁, sprinkles joy 🌈✨, and shares sweet moments 🍬💖. Her kitchen is full of smiles 😄 and sugar-dusted memories 🍪🍯.
Get Delicious Recipes Weekly
Join 25,000+ home cooks getting our best recipes straight to their inbox.
Free forever • No spam • Unsubscribe anytime