
I remember one particular Friday evening, the rain was tapping a gentle rhythm against the windowpanes and the whole world outside felt gray and blurry. My two little ones were building a fort in the living room, and that sudden, specific craving for pizza hit all of us at once. I went to the pantry, my heart sinking a little when I saw the empty spot where the yeast packets usually live. Oops. For a moment, I thought our cozy pizza dream was over. But then I remembered a little note I’d scribbled in the back of my recipe journal—a recipe for a dough that didn't need any yeast at all. It felt like a little miracle. Ten minutes later, my hands were dusted with flour, the kids were giggling as they spread the sauce, and the whole kitchen was filled with that incredible smell of baking bread and melting cheese. It was honestly better than any pizza we could have ordered, not just because of how it tasted, but because of that feeling of making something wonderful out of almost nothing on a rainy evening. It’s a feeling I come back to every time I make this dough.
Why You'll Adore This Recipe
-
Incredibly Fast: I mean, truly. You can have a warm, pliable pizza dough ready to go in about the time it takes for your oven to preheat. There's no proofing, no rising, just simple mixing and a brief knead. It’s the perfect answer to 'What's for dinner?' on a hectic evening.
-
Uses Pantry Staples: Look, you almost certainly have everything you need for this in your kitchen right now. Flour, baking powder, salt, a little oil... it's the kind of recipe born from simplicity. No need to run to the store for special ingredients; it respects that you want to cook with what you have.
-
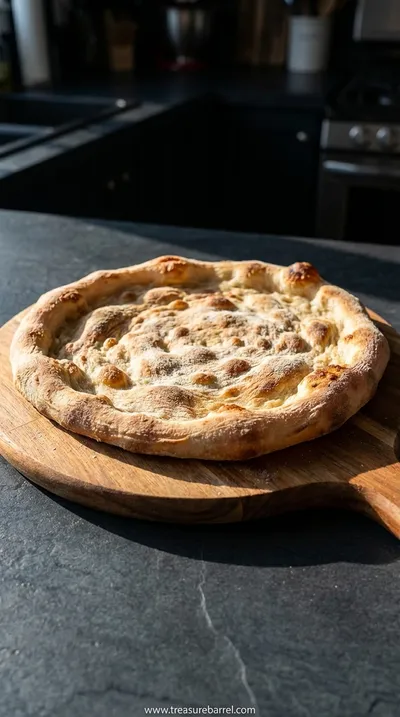
A Beautiful, Versatile Crust: Don't let the speed fool you—this dough bakes up into a wonderfully satisfying crust. It gets beautifully crisp on the bottom, especially on a hot pizza stone, but stays soft and just chewy enough on the inside. It holds up to all sorts of toppings without getting soggy.
-
Wonderfully Forgiving: This is a fantastic recipe for getting comfortable with dough, especially if you're new to home baking. It’s not fussy at all. It’s sturdy enough for little hands to help with, making it a perfect way to bring the kids into the kitchen for a fun, creative meal.
This recipe is an absolute lifesaver for busy weeknights! I honestly couldn't believe how fast and delicious it was.
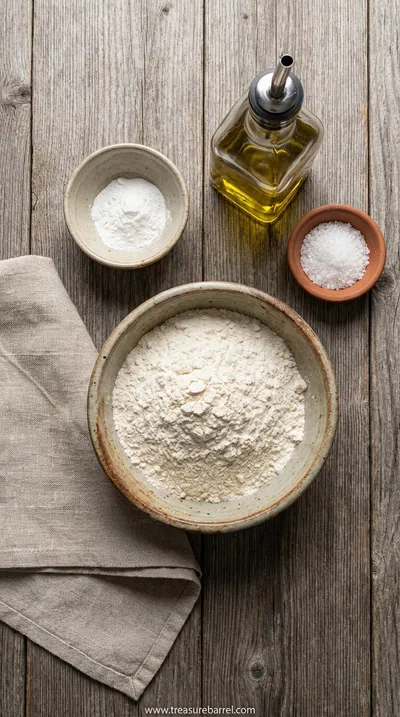
Essential Ingredient Guide
- All-Purpose Flour: This is the heart of our dough, the structure that holds it all together. I just use regular, unbleached all-purpose flour. There’s something so comforting about scooping it into the bowl, that soft, dusty cloud that smells like potential. It gives the crust a tender, gentle chew that isn’t too dense. You don't need fancy bread flour here; simplicity is really the key to its charm.
- Baking Powder: So, this is our little bit of magic. Since we aren't using yeast, the baking powder is what gives the dough its lift and lightness as it bakes in the hot oven. It reacts with the heat to create tiny air bubbles, preventing the crust from being dense or cracker-like. Just do a quick check on the expiration date of your baking powder—fresh is definitely best for getting that perfect puff.
- Olive Oil: A good drizzle of extra virgin olive oil does more than just bring the dough together; it adds a subtle, beautiful flavor and richness. It also helps to tenderize the crust, keeping it from being tough, and encourages that lovely golden-brown color as it bakes. I love the fruity aroma it adds, a little hint of the Mediterranean in our super-quick pizza night.
 Warm Meals
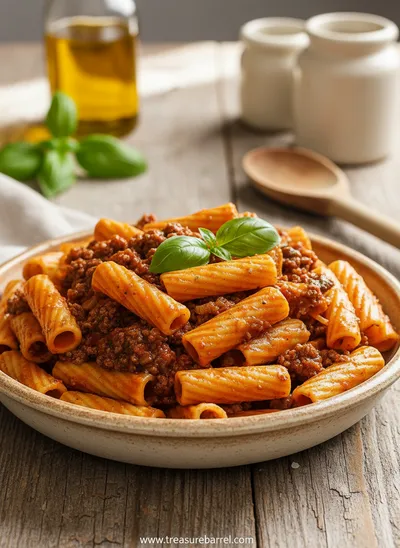
Beef Ragu Pasta Recipe in Tomato Sauce
A rich and hearty pasta dish with slow-cooked beef ragu in a savory tomato sauce.
Complete Cooking Process
-
Mixing The Dough:
This first step is so beautifully simple and calming. You’ll start by just whisking your dry ingredients—the flour, baking powder, and salt—together in a nice big bowl. I love this part; it’s so quiet and meditative. Taking a moment to combine them well ensures that the baking powder is evenly distributed, which is the secret to a uniform rise in the oven. Creating a little well in the center of the flour mixture feels like such a classic, time-honored baking step, even in a recipe this quick. It prepares a little nest for your warm water and olive oil, making it easier to incorporate everything without a huge mess.
-
Forming and Kneading:
Now for the part where it all comes together. Pour the warm water and olive oil into the well you made. Using a simple wooden spoon or a spatula, begin to gently stir from the center outwards, pulling in the flour from the sides until a shaggy, slightly sticky dough starts to form. Don't worry if it looks a bit messy at first—that's totally normal. Once it’s too hard to stir, turn it out onto a lightly floured surface. You only need to knead it for a minute or two, just until it becomes smooth and cohesive. This isn’t a workout; it’s more like a gentle persuasion, pushing and folding until the dough feels soft and supple under your palms.
-
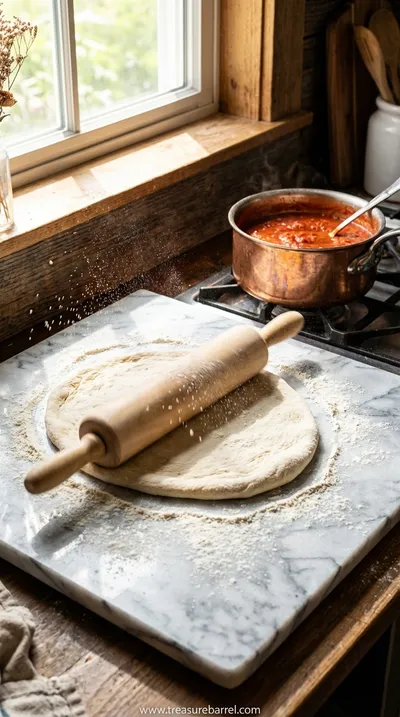
Rolling and Topping:
Once your dough is smooth, it's ready. Unlike yeasted dough, it doesn't need a long rest. You can let it sit for five minutes while you gather your toppings, which just helps the gluten relax a tiny bit, making it easier to roll out. On your floured surface, use a rolling pin to shape your dough into a circle or rustic rectangle. I personally love the imperfect, organic shapes. Don't press too hard; use a gentle, even pressure. This dough is your canvas. Transfer it to your baking sheet or preheated pizza stone, and now comes the best part: adding your favorite sauce, cheese, and toppings. This is where you make it your own.

Frequently Asked Questions
→ Can I make this dough ahead of time?
Honestly, this dough is at its absolute best when made right before you plan to use it. Its magic really lies in its speed! Since the leavening comes from baking powder, which is activated by liquid and heat, it doesn't benefit from a long rest. If you need to, you could probably mix it and keep it wrapped in the fridge for an hour or so, but for the best texture and rise, I really recommend making it fresh. It only takes ten minutes, I promise!
→ Will the crust be crispy or chewy?
It's a beautiful combination of both, which is why I love it so much. The final texture depends a lot on how you bake it. If you use a preheated pizza stone or an overturned baking sheet, the bottom will get wonderfully crisp and golden. The edges get a nice crunch, while the interior crumb stays soft and slightly chewy. It's not as airy as a long-fermented yeast dough, of course, but it has a really satisfying, sturdy-yet-tender bite that holds up perfectly to toppings.
→ My dough feels really sticky. What should I do?
Oh, don't worry about that at all! A slightly sticky dough is very common and easy to fix. Different flours, and even the humidity in your kitchen, can affect how much moisture the dough absorbs. Simply add a little more flour, just a tablespoon at a time, while you're kneading until it becomes smooth and manageable. The goal is a soft, pliable dough that doesn't stick to your hands or the counter too much. Just be careful not to add too much flour, as that can make the final crust dry.
→ Can I use whole wheat flour in this recipe?
Yes, you can definitely experiment with that! I would suggest starting by replacing about half of the all-purpose flour with whole wheat flour. Using 100% whole wheat will result in a much denser, heavier crust and it will absorb more water, so you may need to add an extra tablespoon or two of water to get the right consistency. The flavor will be nuttier and more robust, which can be really delicious with earthy toppings like mushrooms and herbs.
→ Is it possible to freeze this pizza dough?
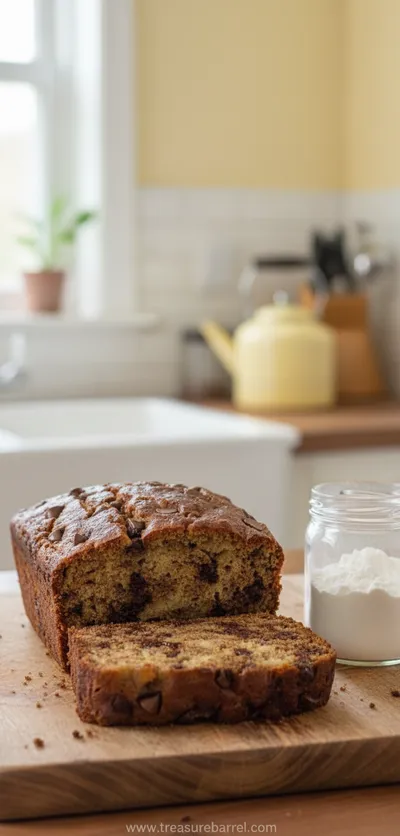
I generally advise against freezing this particular dough. Because it relies on baking powder for its rise, the freezing and thawing process can diminish its leavening power, potentially leading to a flatter, denser crust. The beauty of this recipe is that it's an 'in-the-moment' dough, so quick that you won't even need to think about making it in advance. For other baking projects that are more freezer-friendly, you might enjoy this foolproof banana bread.
→ What's the secret to getting a really crispy bottom crust?
The key is high, direct heat. My absolute best tip is to use a pizza stone or a pizza steel if you have one. Place it in your oven while it's preheating to get it screaming hot. Then, carefully slide your pizza onto the hot surface to bake. If you don't have a stone, you can get a similar effect by preheating a sturdy, rimless baking sheet or turning a regular baking sheet upside down and preheating that. This initial blast of heat helps crisp up the bottom beautifully.
→ Can I use this dough for other things besides pizza?
Absolutely! It's wonderfully versatile. I love to brush it with olive oil, sprinkle it with sea salt and rosemary, and bake it as a simple flatbread to serve with dips or soup. You can also use it to make cheesy garlic breadsticks—just shape it into a rectangle, top with garlic butter and mozzarella, bake, and slice. It's not quite right for a puffy calzone that needs a lot of stretch, but for anything flat and delicious, it's perfect.
Nutrition Facts
per serving
250
Calories
6g
Protein
38g
Carbs
8g
Fat
Taste Profile
A neutral, savory base with a subtle richness from olive oil, designed to complement toppings.
Ingredient Substitutions
Don't have an ingredient? Try these alternatives
Bread flour will result in a slightly chewier crust. When using a gluten-free blend, you may need to add a bit more water as they tend to be thirstier.
While olive oil adds lovely flavor, any liquid fat will work to tenderize the dough. The flavor profile of the crust will be more neutral with other oils.
Recipe Variations
Try these delicious twists on the original
Herbed Garlic Dough
Add 1 teaspoon of dried oregano or Italian seasoning and ½ teaspoon of garlic powder to the dry ingredients for a wonderfully aromatic crust with built-in flavor.
Whole Wheat Blend
For a nuttier flavor and extra fiber, substitute 1 cup of the all-purpose flour with 1 cup of whole wheat flour. You may need to add an extra tablespoon of water.
Common Mistakes to Avoid
Learn from others' mistakes for perfect results
- Not preheating the oven and baking surface enough. A hot start is key for a crisp crust.
- Adding too much flour during kneading. This can make the crust dense and dry. Add just enough to prevent sticking.
- Overloading with toppings. Too many toppings, especially wet ones, can make the center of the pizza soggy. Less is often more.
- Rolling the dough too thin. Aim for about ¼-inch thickness. If it's too thin, it may not hold the toppings well or could burn easily.
- Using cold water. Warm water helps activate the dough and makes it softer and easier to handle, just like in this chocolate chip bread.
Meal Prep & Storage
Make Ahead Tips
This recipe is specifically designed to be made and used immediately, so there's really no 'make ahead' component for the dough. Its charm is its speed! However, you can prep all your toppings in advance—grate your cheese, chop your vegetables, and make your sauce. Store them in airtight containers in the fridge, and then your pizza night will come together in under 20 minutes.
Leftover Ideas
Leftover baked pizza slices are a treat! Reheat them in a dry skillet over medium heat for a perfectly re-crisped crust. You can also chop up the cold pizza slices and toss them into a scramble for a fun 'pizza omelet' the next morning. Sometimes, simple is best, like with this moist banana bread.
Perfect Pairings
Serve this with...
Cooking Timeline
Preheat oven and pizza stone. Whisk together flour, baking powder, and salt in a large bowl.
Add warm water and olive oil. Mix with a spoon until a shaggy dough forms.
Turn dough onto a floured surface and knead gently until smooth.
Roll out the dough into a 12-inch circle and transfer to parchment paper. Add sauce and toppings.
Bake for 12-15 minutes until golden and bubbly. Let rest for a minute before slicing and serving. For other easy baking, see our sweet treats.
 Warm Meals
Garlic Steak Tortellini – A Warm Classic
Steak meets garlic‑kissed tortellini in a creamy, herb‑filled sauce for a cozy night in.
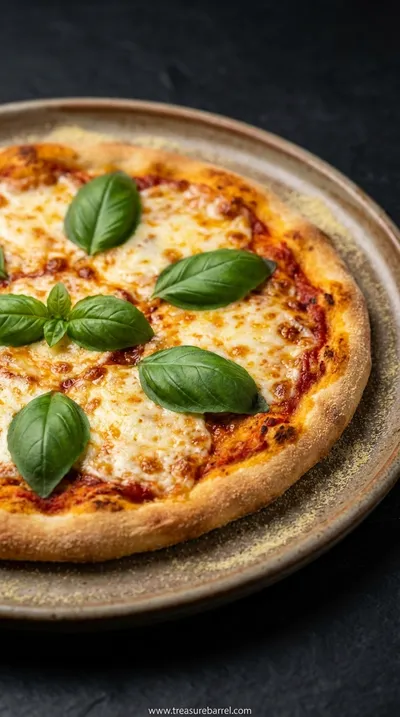
No Yeast Pizza Dough: Super Quick & Easy Recipe
Make excellent no yeast pizza dough in minutes! This quick recipe creates a perfect crust without yeast.
Timing
Prep Time
10 Minutes
Cook Time
15 Minutes
Total Time
25 Minutes
Recipe Details
Ingredients
For the Pizza Dough
-
01
2 ½ cups (300g) all-purpose flour, plus more for dusting
-
02
2 teaspoons baking powder
-
03
1 teaspoon fine sea salt
-
04
3 tablespoons extra virgin olive oil
-
05
¾ cup (180ml) warm water
Instructions
First, let's create a calm little space for ourselves. Start by preheating your oven to 425°F (220°C). If you have a pizza stone, place it in the oven now to get it nice and hot. In a large, comforting bowl, add the flour, baking powder, and salt. Take a whisk and gently stir them together, just for a moment. This simple action feels so grounding and it ensures all the dry ingredients are evenly mixed, which is key for a perfect crust. This is also a lovely moment to appreciate the simplicity before the magic happens, much like when making an easy banana bread.
Now, make a little well in the center of your flour mixture. I just love doing this; it feels so traditional. Pour the warm water and the olive oil right into that center. The water should be warm to the touch, like a baby's bath—not too hot, not too cold. Using a wooden spoon or a sturdy spatula, begin to mix from the middle, gradually pulling the flour from the sides into the wet ingredients. Keep mixing until a soft, slightly shaggy dough begins to form. Don't worry if it looks a little messy or uneven at this stage; it's all part of the process.
Lightly flour a clean work surface—your countertop or a large wooden board. Turn the shaggy dough out of the bowl and onto the floured surface. Now, we'll knead, but just for a minute or two. This isn't about developing gluten for hours; it's simply about bringing the dough together until it's smooth and cohesive. Gently push the dough away from you with the heel of your hand, then fold it over and give it a quarter turn. Repeat this gentle motion until the dough feels supple and is no longer sticky. It's a quick, satisfying process.
Once the dough is smooth, it's ready to be shaped. Unlike other doughs, it needs no time to rise. On your floured surface, use a rolling pin to gently roll the dough out into your desired shape. I usually aim for about a 12-inch circle, but a rustic, free-form rectangle is just as lovely. If the dough springs back, just let it rest for a minute before continuing. Transfer the shaped dough to a piece of parchment paper or a lightly oiled baking sheet. If you're using a hot pizza stone, the parchment will help you slide it on safely. If you love simple recipes, I think you'd also enjoy this moist and simple bread.
Now for the fun part! Top your pizza with your favorite sauce, cheese, and toppings. Be creative! Leave a little border around the edge for a nice crust. Brush the edges with a little olive oil for an extra golden finish if you like. Carefully slide your pizza (on the parchment, if using) onto the preheated stone or baking sheet in the oven. Bake for 12-15 minutes, or until the crust is golden brown and the cheese is bubbly and melted. The whole kitchen will smell absolutely incredible. Let it rest for a minute before slicing and serving. It's as satisfying as pulling a perfect loaf of super easy delicious bread from the oven.
Notes & Tips
-
1
The temperature of the water is gently important here. Using warm water helps to create a softer, more pliable dough that's easier to work with. It shouldn't be hot, as that could affect the baking powder, but pleasantly warm to the touch is just perfect.
-
2
Be mindful not to over-knead the dough. We're not trying to develop a ton of gluten like in a yeasted bread. Just a minute or two of kneading is all it takes to bring it together into a smooth ball. Over-kneading can make the final crust tough rather than tender.
-
3
For an extra crispy crust, the secret is a very hot surface. Preheating your pizza stone or baking sheet is non-negotiable! This initial blast of heat is what sets the bottom of the crust and gives it that lovely, crisp texture we all crave in a good pizza. It makes a huge difference.
 Cozy Classics
Easy Chocolate Chip Banana Bread
Moist chocolate chip banana bread, quick to bake, perfect for cozy breakfasts.
Tools You'll Need
-
Large Mixing Bowl: A simple, wide bowl is all you need to bring the ingredients together. I have a favorite ceramic one that just feels right in my arms, perfect for containing the initial soft flour and mixing the dough without making a huge mess.
-
Rolling Pin: A good rolling pin helps you gently persuade the dough into its final shape. A classic wooden one works beautifully, but a tapered French pin is lovely too. It allows you to feel the dough under your hands and create an even thickness.
-
Baking Sheet or Pizza Stone: This is what you'll bake your pizza on. A heavy-duty baking sheet works great, but a pizza stone is fantastic for getting that signature crisp crust because it holds heat so well. Either way, make sure to preheat it with the oven!
-
Whisk and Wooden Spoon: Simple tools for simple tasks. A whisk is perfect for lightly combining the dry ingredients, and a sturdy wooden spoon is my go-to for bringing the wet and dry together until the shaggy dough forms.
Must-Know Tips
-
Don't Over-flour: A little flour on your work surface is essential, but try not to add too much more to the dough itself. Excess flour can make the crust dry and tough rather than tender and chewy.
-
Hot, Hot Oven: A high oven temperature is crucial for this recipe. It helps the baking powder act quickly to create lift and ensures the crust cooks through and becomes golden before the toppings overcook.
-
Work Gently: This dough doesn't need aggressive handling. A gentle touch when kneading and rolling will give you the best, most tender result. Think of it as guiding the dough, not forcing it.
Professional Secrets
-
A Touch of Sugar: For a crust that browns a little more beautifully, you can add a tiny pinch (about 1/2 teaspoon) of sugar to the dry ingredients. It's not enough to make it sweet, but it helps with caramelization in the oven.
-
Rest Before Rolling: While the dough doesn't need a long proofing time, letting it rest for just 5-10 minutes after kneading allows the gluten to relax. This makes the dough much easier to roll out without it constantly springing back.
-
Par-Bake for Wet Toppings: If you're loading your pizza with lots of vegetables or other moist toppings, consider par-baking the crust. Just bake the plain crust for about 5-7 minutes before adding toppings and finishing. This prevents a soggy bottom.

Recipe by
Sofia BelleSofia bakes with love 🧁💛, sweet smells filling her home 🍪🏡, and flour on her hands 🤲✨. She believes every loaf 🍞 and cake 🎂 tells a story of wa ...
Get Delicious Recipes Weekly
Join 25,000+ home cooks getting our best recipes straight to their inbox.
Free forever • No spam • Unsubscribe anytime