
The Oreo cookie itself has a rich history dating back to 1912, when the National Biscuit Company introduced what would become America's favorite sandwich cookie. These no-bake balls represent a modern twist on classic comfort, transforming the familiar cookie into bite-sized delights that require no oven time. The method of creating truffle-like treats from crushed cookies and cream cheese gained popularity in the 1990s, offering home cooks an accessible way to create elegant-looking desserts without professional pastry skills. The combination of crunchy cookie exterior and creamy interior plays on textures we've loved for generations, while the chocolate coating adds that final touch of decadence that makes these feel truly special.
Why You'll Love It
-
No baking required - perfect for hot summer days when you don't want to turn on the oven
-
Just three main ingredients means you probably have everything on hand already
-
They look fancy but are surprisingly simple to make - great for impressing guests
-
Kids can help with every step, making it a fun family activity
"My kids beg me to make these every weekend - they're the perfect treat for movie nights and birthday parties alike!"
Essential Ingredient Guide
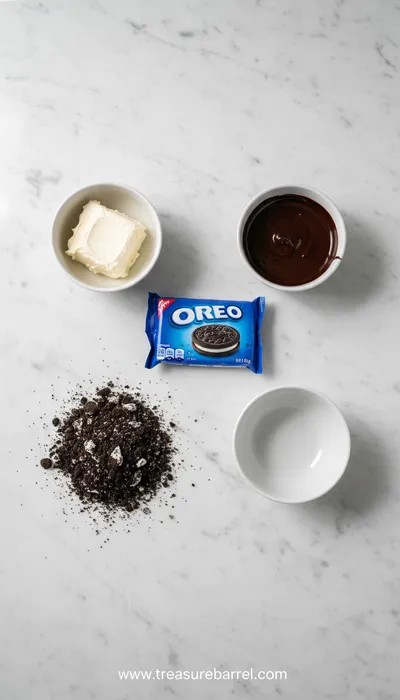
- Oreo cookies: The foundation of our treat - I always use the original variety because that familiar chocolate flavor is what makes these so comforting. You'll need the whole cookie, cream filling and all, for that perfect balance of crunchy and creamy.
- Cream cheese: This is what binds everything together and gives that smooth, melt-in-your-mouth texture. Make sure it's softened to room temperature so it blends easily with the cookie crumbs without overmixing.
- Chocolate coating: I prefer semi-sweet chocolate chips for dipping because they balance the sweetness of the cookies perfectly. You could use milk chocolate if you want something sweeter, or dark chocolate for a richer taste.
- Vanilla extract: Just a teaspoon enhances all the other flavors and adds that warm, homemade quality that makes these feel special.
- Salt: A tiny pinch might seem odd in a sweet recipe, but it makes the chocolate flavor pop and cuts through the richness beautifully.
- Sprinkles or toppings: These are optional but oh-so-fun for special occasions. I keep various sprinkles in my pantry for when the mood strikes.
Complete Cooking Process
-
Ingredient Readiness:
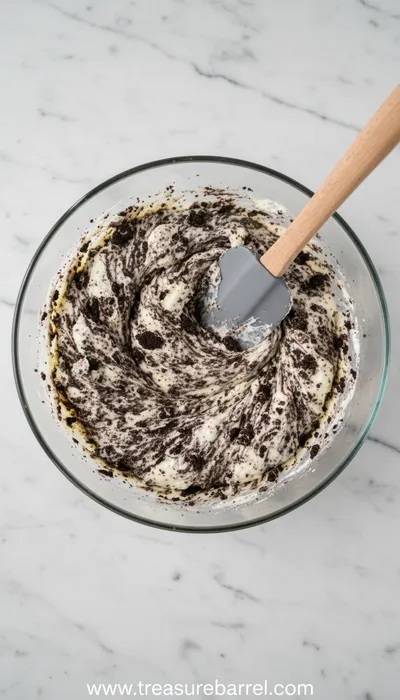
Let your cream cheese sit out for about 30 minutes until it's soft to the touch. This makes blending so much easier and prevents overworking the mixture. Meanwhile, crush your Oreos - I use a food processor because it's fast, but you can also put them in a zip-top bag and roll with a rolling pin. Either way, you want fine crumbs with no big chunks.
-
Flavor Development:
When you mix the cream cheese into the cookie crumbs, that's when the magic happens. The cream cheese mellows the cookie's sweetness while adding its own tangy note. The vanilla and salt you add here will blend throughout, creating layers of flavor that make these more than just crushed cookies.
-
Texture Control:
Chilling the mixture for at least an hour is crucial - it firms up the balls so they hold their shape when dipping. When you're coating them in chocolate, work quickly but gently to maintain that perfect round shape.
-
Finishing Touches:
The final sprinkle decoration isn't just pretty - it adds little textural surprises and makes each bite unique. Adding toppings while the chocolate is still wet ensures they stick properly.
-
Serving Timing:
These are best served chilled but not ice-cold. Take them out of the refrigerator about 10 minutes before serving so the chocolate has a chance to soften slightly, making for the perfect bite.
-
Use a cookie scoop for evenly sized balls - it makes dipping much easier
-
If your mixture feels too soft after chilling, pop it back in the freezer for 15 minutes
-
Melt chocolate in short bursts in the microwave, stirring between each, to avoid seizing
-
Line your baking sheet with parchment paper to prevent sticking during chilling
Pro Tips
I've made these so many times over the years that these steps feel second nature now. The first time I tried, honestly, I rushed the chilling part and ended up with messy balls that lost their shape. But you live and learn, right? Now I know that patience pays off with these treats.
Another thing I've learned is that the quality of your chocolate really matters. Since there are so few ingredients, each one shines through. I like to use good quality chocolate chips rather than baking chocolate - they seem to melt more smoothly and have a better flavor. But you know, even with basic ingredients, these turn out wonderful. That's the beauty of simple recipes.
 Sweet Treats
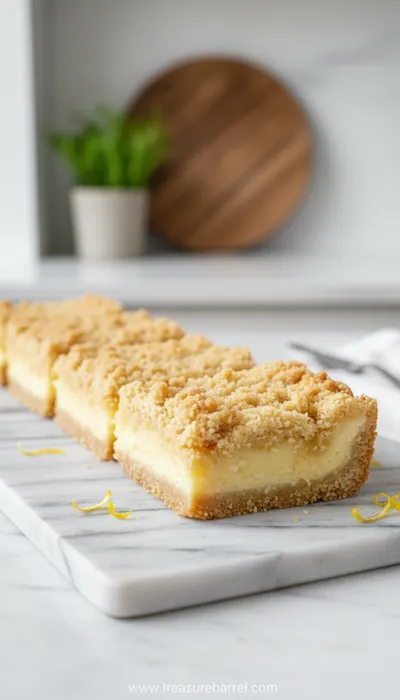
Cranberry Orange Muffins
Tender muffins bursting with orange zest and tart cranberries, ideal for a comforting morning treat.
The essence of the dish:
These Oreo balls capture that childhood joy of eating cookies while feeling sophisticated enough for grown-up gatherings. They're the perfect bridge between simple comfort and elegant dessert.
A fun fact or historical angle:
The Oreo cookie was originally sold in a tin for 25 cents per pound - quite different from today's packaging! The classic design with the Oreo name embossed on the cookie has remained largely unchanged for over a century.
Flavor or sensory focus:
What you'll notice first is the smooth chocolate shell giving way to that creamy, slightly crumbly interior. The combination of textures is what makes these so addictive - crisp coating, tender center, with little bursts of cookie crunch throughout.
You Must Know
-
Don't skip the chilling time - it's essential for easy handling and proper texture
-
Use a double boiler if you're nervous about melting chocolate - it's more forgiving than the microwave
-
These freeze beautifully for up to 3 months, making them perfect for make-ahead entertaining
-
If the mixture sticks to your hands, dampen them slightly - the water creates a barrier that prevents sticking
Frequently Asked Questions
→ Can I use reduced-fat cream cheese?
You can, but the texture might be slightly different. Full-fat cream cheese gives the richest, creamiest results, but reduced-fat will work in a pinch. I wouldn't recommend fat-free cream cheese as it doesn't bind as well.
→ How long do these keep in the refrigerator?
They'll stay fresh for about a week in an airtight container. The chocolate coating helps protect them, but the cream cheese means they shouldn't be left out at room temperature for more than a couple of hours.
→ Can I make these without a food processor?
Absolutely! Place the cookies in a sturdy zip-top bag and crush them with a rolling pin or the bottom of a heavy pan. It might take a bit more effort, but the results are just as good.
→ What if my chocolate coating is too thick?
Add a teaspoon of coconut oil or shortening to thin it out. This will make the coating smoother and easier to work with without affecting the flavor.
→ Can I use different types of Oreos?
Yes! Mint, peanut butter, or golden Oreos all work wonderfully. Just keep in mind that the filling flavor will come through in the final product.
→ How far in advance can I make these?
They're perfect for making a day or two ahead. The flavor actually improves as the ingredients meld together. Just store them properly in the refrigerator until you're ready to serve.
Nutrition Facts
per serving
120
Calories
2g
Protein
14g
Carbs
7g
Fat
Taste Profile
Rich chocolate sweetness balanced by creamy tang
Ingredient Substitutions
Don't have an ingredient? Try these alternatives
Creates an even richer, more luxurious texture with a slightly sweeter flavor
White chocolate makes them sweeter, dark chocolate adds richness - adjust to your preference
Recipe Variations
Try these delicious twists on the original
Peppermint Twist
Use mint Oreos and add a drop of peppermint extract to the mixture. Perfect for holiday gatherings.
Peanut Butter Delight
Use peanut butter Oreos and dip in peanut butter chips mixed with chocolate for a double peanut flavor.
Common Mistakes to Avoid
Learn from others' mistakes for perfect results
- Not chilling long enough - results in messy dipping and misshapen balls
- Overheating the chocolate - causes seizing and grainy texture
- Using cold cream cheese - creates lumps and uneven mixing
- Adding toppings after chocolate sets - they won't stick properly
Meal Prep & Storage
Make Ahead Tips
You can make these up to 3 days in advance. The flavor actually improves as the ingredients meld together. Store in an airtight container in the refrigerator until ready to serve. They also freeze beautifully for up to 3 months.
Leftover Ideas
Store any leftovers in an airtight container in the refrigerator. They'll keep for about a week. The texture remains good, though the chocolate coating may lose some of its shine over time.
Perfect Pairings
Serve this with...
Cooking Timeline
Crush Oreos and mix with cream cheese, vanilla, and salt until well combined
Portion and roll mixture into balls, place on parchment-lined baking sheet
Chill balls in refrigerator until firm (minimum 1 hour)
Melt chocolate and coconut oil until smooth and liquid
Dip chilled balls in chocolate, decorate with toppings, return to refrigerator to set
 Sweet Treats
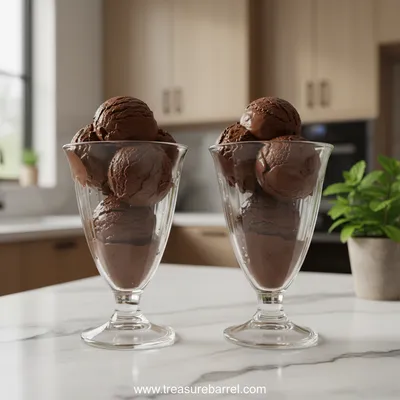
Duo of Chocolate Ice Cream Glasses
Elegant chocolate ice cream duo served in glasses – creamy, refreshing, and utterly satisfying.
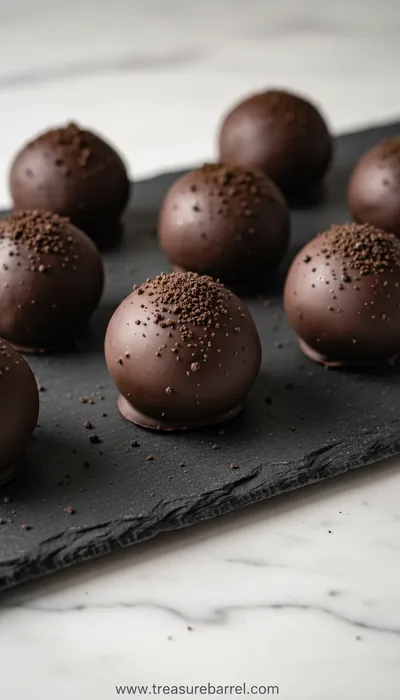
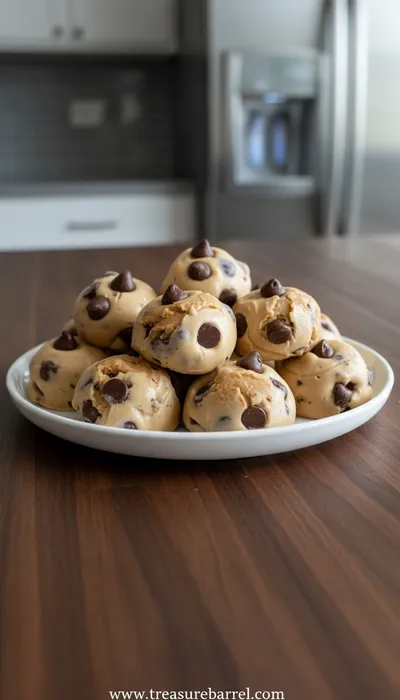
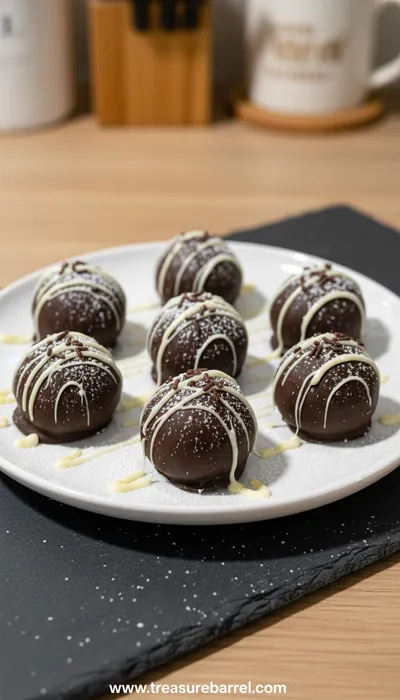
Oreo Balls: No-Bake Sweet Treat Recipe
These no-bake Oreo balls are pure magic - creamy, chocolatey bites that come together with just three simple ingredients. Honestly, they're the kind of treat that makes you feel like you've created something special without any fuss.
Timing
Prep Time
20 Minutes
Cook Time
0 Minutes
Total Time
1 Hour 20 Minutes
Recipe Details
Ingredients
Main Mixture
-
01
1 package (14.3 oz) Oreo cookies
-
02
8 oz cream cheese, softened
-
03
1 teaspoon vanilla extract
-
04
Pinch of salt
Chocolate Coating
-
01
2 cups semi-sweet chocolate chips
-
02
1 tablespoon coconut oil or shortening
-
03
Sprinkles, crushed cookies, or other toppings for decoration
Instructions
Place the entire Oreo cookies (cream filling included) in a food processor and pulse until you have fine crumbs. You should have about 3 cups of crumbs. If you don't have a food processor, place cookies in a sturdy zip-top bag and crush with a rolling pin until finely ground.
In a medium bowl, combine the Oreo crumbs, softened cream cheese, vanilla extract, and salt. Mix until well combined and the mixture holds together when pressed. I like to use my hands for this - there's something satisfying about feeling the texture come together.
Line a baking sheet with parchment paper. Using a small cookie scoop or tablespoon, portion the mixture and roll into 1-inch balls. Place them on the prepared baking sheet. If the mixture sticks to your hands, lightly dampen them with water.
Chill the balls in the refrigerator for at least 1 hour, or until firm. This step is crucial - it makes the dipping process much easier and helps the balls hold their shape. You can also freeze them for 15-20 minutes if you're in a hurry.
While the balls are chilling, melt the chocolate chips and coconut oil together. You can use a double boiler or microwave in 30-second intervals, stirring between each, until smooth and fully melted.
Using a fork or dipping tool, dip each chilled ball into the melted chocolate, coating completely. Let excess chocolate drip off, then return to the parchment-lined baking sheet. Immediately add sprinkles or toppings before the chocolate sets.
Return the coated balls to the refrigerator for about 15 minutes, or until the chocolate is fully set. Store in an airtight container in the refrigerator until ready to serve.
Notes & Tips
-
1
These freeze beautifully for up to 3 months - perfect for unexpected guests or last-minute treats
-
2
If the mixture feels too soft after chilling, add a tablespoon more crushed cookies to firm it up
-
3
For a lighter version, you can use reduced-fat cream cheese, though the texture will be slightly different
-
4
Make sure your hands are clean and dry when rolling the balls to prevent sticking
Tools You'll Need
-
Food processor or zip-top bag and rolling pin
-
Mixing bowls
-
Baking sheet
-
Parchment paper
-
Cookie scoop or tablespoon
-
Fork or dipping tool
-
Double boiler or microwave-safe bowl
Must-Know Tips
-
Don't skip the chilling time - it's what makes these easy to handle and dip
-
Use a cookie scoop for evenly sized balls - they'll look more professional and dip more evenly
-
Melt chocolate slowly and gently to avoid seizing - patience pays off here
-
Work quickly when dipping - the chilled balls will start to soften if left out too long
Professional Secrets
-
Room temperature cream cheese blends more smoothly - no lumps means better texture
-
A tiny pinch of salt enhances the chocolate flavor without making it taste salty
-
Using a combination of chocolate chips gives more complex flavor - try mixing semi-sweet and milk chocolate
-
Chilling the dipped balls on a wire rack allows excess chocolate to drip off for perfect coverage

Recipe by
Lila GraceLila creates magical desserts 🍫🧁, sprinkles joy 🌈✨, and shares sweet moments 🍬💖. Her kitchen is full of smiles 😄 and sugar-dusted memories 🍪🍯.
Get Delicious Recipes Weekly
Join 25,000+ home cooks getting our best recipes straight to their inbox.
Free forever • No spam • Unsubscribe anytime