
I remember Friday nights as a kid, the air thick with the scent of my dad’s pizza experiments. He’d stand at the counter, a little dusting of flour on his nose, humming along to the radio. The pizzas were never perfectly round, and sometimes the toppings would slide a little, but wow, they were the best thing I’d ever tasted. This recipe is my ode to those memories—the warmth of the kitchen, the sound of the pizza cutter rolling through the crisp crust, the simple happiness of sharing a meal made with love. It’s a departure from my usual baking projects, which often lean towards a cozy moist banana bread. This is more... interactive. It’s a recipe that invites messy hands and creative freedom, and every time I make it, I feel a little bit of that childhood joy bubbling up again. It’s that feeling of home, captured in a simple, beautiful dough.
Why You'll Adore This Dough
-
It’s unbelievably fast. No, really. You don’t need to plan your day around it. From a few simple ingredients to a ready-to-shape dough, it happens in about an hour. It’s the perfect answer to that last-minute 'what’s for dinner?' question, offering a homemade touch without the fuss.
-
The texture is a dream. I'm talking about that perfect balance of a chewy, tender interior with a lovely, subtle crisp on the bottom. It’s sturdy enough to hold all your favorite toppings without getting soggy, yet it bakes up light and airy. It’s just, well, it’s everything you want in a pizza crust.
-
It’s so wonderfully forgiving. Honestly, you can’t really mess this up. If it's a little sticky, add a sprinkle of flour. If it's a bit dry, a tiny splash of water. It’s a great recipe for beginners or for when you want to get the kids involved in the kitchen without any stress.
-
It's a beautiful blank canvas. This dough is the starting point for endless creativity. A classic margherita? Absolutely. A wild combination of whatever is in the fridge? Go for it. It doesn’t judge. It just bakes up golden and delicious, ready for whatever story you want to tell with your toppings.
This is our go-to for Friday nights. It's so forgiving and always turns out perfect.
Essential Ingredient Guide
- Yeast: This is where the magic begins. I use active dry yeast because I love the little ritual of waking it up in warm water with a touch of honey. Watching it foam and bubble is one of my favorite kitchen moments; it’s like the dough is taking its first breath. It’s a quiet, beautiful signal that something wonderful is about to happen. Make sure your water is just warm to the touch, not hot, like a baby’s bath.
- All-Purpose Flour: You don't need anything fancy here, which is part of its charm. Simple, unbleached all-purpose flour gives this dough the perfect structure and a soft, gentle chew. The feel of scooping it into the bowl, so light and dusty, is the foundation of so many of my favorite home baking projects. It’s the heart of this recipe, providing the body and soul for your beautiful pizza.
- Good Olive Oil: Please use an olive oil that you love the taste of. It does more than just prevent sticking; it adds a subtle richness and a beautiful, soft texture to the finished crust. That little bit of fruity, peppery flavor weaving through the dough is what elevates it from good to truly special. It makes the dough supple and a dream to knead, coating your hands with its lovely scent.
 Warm Meals
Beef Ragu Pasta Recipe in Tomato Sauce
A rich and hearty pasta dish with slow-cooked beef ragu in a savory tomato sauce.
Complete Cooking Process
-
Mixing & Kneading: The Beginning:
This first stage is all about gentle transformation. You’ll start by coaxing the yeast to life in warm water, then combine it with the flour, salt, and oil. At first, it will look like a shaggy, unpromising mess in the bowl, and you might think, 'oops, did I do that right?'. But trust the process. As you begin to knead, whether by hand on a lightly floured counter or with a stand mixer, you'll feel the dough change. It will go from sticky and chaotic to smooth, elastic, and alive under your hands. It’s a quiet, ten-minute conversation between you and the dough.
-
The Rise: A Moment of Patience:
Now, you just let it be. Tuck the smooth ball of dough into a lightly oiled bowl, cover it with a clean kitchen towel, and find a cozy, warm spot for it to rest. This isn’t a long, drawn-out rise; it’s just a brief pause. In about an hour, it will have puffed up, growing soft and airy. This little nap is what develops the flavor and creates the lovely, light texture. It’s a much faster process than some bakes, like my favorite one-bowl banana bread, but just as magical. When you peek under the towel, you’ll see it has beautifully doubled.
-
Shaping & Topping: The Creative Part:
This is where the personality comes in. Gently punch down the risen dough—the sigh it makes is so satisfying—and divide it in two. Now, just use your fingertips to gently press and stretch the dough into your desired shape. Forget perfect circles. Rustic, oblong, free-form shapes are beautiful and honest. This is your canvas. Ladle on your sauce, scatter your cheese, and arrange your toppings. Let everyone make their own little corner of the pizza. It’s a wonderfully collaborative moment before it heads into the hot oven.
-
Use warm, not hot, water to activate the yeast. Too hot, and you'll ruin its magic.
-
Don't add too much extra flour when kneading. A little stickiness is okay; it leads to a more tender crust.
-
Let your oven get really, really hot. A screaming hot oven is the secret to a great pizza crust.
Pro Tips for Success
These little details make all the difference, turning a simple meal into something truly special.

Frequently Asked Questions
→ Can I use whole wheat flour in this recipe?
You certainly can, and it adds a lovely nutty flavor! I would suggest starting by replacing half of the all-purpose flour with whole wheat flour. The dough might be a bit denser and thirstier, so you may need to add an extra tablespoon or two of water to get the right consistency. It won't be quite as light and airy, but it will be wonderfully rustic and delicious in its own way.
→ Can I make this dough ahead of time?
Absolutely! This is one of my favorite things about it. You can make the dough through the kneading step, then place it in a sealed, oiled bag or container in the refrigerator for up to three days. The cold fermentation will actually develop a more complex, nuanced flavor. Just remember to take it out and let it sit at room temperature for about 30-45 minutes before you want to shape it.
→ Help! Why didn't my dough rise?
Ugh, that's always a disappointing moment, but it's usually an easy fix for next time. The most common culprit is the yeast. It might have been old, or the water you used to activate it was either too hot or too cold. Always check the expiration date on your yeast packet! And remember, the water should feel comfortably warm to the touch, not hot. A little patience in a warm, draft-free spot is also key.
→ How thin should I stretch the dough?
Well, that's the beauty of homemade—it's entirely up to you! If you love a classic Neapolitan-style pizza with a thin base and a puffy outer crust (a 'cornicione'), stretch it thin in the middle, leaving a thicker border. If you prefer a chewier, slightly thicker crust that's more like a Sicilian style, just press it out a bit less. Don't be afraid to experiment to find what you and your family love most.
→ Can I use a stand mixer to knead the dough?
Of course! A stand mixer makes this process even easier. Just use the dough hook attachment and knead on a low to medium speed for about 5-7 minutes, or until the dough is smooth and pulls away from the sides of the bowl. It's a different sensory experience than kneading by hand, sort of like the difference between making a quick bread by hand and using a mixer for something like my easy banana bread, but the results are just as wonderful.
→ Is it possible to freeze this pizza dough?
Yes, it freezes beautifully! After the dough has gone through its first rise, gently punch it down, divide it, and form it into balls. Lightly coat each ball with olive oil and place them in individual freezer-safe bags. They will keep for up to three months. To use, just thaw the dough in the refrigerator overnight, then let it rest on the counter for about 30 minutes to an hour before shaping.
→ What's the best temperature for baking homemade pizza?
The hotter, the better! Seriously. Most home ovens don't get as hot as professional pizza ovens, so you want to crank yours up to its highest setting, usually around 500-550°F (260-290°C). Preheating your baking sheet or pizza stone in the oven is also crucial. That initial blast of high heat is what helps create that coveted crispy-bottomed crust and beautiful oven spring.
→ My dough is incredibly sticky, what should I do?
Don't panic! A sticky dough is often a good sign—it means it's well-hydrated, which leads to a tender crust. Resist the urge to dump a lot of flour on it. Instead, just add flour one tablespoon at a time while kneading, waiting for it to be fully incorporated before adding more. You want it to be smooth and easy to handle, but still slightly tacky to the touch. This is a common situation with many doughs, even with the batter for my moist banana bread.

Nutrition Facts
per serving
250
Calories
7g
Protein
45g
Carbs
4g
Fat
Taste Profile
A beautifully simple, savory, and slightly yeasty flavor that provides the perfect neutral canvas for any toppings.
Ingredient Substitutions
Don't have an ingredient? Try these alternatives
You can use the same amount of instant yeast. The best part is you can skip the blooming step and mix it directly in with the flour and other dry ingredients.
Any of these will work perfectly to give the yeast the little bit of food it needs to get started. The flavor difference in the final dough is almost undetectable.
Recipe Variations
Try these delicious twists on the original
Garlic Herb Dough
Add 1 teaspoon of dried oregano, 1/2 teaspoon of garlic powder, and a pinch of red pepper flakes to the dry ingredients for an incredibly fragrant and savory crust.
Whole Wheat Blend Dough
For a heartier, nuttier flavor, replace 1 cup of the all-purpose flour with whole wheat flour. You might need to add an extra tablespoon of water to get the right consistency.
Common Mistakes to Avoid
Learn from others' mistakes for perfect results
- Using water that is too hot, which kills the yeast before it can work.
- Adding too much flour during kneading, which results in a dense, tough crust.
- Not preheating the oven and baking surface sufficiently, leading to a pale, soft crust.
- Overloading the pizza with too many toppings, which can make it soggy and prevent even cooking.
- Using a rolling pin, which can deflate the beautiful air pockets you created during the rise.
Meal Prep & Storage
Make Ahead Tips
This dough is perfect for making ahead. You can prepare it through the kneading stage and store it in an airtight container in the refrigerator for up to 3 days. The flavor actually improves with this slow, cold fermentation! Just be sure to let it sit at room temperature for about 30-60 minutes before you plan to shape and bake it.
Leftover Ideas
Leftover pizza dough can be stored in the fridge for a few days or frozen for up to 3 months. For leftover baked pizza, reheat slices in a hot skillet, air fryer, or oven to bring back that wonderful crispness. Avoid the microwave if you can, as it tends to make the crust chewy and soft. I also love chopping up leftover pizza slices and scrambling them with eggs the next morning.
Perfect Pairings
Serve this with...
Cooking Timeline
Activate the yeast in warm water. Mix all ingredients to form a shaggy dough.
Knead the dough on a floured surface until smooth and elastic.
Place dough in an oiled bowl and let it rise in a warm place until doubled.
Preheat your oven and baking stone. Gently shape the dough, add toppings.
Bake the pizza until the crust is golden and the cheese is bubbly, about 10-12 minutes.
 Warm Meals
Garlic Steak Tortellini – A Warm Classic
Steak meets garlic‑kissed tortellini in a creamy, herb‑filled sauce for a cozy night in.
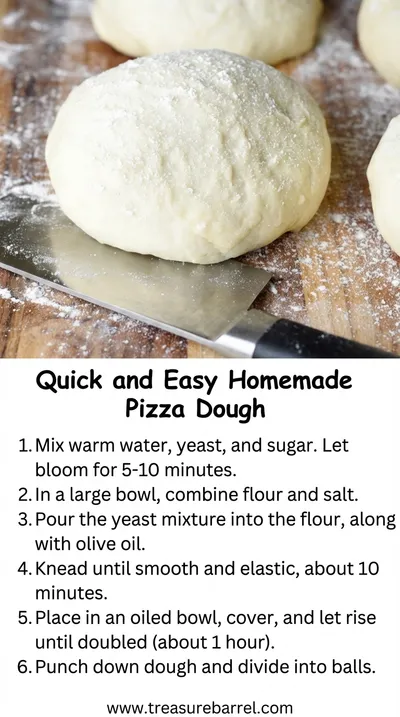
Quick and Easy Pizza Dough Recipe for Perfect Homemade Pizza
Make perfect homemade pizza with this quick and easy pizza dough recipe.
Timing
Prep Time
15 Minutes
Cook Time
12 Minutes
Total Time
1 Hour 27 Minutes
Recipe Details
Ingredients
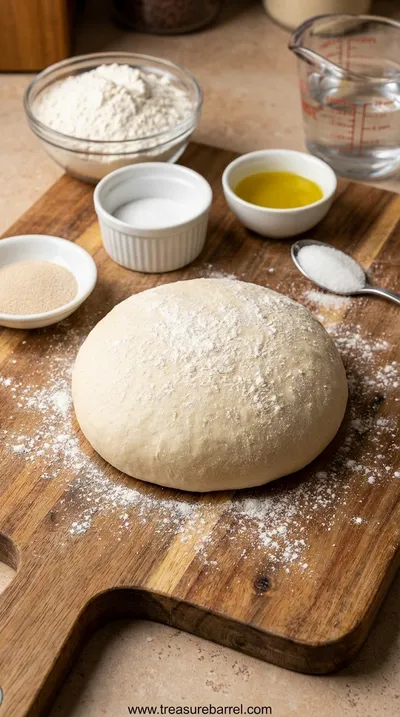
For the Dough
-
01
1 ½ cups (355 ml) warm water (about 110°F or 43°C)
-
02
2 ¼ teaspoons (1 packet) active dry yeast
-
03
1 teaspoon honey or granulated sugar
-
04
3 ½ cups (420 g) all-purpose flour, plus more for dusting
-
05
2 tablespoons olive oil
-
06
1 ½ teaspoons fine sea salt
Instructions
First, let's gently wake up the yeast. Find a medium-sized bowl and pour in the warm water. It should feel like a comfortable bath for your fingertips. Sprinkle the yeast and the honey over the surface. Give it a gentle whisk, just for a moment, and then let it be. For about 5 to 10 minutes, just let it sit in a warm spot in your kitchen. You'll see it start to get foamy and creamy on top, and it will smell sweet and alive. This beautiful little bloom is your sign that the yeast is active and ready to work its magic.
In a larger bowl, add your flour and salt and give them a quick stir with a whisk to combine everything. It’s like making a soft, fluffy bed for the other ingredients. Now, pour in your beautifully bloomed yeast mixture and the olive oil. Use a sturdy wooden spoon or a spatula to mix everything together until a shaggy, messy dough starts to form. Don't worry if it looks a bit chaotic at this point; that’s exactly how it should look. Just focus on getting all the dry bits of flour from the bottom of the bowl incorporated.
Now it's time to bring it all together. Turn the dough out onto a lightly floured, clean surface. It will feel a bit sticky at first, but have faith. Start kneading by gently pushing the dough away from you with the heel of your hand, then folding it over and giving it a quarter turn. Repeat this rhythmic, soothing motion for about 8-10 minutes. You'll feel the dough transform under your hands, becoming smooth, elastic, and just slightly tacky. It's a wonderful, tactile process that connects you to what you're making.
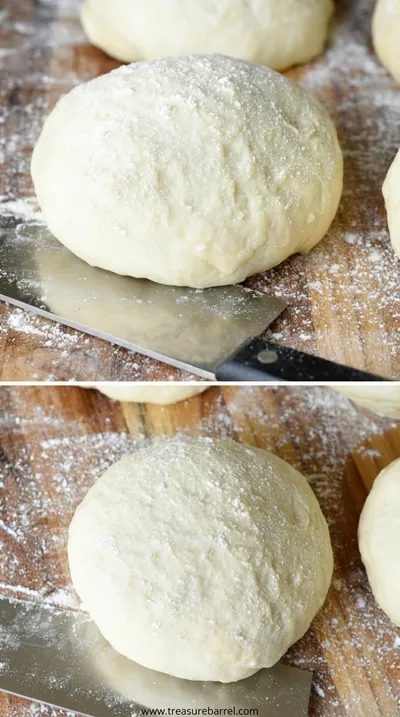
Once your dough feels smooth and happy, form it into a neat ball. Drizzle a little olive oil into a clean bowl and turn the dough ball in it to coat lightly. Cover the bowl with a clean kitchen towel or plastic wrap. Let it rest in a warm, draft-free place for about an hour, or until it has doubled in size. Once risen, gently press it down, turn it out onto your counter, divide it in two, and it's ready to be shaped into your perfect pizza. This step is a common thread in so many great recipes and always feels like a little bit of kitchen alchemy.
Notes & Tips
-
1
Don't be tempted to add too much flour while kneading. A slightly sticky dough is the secret to a light, tender crust. Keep your hands and the surface lightly floured, and that should be enough to keep it manageable.
-
2
For an extra crispy crust, preheat your pizza stone or an upside-down baking sheet in the oven for at least 30 minutes before baking. The intense heat hitting the dough right away makes a huge difference.
-
3
This dough is wonderfully versatile. Try adding a teaspoon of dried herbs like oregano or some garlic powder to the flour for a savory, aromatic twist. It's a simple change, unlike swapping ingredients in something like an easy chocolate chip banana bread, and it adds a lovely new dimension.
Tools You'll Need
-
Large Mixing Bowl: You’ll need a nice, roomy bowl to give your dough space to come together and then to rise. I love using my grandmother’s old ceramic one; it just feels right.
-
Measuring Cups and Spoons: Baking is a bit of a science, so accurate measurements are your friend here, especially for the water and yeast. Precision at the start leads to beautiful results.
-
Wooden Spoon or Spatula: A sturdy wooden spoon is perfect for the initial mixing when the dough is shaggy and wet. It feels so much more connected than a plastic one, doesn't it?
-
Baking Stone or Heavy Baking Sheet: To get that perfect crispy-chewy crust, a pre-heated surface is key. A pizza stone is fantastic, but a sturdy baking sheet flipped upside down works beautifully too.
Must-Know Tips
-
Warm is good, hot is not. When blooming your yeast, make sure the water is just warm. If it's too hot, it will kill the yeast, and your dough won't rise. Think baby bottle temperature.
-
Let the oven preheat fully. Don't rush this part. A properly heated oven is crucial for getting that amazing crust. Give it at least 30 minutes at the highest temperature.
-
Don't overload with toppings. It’s so tempting, I know! But too many toppings, especially wet ones, can make your crust soggy. A 'less is more' approach often yields the most beautiful results.
Professional Secrets
-
A touch of sugar feeds the yeast. The little bit of honey or sugar isn't just for flavor; it gives the yeast a little boost of energy to get it working quickly and effectively.
-
A slow, cold ferment builds flavor. If you have the time, letting the dough rest in the fridge for a day or two develops a much deeper, more complex, and delicious flavor. It's my favorite secret for next-level pizza.
-
Use your fingertips to shape. Avoid using a rolling pin if you can. Gently pressing and stretching the dough with your fingers preserves the delicate air bubbles created during the rise, leading to a lighter, airier crust.

Recipe by
Sofia BelleSofia bakes with love 🧁💛, sweet smells filling her home 🍪🏡, and flour on her hands 🤲✨. She believes every loaf 🍞 and cake 🎂 tells a story of wa ...
Get Delicious Recipes Weekly
Join 25,000+ home cooks getting our best recipes straight to their inbox.
Free forever • No spam • Unsubscribe anytime