
Vanilla ice cream traces its roots to the early 18th century when explorers brought the fragrant pod to Europe, sparking a sweet fascination that endures today. The concept of a no‑cook version emerged later, as home cooks sought quick comfort without heating. This method honors that legacy, delivering the classic flavor with modern convenience.
Why You'll Love It
-
- No heat required, easy on summer days
-
- Pure vanilla flavor shines through
-
- Creamy texture without an ice‑cream maker
-
- Perfect base for toppings and swirls
"The texture is unbelievably smooth, and I made it in under ten minutes!"
Essential Ingredient Guide
- Heavy cream: Choose a cream with at least 35% fat for that melt‑in‑your‑mouth richness.
- Whole milk: Provides balance; avoid low‑fat varieties which can make the mix watery.
- Vanilla bean or extract: Split the bean and scrape the seeds for the most aromatic flavor.
- Sugar: Granulated sugar dissolves best; adjust to taste for a gentle sweetness.
- A pinch of salt: Enhances the vanilla and rounds out the sweet notes.
- Optional: a splash of vanilla‑infused almond milk: Adds a subtle nutty undertone without altering the texture.
 Warm Meals
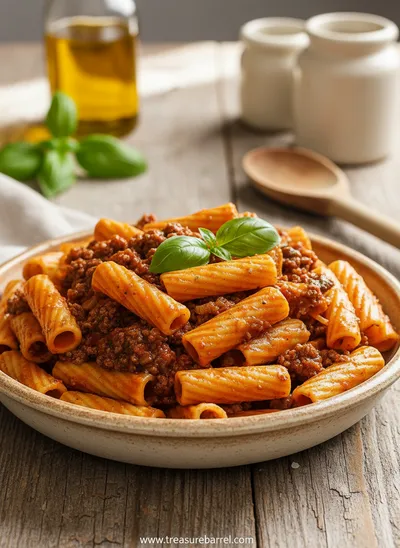
Beef Ragu Pasta Recipe in Tomato Sauce
A rich and hearty pasta dish with slow-cooked beef ragu in a savory tomato sauce.
Complete Cooking Process
-
Ingredient Readiness:
Gather all components at room temperature; this prevents the mixture from curdling when combined.
-
Flavor Development:
Let the vanilla bean steep in the milk for a few minutes, allowing its fragrant oils to infuse the base.
-
Texture Control:
Whisk gently until sugar dissolves, then fold in the cream to keep the mixture airy.
-
Finishing Touches:
Cover and chill for at least two hours; the mixture will thicken naturally.
-
Serving Timing:
Serve shortly after chilling for the soft‑serve texture, or freeze longer for a firmer scoop.
-
Use a fine‑mesh sieve to catch any vanilla bean shards.
-
If the mixture feels thin, add a touch more cream and chill again.
-
Stir gently while freezing to keep the texture smooth.
Pro Tips
Well, these little adjustments keep the ice cream from turning grainy. I remember once forgetting to sift the vanilla seeds and ending up with a speckled bite—still tasty, but a smoother mouthfeel feels more comforting. So take a moment, give it a quick stir, and let the cool anticipation settle in.
The essence of the dish:
A simple balance of cream, milk, sugar, and real vanilla creates a dessert that feels both luxurious and home‑grown. The subtle sweetness lets the vanilla sing without being overpowered.
A fun fact or historical angle:
Did you know that vanilla was once so valuable it was used as currency? Its journey from Mexican jungles to dessert tables adds a hint of adventure to every scoop.
Flavor or sensory focus:
You’ll notice the creamy melt on your tongue, the fragrant whisper of vanilla, and a mellow sweetness that lingers gently.
You Must Know
-
Keep everything cold for best texture
-
Avoid shaking the mixture once chilled
-
Taste before freezing to adjust sweetness
Frequently Asked Questions
→ Do I need an ice‑cream maker?
No, this recipe is designed to freeze without any special equipment; just a freezer‑safe container.
→ Can I use plant‑based milk?
Yes, substitute the dairy milk with almond or oat milk; the texture will be slightly lighter.
→ How long can I store it?
Keep it sealed for up to a week; stir before serving to restore smoothness.
→ What toppings work best?
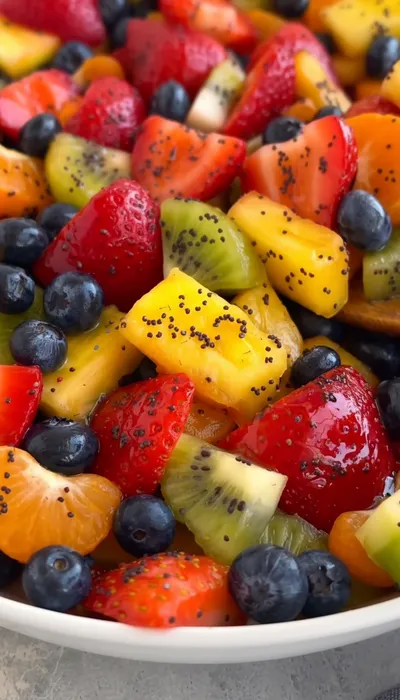
Fresh berries, toasted coconut, or a drizzle of caramel complement the vanilla beautifully.
→ Can I add other flavors?
Swirl in fruit purees or a pinch of cinnamon after the mixture chills for added depth.
→ Is this recipe paleo‑friendly?
Use coconut cream and a natural sweetener like maple syrup; see paleo vanilla for details.
Nutrition Facts
per serving
240
Calories
3g
Protein
18g
Carbs
20g
Fat
Taste Profile
Gentle vanilla sweetness with a buttery cream base
Ingredient Substitutions
Don't have an ingredient? Try these alternatives
Provides similar richness; may add a slight coconut flavor.
Adds depth; use slightly less as it’s liquid.
Recipe Variations
Try these delicious twists on the original
Spicy Version
Add a pinch of ground cinnamon and a dash of ground cardamom for a warm, aromatic twist.
Mediterranean Style
Stir in a spoonful of honey and garnish with toasted pistachios for a nutty finish.
Common Mistakes to Avoid
Learn from others' mistakes for perfect results
- Using cold cream can cause the mixture to separate.
- Over‑stirring can incorporate too much air, making it icy.
- Skipping the rest period results in a less smooth texture.
Meal Prep & Storage
Make Ahead Tips
You can whisk the base and chill it overnight; the flavors deepen, and it’s ready to freeze the next day.
Leftover Ideas
Scoop into a bowl and let sit 5 minutes; the texture will soften for a quick snack.
Perfect Pairings
Serve this with...
Cooking Timeline
Combine milk, sugar, salt; whisk until dissolved.
Add vanilla seeds and pod; let steep.
Remove pod, fold in cream and vanilla extract.
Cover and refrigerate for at least 2 hours.
Stir and transfer to freezer; freeze, stirring midway.
 Warm Meals
Garlic Steak Tortellini – A Warm Classic
Steak meets garlic‑kissed tortellini in a creamy, herb‑filled sauce for a cozy night in.
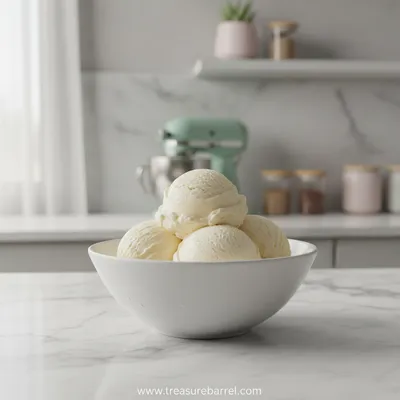
Vanilla Ice Cream – No‑Cook Homemade Recipe
A silky, sweet treat that comes together without ever touching the stove. This no‑cook vanilla ice cream is gentle on the palate, with a whisper of vanilla bean and a creamy texture that feels like summer on a spoon. vanilla ice cream lovers will appreciate the simplicity and the comforting scent of fresh vanilla that fills the kitchen.
Timing
Prep Time
10 Minutes
Cook Time
0 Minutes
Total Time
2 Hours
Recipe Details
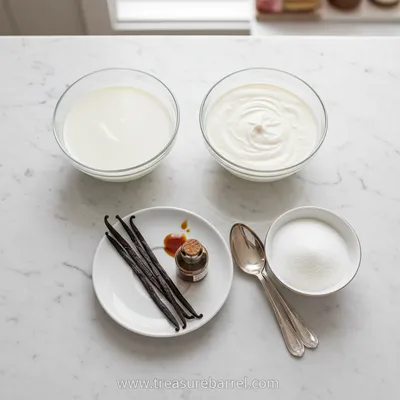
Ingredients
Base
-
01
2 cups heavy cream
-
02
1 cup whole milk
-
03
1/2 cup granulated sugar
-
04
1 vanilla bean, split and seeds scraped (or 2 tsp pure vanilla extract)
-
05
Pinch of sea salt
Optional Add‑ins
-
01
2 tbsp almond milk (for a nutty nuance)
-
02
Fresh berries for serving
Instructions
In a large bowl, whisk together the milk, sugar, and a pinch of salt until the sugar begins to dissolve.
Split the vanilla bean, scrape the seeds into the mixture, and add the pod; let it sit for 5 minutes to steep.
Remove the bean pod, then gently fold in the heavy cream and vanilla extract (if using) until fully incorporated.
Cover the bowl with plastic wrap and refrigerate for at least 2 hours, or overnight for deeper flavor.
When ready, give the mixture a quick stir, pour into a freezer‑safe container, and freeze for 45 minutes.
After 45 minutes, stir vigorously to break any ice crystals; return to freezer and repeat once more for a softer texture.
Serve scoops topped with fresh berries or a drizzle of honey; enjoy the gentle vanilla aroma.
Notes & Tips
-
1
If the mixture feels too soft after chilling, let it sit in the freezer an extra 30 minutes.
-
2
A quick taste before freezing helps you decide if you need a touch more sugar.
-
3
For a dairy‑free version, swap heavy cream with coconut cream and use maple syrup as sweetener.
 Cozy Classics
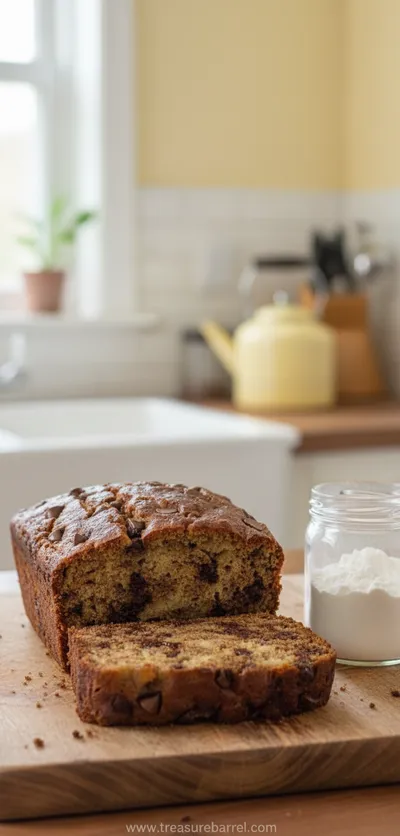
Easy Chocolate Chip Banana Bread
Moist chocolate chip banana bread, quick to bake, perfect for cozy breakfasts.
Tools You'll Need
-
Large mixing bowl
-
Whisk
-
Plastic wrap
-
Freezer‑safe container
-
Measuring cups and spoons
Must-Know Tips
-
Keep ingredients cold to prevent separation.
-
Stir gently while freezing to keep the texture smooth.
-
Taste before chilling to adjust sweetness.
Professional Secrets
-
Use a vanilla bean instead of extract for deeper aroma.
-
Cold milk and cream blend more uniformly, reducing graininess.
-
A brief stir mid‑freeze creates a velvety soft‑serve feel.

Recipe by
Lila GraceLila creates magical desserts 🍫🧁, sprinkles joy 🌈✨, and shares sweet moments 🍬💖. Her kitchen is full of smiles 😄 and sugar-dusted memories 🍪🍯.
Get Delicious Recipes Weekly
Join 25,000+ home cooks getting our best recipes straight to their inbox.
Free forever • No spam • Unsubscribe anytime