
The ice cream cake as we know it emerged in the 1970s, when fast‑food chains began offering frozen desserts to delight families on the go. Its popularity surged as celebrations sought a dessert that could be served both cold and sweet. The original Dairy Queen version combined soft vanilla ice cream with a chocolate cake base, creating a textural contrast that quickly became iconic. This recipe honors that heritage while letting home cooks craft their own perfect slice.
Why You'll Love It
-
- No fancy equipment required, just a freezer and a pan
-
- Layers stay moist and creamy for hours
-
- Easy to customize with your favorite toppings
-
- Perfect for any celebration, big or small
"I made this for my grandson’s birthday – he devoured it in minutes!"
Essential Ingredient Guide
- Vanilla ice cream: Choose a high‑quality, creamy vanilla ice cream; it forms the soft, dreamy middle layer.
- Chocolate cake mix: A classic yellow cake mix gives a light, spongy base that absorbs the ice cream’s chill.
- Whipped topping: Adds a light, airy frosting that melts gently into the cake’s surface.
- Chocolate ganache: Provides a glossy, rich finish; melt slowly to keep it smooth.
- Salted caramel drizzle: A touch of caramel brightens the chocolate and balances the vanilla.
- Sprinkles: Just a handful adds visual fun without overwhelming the flavor.
Complete Cooking Process
-
Ingredient Readiness:
Soften the ice cream on the counter for about 10 minutes and pre‑heat the oven for the cake layers.
-
Flavor Development:
Bake the chocolate cake until a toothpick comes out clean; the warm crumb will later meld with the cold ice cream.
-
Texture Control:
After cooling, spread the softened ice cream evenly, letting it settle into the cake’s pores.
-
Finishing Touches:
Pour the ganache over the top, swirl with a spoon, then drizzle caramel and sprinkle topping.
-
Serving Timing:
Freeze the assembled cake for at least 2 hours before cutting, ensuring clean slices.
-
Use a springform pan for easy release
-
Let the ice cream soften just enough to spread, not melt
-
Freeze each layer separately for sharper definition
-
Garnish with fresh berries for a pop of acidity
Pro Tips
I usually let the cake sit at room temperature for a few minutes before serving – that tiny pause lets the frosting soften just enough to melt on your tongue. It feels like a small, quiet celebration each time I slice it, and the aroma of chocolate and vanilla fills the kitchen, inviting everyone to gather closer.
 Sweet Treats
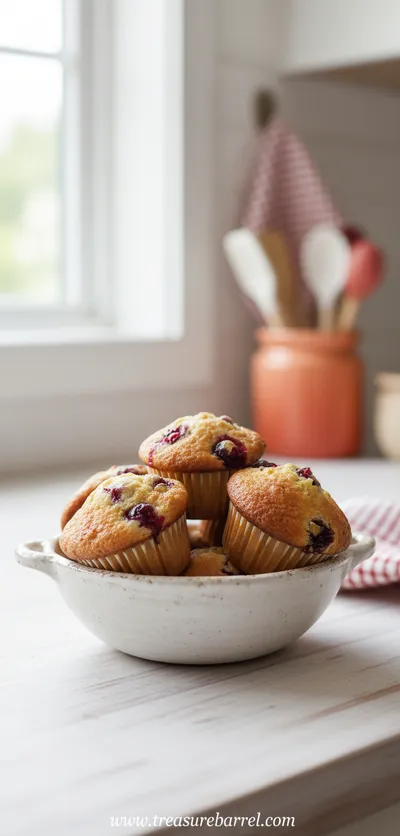
Cranberry Orange Muffins
Tender muffins bursting with orange zest and tart cranberries, ideal for a comforting morning treat.
The essence of the dish:
It’s the marriage of cool, creamy vanilla ice cream with soft, spongy chocolate cake, finished with a glossy ganache that glistens like a memory in the light.
A fun fact or historical angle:
The original Dairy Queen ice cream cake was introduced in 1979 and quickly became a go‑to for birthday parties across the United States.
Flavor or sensory focus:
You’ll notice the first cool bite of vanilla, followed by a warm chocolate crumb, then a silky finish of chocolate ganache and a whisper of caramel.
You Must Know
-
Keep the cake cold until serving
-
Use a sharp, warm knife for clean cuts
-
Allow the cake to breathe for a minute before plating
Frequently Asked Questions
→ Can I use dairy‑free ice cream?
Yes, choose a coconut‑based or almond‑milk ice cream; the texture remains creamy, though you may need to add a splash of vanilla extract for flavor.
→ How long can the cake be stored?
Keep it tightly wrapped in the freezer for up to 2 weeks. Thaw briefly before serving for optimal texture.
→ What if I don’t have a springform pan?
A regular 9‑inch round cake pan works; just line it with parchment paper and loosen the edges before unmolding.
→ Can I add fruit layers?
Absolutely – thin layers of fresh strawberries or raspberries add a bright note. Add them after the ice cream layer and before the ganache.
→ Is it possible to make a mini version?
Yes, use a muffin tin lined with paper cups for individual servings; adjust baking time for the cake base accordingly.
→ Do I need to soften the ice cream?
A brief 5‑10 minute sit at room temperature makes spreading easier without melting the ice cream.
Nutrition Facts
per serving
420
Calories
5g
Protein
45g
Carbs
22g
Fat
Taste Profile
Creamy, chocolatey, and gently sweet
Ingredient Substitutions
Don't have an ingredient? Try these alternatives
Creates a dairy‑free ganache with a slight coconut note.
Ensures the recipe stays gluten‑free without changing texture.
Recipe Variations
Try these delicious twists on the original
Spicy Version
Add a pinch of cayenne and a drizzle of spicy chocolate sauce for a subtle kick.
Mediterranean Style
Swap the chocolate ganache for a honey‑yogurt glaze and garnish with pistachios.
Common Mistakes to Avoid
Learn from others' mistakes for perfect results
- Overmixing the cake batter, leading to a dense texture.
- Letting the ice cream melt too much before spreading.
- Skipping the final freeze, resulting in a crumbly slice.
Meal Prep & Storage
Make Ahead Tips
You can bake the cake layer and freeze it, then add the ice‑cream layer the night before; store assembled cake wrapped tightly in the freezer.
Leftover Ideas
Slice remaining pieces and store in an airtight container in the freezer; let thaw slightly before enjoying.
Perfect Pairings
Serve this with...
Cooking Timeline
Preheat oven, prepare cake batter, and grease pan.
Bake cake, cool completely, and soften ice cream.
Spread ice cream layer, freeze to set.
Prepare ganache, pour over cake, add toppings.
Final freeze for at least one hour before serving.
 Sweet Treats
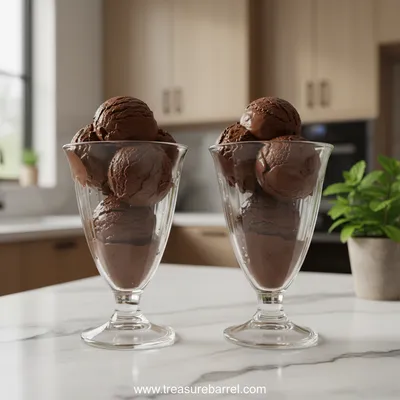
Duo of Chocolate Ice Cream Glasses
Elegant chocolate ice cream duo served in glasses – creamy, refreshing, and utterly satisfying.
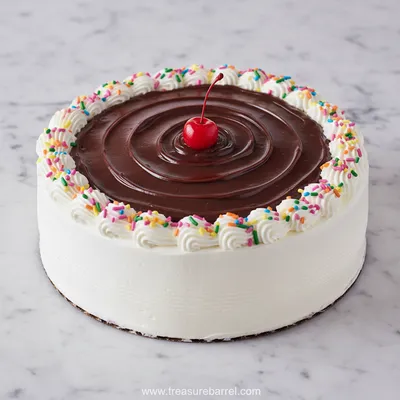
Copycat Dairy Queen Ice Cream Cake Recipe
I remember the first time I tasted a Dairy Queen ice cream cake – the cool vanilla layers, the velvety chocolate frosting, and that nostalgic swirl. Honestly, this copycat version brings that same comfort to your kitchen. With simple ingredients and a few gentle steps, you’ll have a creamy, festive cake that feels like a celebration in every bite. Chocolate cake vibes meet ice‑cream bliss.
Timing
Prep Time
20 Minutes
Cook Time
30 Minutes
Total Time
50 Minutes (plus chilling time)
Recipe Details
Ingredients
Cake Base
-
01
1 box yellow chocolate cake mix
-
02
1 cup water
-
03
1/2 cup vegetable oil
-
04
3 large eggs
Ice Cream Layer
-
01
1 quart high‑quality vanilla ice cream (softened)
-
02
1 tsp pure vanilla extract
Ganache & Frosting
-
01
1 cup heavy cream
-
02
8 oz semi‑sweet chocolate, chopped
-
03
2 tbsp unsalted butter
-
04
1/4 cup caramel sauce
-
05
Sprinkles, for garnish
Instructions
Preheat oven to 350°F (175°C). Grease a 9‑inch springform pan and set aside.
In a bowl, combine cake mix, water, oil, and eggs; mix until smooth. Pour batter into pan and bake 25‑30 minutes until a toothpick comes out clean. Let cool completely.
While the cake cools, soften the vanilla ice cream on the counter for about 10 minutes, then stir in vanilla extract.
Spread the softened ice cream evenly over the cooled cake layer, smoothing with a spatula. Return to freezer for 1 hour to firm.
Prepare the ganache: heat cream until just simmering, pour over chopped chocolate, let sit 1 minute, then stir until glossy. Add butter and mix until melted.
Pour ganache over the firm ice‑cream layer, letting it drip down the sides. Drizzle caramel sauce over the top, then sprinkle with colorful sprinkles.
Freeze the assembled cake for at least another hour. When ready, run a warm knife around the edge, release the springform, slice, and serve.
Notes & Tips
-
1
If you prefer a sturdier base, bake two thin cake layers and stack them before adding ice cream.
-
2
For extra flavor, fold in a handful of crushed chocolate cookies into the softened ice cream.
-
3
Allow the cake to sit at room temperature for 5 minutes before slicing for cleaner cuts.
Tools You'll Need
-
9‑inch springform pan
-
Mixing bowls
-
Electric mixer
-
Spatula
-
Saucepan
-
Sharp knife
Must-Know Tips
-
Don’t overmix the cake batter, it can become tough.
-
Let the ice cream soften just enough to spread, not melt.
-
Freeze each component separately for better layer definition.
Professional Secrets
-
Use room‑temperature butter for a light cake crumb.
-
Heat cream just to a simmer; overheating can scorch the chocolate.
-
Run a hot, wet knife through the ganache for a glossy finish.

Recipe by
Lila GraceLila creates magical desserts 🍫🧁, sprinkles joy 🌈✨, and shares sweet moments 🍬💖. Her kitchen is full of smiles 😄 and sugar-dusted memories 🍪🍯.
Get Delicious Recipes Weekly
Join 25,000+ home cooks getting our best recipes straight to their inbox.
Free forever • No spam • Unsubscribe anytime