
Originating from classic American cheesecake traditions, the no‑bake version emerged as a pantry‑friendly shortcut during the mid‑20th century when convenience foods were on the rise. This recipe honors that heritage while adding the beloved crunch of Oreo cookies, creating a modern sweet treat that feels both nostalgic and fresh.
Why You'll Love It
-
- No oven needed, perfect for hot days
-
- Ready in under 15 minutes
-
- Creamy texture balanced by crunchy crust
-
- Easy to portion for parties or solo treats
"These cups are the perfect pick‑me‑up snack—light, creamy, and just the right amount of chocolatey!"
Essential Ingredient Guide
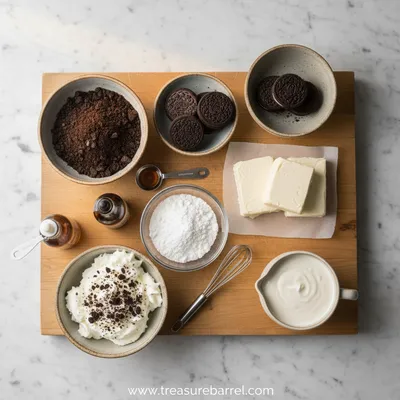
- Oreo cookies: Use the classic chocolate‑and‑cream variety; crush finely for a buttery base.
- Cream cheese: Room‑temperature cheese blends smoothly, avoiding lumps.
- Whipped topping: Adds lightness; fold gently to keep the mousse airy.
- Sugar: A modest amount sweetens without overpowering the chocolate.
- Lemon juice: A splash brightens the flavor and balances richness.
- Vanilla extract: Just a dash enhances the overall aroma.
Complete Cooking Process
-
Ingredient Readiness:
Gather all components, crush the cookies, and let the cream cheese soften to room temperature before mixing.
-
Flavor Development:
Combine the sweetened cream cheese with vanilla and lemon, then fold in the whipped topping for a silky blend.
-
Texture Control:
Press the cookie crumbs firmly into each cup, then spoon the creamy mixture on top, ensuring a smooth surface.
-
Finishing Touches:
Refrigerate the cups for at least 30 minutes; finish with a garnish of crushed Oreo bits or a drizzle of chocolate.
-
Serving Timing:
Serve chilled, directly from the fridge, for the most refreshing bite.
-
Use a food processor for even cookie crumbs; a zip‑top bag and rolling pin work too.
-
If the filling is too soft, add a spoonful of powdered sugar to firm it up.
-
Top each cup with a mini Oreo half for an extra visual pop.
Pro Tips
I found that letting the cups sit a little longer than 30 minutes makes the crust absorb a hint of moisture, creating a perfect meld of textures. Also, when you’re serving a crowd, set out the cups on a chilled tray; it keeps them firm and the presentation stays crisp. It’s those small, thoughtful steps that turn a simple snack into a memorable moment.
The essence of the dish:
A buttery Oreo crust cradles a velvety cream cheese mousse, all finished with a whisper of citrus and a cloud of whipped topping.
A fun fact or historical angle:
The Oreo cookie was first introduced in 1912, and its iconic design has inspired countless desserts—this cup is just one of the many modern twists.
Flavor or sensory focus:
Expect the first bite to be a cool, creamy melt with a subtle tang, followed quickly by the familiar chocolate crunch of the Oreo base.
You Must Know
-
Keep the cream cheese soft for a smooth blend
-
Press the crust firmly for stability
-
Chill thoroughly for the best texture
Frequently Asked Questions
→ Can I make these ahead of time?
Yes, you can assemble the cups up to 24 hours in advance; just keep them covered in the refrigerator.
→ What can I use instead of cream cheese?
For a lighter version, try a mixture of Greek yogurt and mascarpone; adjust sugar accordingly.
→ Are these gluten‑free?
Standard Oreo cookies contain wheat, but you can substitute gluten‑free chocolate sandwich cookies for the crust.
→ How long do they keep?
Stored in an airtight container, they stay fresh for 3‑4 days in the fridge.
→ Can I add fruit?
A few fresh berries on top add brightness; just add them right before serving to avoid sogginess.
→ What’s a good garnish?
A drizzle of melted chocolate, a pinch of sea salt, or a mini Oreo half work beautifully.
Nutrition Facts
per serving
210
Calories
5g
Protein
20g
Carbs
13g
Fat
Taste Profile
Creamy with a chocolate‑cookie finish
Ingredient Substitutions
Don't have an ingredient? Try these alternatives
Maintain the same quantity; they'll give a similar texture.
Whip with a bit of powdered sugar for sweetness.
Recipe Variations
Try these delicious twists on the original
Spicy Version
Add a pinch of cayenne and a drizzle of chocolate for a subtle heat.
Mediterranean Style
Incorporate crumbled feta and a touch of orange zest into the filling.
Common Mistakes to Avoid
Learn from others' mistakes for perfect results
- Over‑mixing the filling, which can make it dense
- Skipping the chill, resulting in a soft crust
- Using cold cream cheese, leading to lumps
Meal Prep & Storage
Make Ahead Tips
You can prepare the crust and filling separately and store them in the fridge; assemble just before serving for maximum freshness.
Leftover Ideas
Reheat gently in a microwave for 10‑15 seconds if you prefer a softer texture, but they are best enjoyed chilled.
Perfect Pairings
Serve this with...
Cooking Timeline
Crush cookies and combine with butter; press into cups.
Beat cream cheese, sugar, vanilla, and lemon; fold in whipped topping.
Spoon filling into crusts and smooth tops.
Refrigerate to set; garnish before serving.
 Sweet Treats
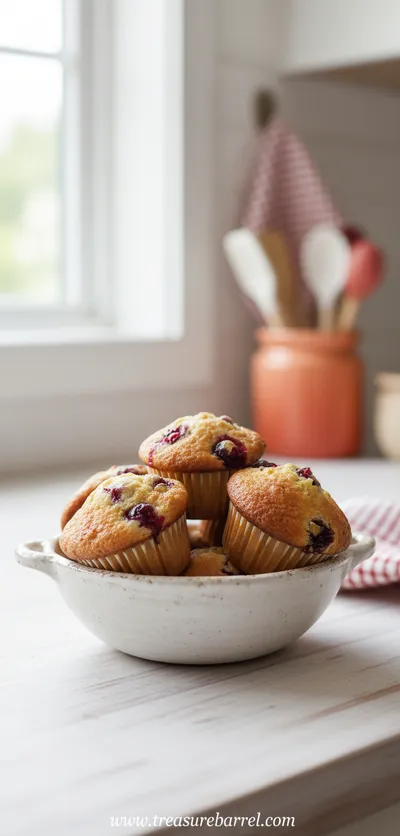
Cranberry Orange Muffins
Tender muffins bursting with orange zest and tart cranberries, ideal for a comforting morning treat.
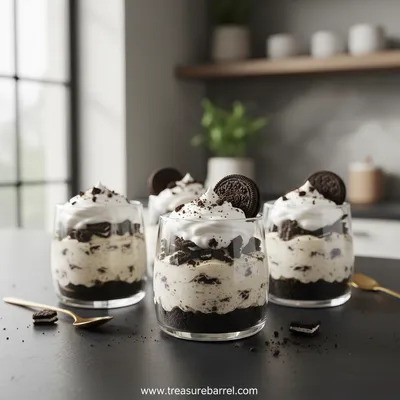
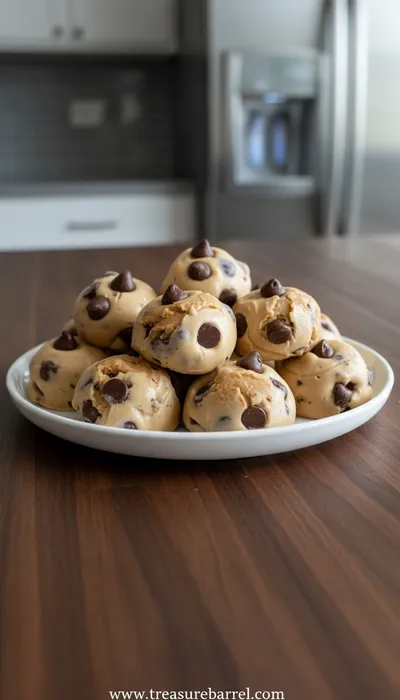
Oreo No-Bake Cheesecake Cups
These Oreo No-Bake Cheesecake Cups are quick, creamy treats that come together in minutes. I love how the buttery crust meets the silky filling, and honestly, they’re perfect for a quiet afternoon or a small gathering. Pair them with a handful of oreo balls for an extra crunch, or serve alongside mini cheesecakes for a dessert spread.
Timing
Prep Time
10 Minutes
Cook Time
0 Minutes
Total Time
40 Minutes
Recipe Details
Ingredients
Crust
-
01
1 ½ cups Oreo cookies, finely crushed
-
02
2 tbsp melted unsalted butter
Filling
-
01
8 oz cream cheese, softened
-
02
¼ cup powdered sugar
-
03
1 tsp vanilla extract
-
04
1 tbsp fresh lemon juice
-
05
½ cup whipped topping (store‑bought or homemade)
-
06
Optional: 2 tbsp cocoa powder for a richer flavor
Garnish
-
01
Crushed Oreo pieces
-
02
Chocolate drizzle
-
03
Mini Oreo halves
Instructions
In a small bowl, combine the crushed Oreo cookies with melted butter; stir until the crumbs are evenly coated.
Press the cookie mixture firmly into the bottom of each serving cup, creating an even layer.
In a mixing bowl, beat the softened cream cheese with powdered sugar, vanilla, and lemon juice until smooth and creamy.
Gently fold the whipped topping into the cream cheese mixture, being careful not to deflate the airy texture.
Spoon the mousse over the prepared crusts, smoothing the tops with the back of a spoon.
Refrigerate the cups for at least 30 minutes, or until set.
Before serving, garnish each cup with crushed Oreo bits, a drizzle of chocolate, and a mini Oreo half.
Notes & Tips
-
1
If the crust seems dry, add an extra teaspoon of melted butter.
-
2
For a lower‑fat version, substitute part of the cream cheese with Greek yogurt.
-
3
Let the cups chill a bit longer for a firmer bite, especially in warm kitchens.
 Sweet Treats
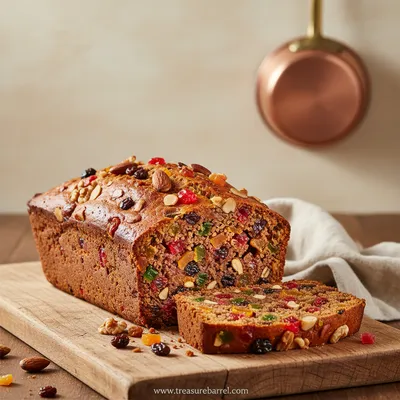
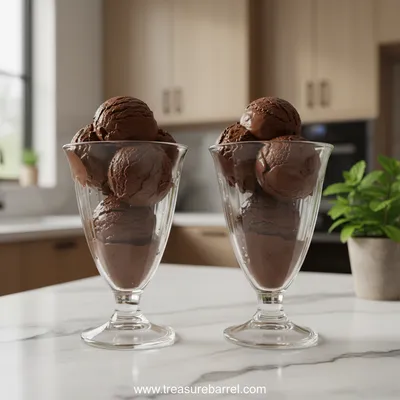
Duo of Chocolate Ice Cream Glasses
Elegant chocolate ice cream duo served in glasses – creamy, refreshing, and utterly satisfying.
Tools You'll Need
-
Small mixing bowls
-
Hand mixer or spatula
-
Food processor or zip‑top bag and rolling pin
-
Measuring cups and spoons
-
8‑oz serving cups or ramekins
Must-Know Tips
-
Don't over‑mix the filling; gentle folding keeps it light.
-
Press the crust firmly to avoid crumbling when serving.
-
Taste the filling before chilling; adjust sweetness if needed.
Professional Secrets
-
Room‑temperature cheese blends without lumps, ensuring a silky texture.
-
A brief chill of the crust before adding filling prevents sogginess.
-
Using a silicone mat for pressing the crust gives a smoother edge.

Recipe by
Lila GraceLila creates magical desserts 🍫🧁, sprinkles joy 🌈✨, and shares sweet moments 🍬💖. Her kitchen is full of smiles 😄 and sugar-dusted memories 🍪🍯.
Get Delicious Recipes Weekly
Join 25,000+ home cooks getting our best recipes straight to their inbox.
Free forever • No spam • Unsubscribe anytime