
I remember the first few times I tried making pizza dough. It was… a journey. One time it was tough as a rock, another time it was a sticky mess I nearly gave up on. But I kept thinking about the pizzas my grandmother would make, the way the dough would be so light and full of air bubbles. She never used a recipe, just the feel of it in her hands. So, I stopped being so rigid and started paying attention to the dough itself—how it felt, how it smelled, how it responded to my touch. This recipe is the result of that slow learning process. It’s forgiving and honest, and now it's the heart of our Friday night tradition, one of those simple suppers that feels like a celebration. The kids love getting their hands dusty with flour, creating their own little pizzas, and I love the beautiful, imperfect mess we make together.
Why You'll Adore This Dough
-
The Scent of Real Baking: There is nothing, and I mean nothing, like the warm, earthy, slightly sweet smell of yeast and flour filling your home. It’s the scent of comfort and anticipation, a signal that something wonderful is about to happen. This dough makes your whole house feel like a cozy bakery.
-
A Dream to Work With: Forget sticky, frustrating doughs. This one is so beautifully soft and pliable. It stretches like a dream without fighting you, feeling smooth and elastic under your fingertips. It’s a genuinely relaxing and tactile experience.
-
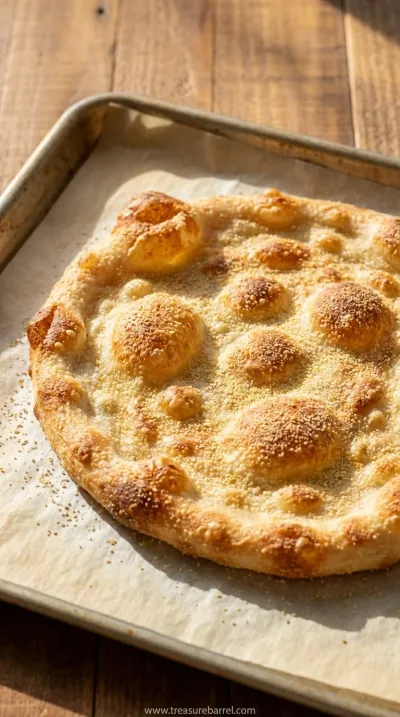
The Perfect Texture: It bakes up into the most incredible crust—crispy and golden on the bottom, with a satisfyingly airy and chewy bite. It’s sturdy enough to hold your favorite toppings but tender enough to melt in your mouth. Wow, it’s just so good.
-
Beautifully Simple: Don’t let yeast intimidate you! This recipe breaks it down into such easy, gentle steps. It’s built on simple, honest ingredients and a process that feels more like play than work. It's the perfect entry into the world of home baking.
Honestly, this dough changed our pizza nights forever. It's so soft and forgiving, and the crust is just perfect.
Essential Ingredient Guide
- Bread Flour: Okay, look, you can use all-purpose flour, but bread flour is what gives you that signature pizzeria-style chew. It has a higher protein content, which develops more gluten, and that’s the magic behind a crust that’s both strong and tender. I find it creates a much more satisfying, substantial bite. It’s worth seeking out, I promise.
- Instant Yeast: I love instant yeast because it’s so reliable and easy. You don’t have to proof it separately if you don’t want to, you can just mix it in with your dry ingredients. It gives a consistent, beautiful rise every single time. It takes the guesswork out of working with yeast, which honestly, is such a relief.
- Extra Virgin Olive Oil: A good olive oil does more than just prevent sticking. It adds a subtle, beautiful flavor to the dough—a little bit of richness and a fruity note that complements tomato sauce so well. It also helps to tenderize the dough, giving the final crust a lovely, soft interior. Don’t skip it!
 Home Baking
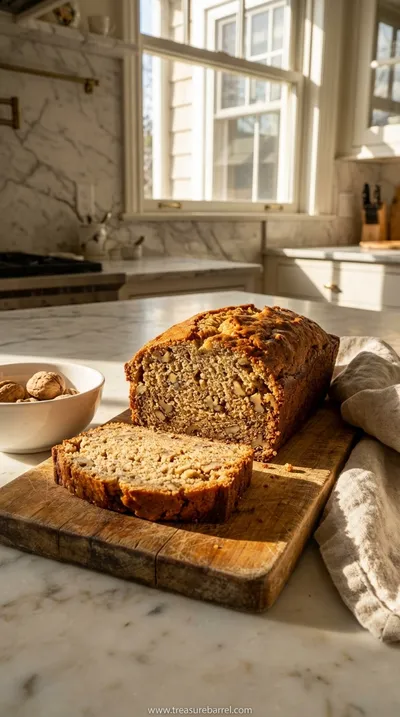
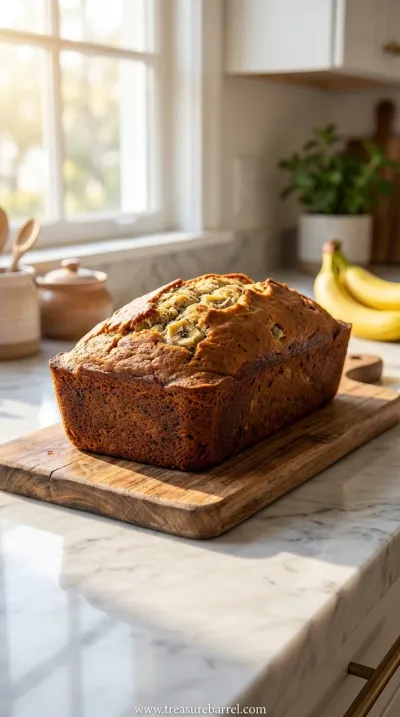
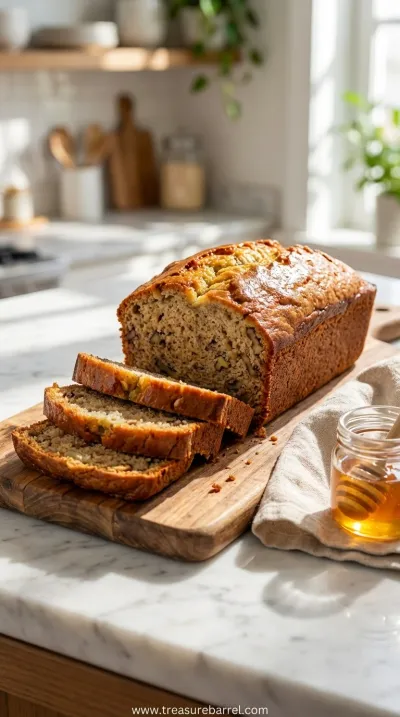
Best Banana Bread Recipe: Moist & Delicious
A classic, incredibly moist homemade banana bread. The perfect easy treat for any day.
Complete Cooking Process
-
Bringing the Dough to Life:
The complete journey of this pizza dough is a practice in patience and sensory awareness. It starts with waking up the yeast, a quiet moment where you see the first signs of life. Then comes the gentle work of mixing and kneading, transforming a shaggy mess into a smooth, elastic ball of potential. The final and most magical part is the rise, where you just step back and let the dough do its thing, puffing up with air and promise. Each stage is simple, but together they create something truly special.
-
Kneading and Resting:
This is my favorite part. Kneading isn't a chore; it's a conversation with the dough. You'll feel it change under your hands, going from sticky and uncertain to confident and smooth. It’s a rhythmic, meditative process. Then, you let it rest. Tucking it into a warm, oiled bowl is like putting a baby down for a nap. This resting period is crucial—it's when the gluten relaxes and the flavor develops, turning simple ingredients into a truly delicious crust.
-
Shaping and Baking:
After the dough has risen, it’s time to shape it. Gently pressing the air out and forming it into a round is so satisfying. You can feel all the life in it. Whether you like a super-thin crust or one with a puffy, pillowy edge, this dough will oblige. Getting it ready for its toppings is the final creative step before it hits the hot oven, where it will transform into a golden, bubbling masterpiece.
Frequently Asked Questions
→ Can I use all-purpose flour instead of bread flour?
You absolutely can, and it will still make a delicious pizza! The main difference you'll notice is in the texture. All-purpose flour has less protein, so the resulting crust will be a bit softer and more tender, less chewy than a classic pizzeria crust. Sometimes, that's exactly what you want! So, yeah, feel free to use it if it's what you have on hand.
→ My dough didn't rise. What did I do wrong?
Ugh, that's the most frustrating feeling, but don't worry, it happens to all of us. The most common culprit is the yeast. It might have been old, or the water might have been too hot (which kills it) or too cold (which doesn't activate it). Your water should feel like a comfortably warm bath. Also, make sure your kitchen isn't too cold; yeast loves a cozy, warm spot to do its work.
→ Can I make this dough ahead of time?
Yes, and you should! This dough actually gets better with a slow, cold fermentation in the fridge. After the first rise, you can place it in a sealed container or bag in the refrigerator for up to three days. This develops a more complex, nuanced flavor. Just remember to take it out and let it sit at room temperature for an hour or two before you plan to shape and bake it.
→ What's the best way to freeze pizza dough?
This dough freezes beautifully. After the first rise, divide it into individual portions. Lightly coat each ball with olive oil and place them in separate freezer-safe bags, squeezing out as much air as possible. It will keep for up to three months. To thaw, just move it from the freezer to the refrigerator the night before you need it, then let it rest on the counter for an hour before using.
→ How do I get a crispy crust?
The key to a crispy crust is high, direct heat. First, make sure your oven is preheated as high as it can go, usually around 500-550°F (260-290°C). If you have a pizza stone or steel, preheat it in the oven for a full hour. This intense heat will instantly crisp up the bottom of the dough. If you don't have one, flipping a sturdy baking sheet upside down and preheating it works well too.
→ Can I use this dough for anything besides pizza?
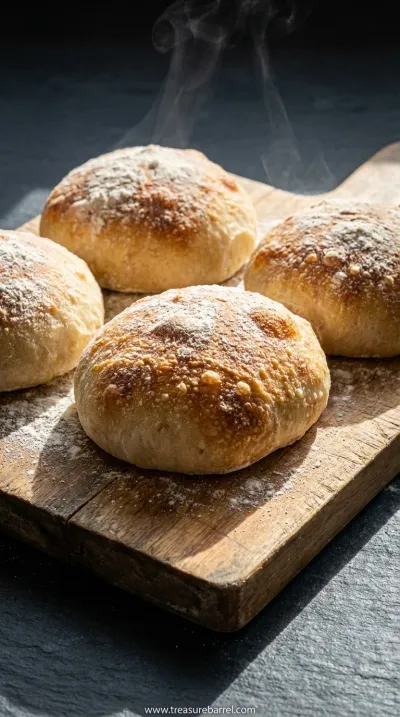
Oh, absolutely! This is such a versatile recipe and a staple for many rustic bites. You can use it to make amazing calzones, cheesy breadsticks, or fluffy stromboli. I've even divided it into small pieces, brushed them with butter and garlic, and baked them as savory knots to serve with pasta. It’s a wonderful base for all sorts of creative kitchen projects.
→ What are your favorite toppings for this dough?
Oh, wow, that's a tough one! For a classic, I adore a simple Margherita with San Marzano tomatoes, fresh mozzarella, and basil. But sometimes, I'll switch it up entirely and use a base of basil pesto with some roasted vegetables and goat cheese. Honestly, the beauty of this dough is that it’s the perfect canvas for whatever you’re craving.
Nutrition Facts
per serving
220
Calories
7g
Protein
39g
Carbs
3.5g
Fat
Taste Profile
A beautifully balanced, savory foundation with a subtle sweetness and earthy notes from the yeast and olive oil.
Ingredient Substitutions
Don't have an ingredient? Try these alternatives
As mentioned, you can use all-purpose flour. The crust will be a bit softer and less chewy, but still absolutely delicious. No need to adjust any other ingredients.
You can easily swap the sugar for an equal amount of honey or maple syrup to feed the yeast. It adds a slightly different, warmer note to the dough's flavor.
Recipe Variations
Try these delicious twists on the original
Herbed Dough Variation
Add 1-2 teaspoons of dried herbs like oregano, basil, or a classic Italian seasoning blend to your dry ingredients for an extra layer of flavor baked right into the crust.
Garlic Lover's Dough
For a savory kick, add 1 teaspoon of garlic powder or 1-2 cloves of very finely minced fresh garlic to the dough when you add the flour. It smells incredible as it bakes.
Common Mistakes to Avoid
Learn from others' mistakes for perfect results
- Using water that is too hot, which can kill the delicate yeast before it even starts working.
- Not kneading the dough long enough, which results in a dense crust that doesn't have that signature chew.
- Adding too much flour during kneading, which can make the dough tough and dry.
- Not preheating the oven and baking surface sufficiently, which leads to a soft, pale, and sometimes soggy crust.
Meal Prep & Storage
Make Ahead Tips
This dough is perfect for making ahead. You can prepare it through the first rise, then place it in the refrigerator for up to 3 days. This cold ferment actually improves the flavor. Just be sure to let it come to room temperature for about an hour before you plan to shape and bake it.
Leftover Ideas
Leftover baked pizza can be stored in the refrigerator. To reheat, I highly recommend using a hot skillet on the stovetop or a hot oven to crisp the crust back up. Microwaving tends to make it soft and soggy. Leftover unbaked dough can be used for mini pizzas or breadsticks the next day.
Perfect Pairings
Serve this with...
Cooking Timeline
Activate the yeast in warm water with sugar.
Mix flour, salt, olive oil, and yeast mixture to form a shaggy dough.
Knead the dough on a floured surface until smooth and elastic.
Place dough in an oiled bowl and let it rise until doubled in size.
Punch down the dough, divide, and shape. Let it rest for 10-15 minutes before topping.
Top the pizza and bake in a very hot oven for 10-12 minutes.
Homemade Pizza Dough Recipe: Perfect Crust Every Time
Learn how to make the best homemade pizza dough from scratch. This easy recipe creates the perfect crust.
Timing
Prep Time
20 Minutes
Cook Time
12 Minutes
Total Time
1 Hour 32 Minutes
Recipe Details
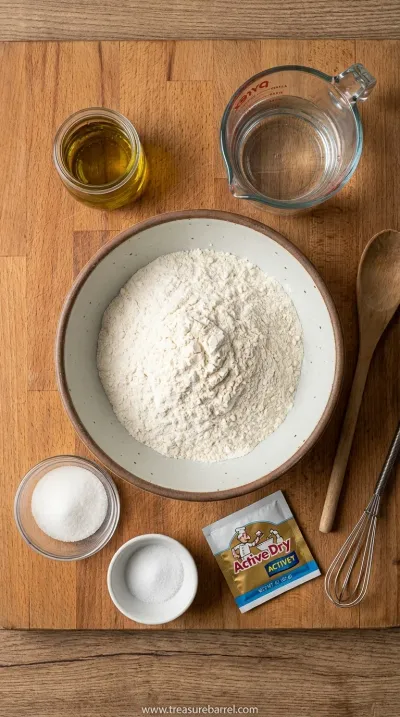
Ingredients
For the Dough
-
01
1 1/2 cups (355 ml) warm water (about 110°F or 43°C)
-
02
2 1/4 teaspoons (7g) instant yeast (1 standard packet)
-
03
1 tablespoon (15g) granulated sugar or honey
-
04
2 tablespoons (30 ml) extra virgin olive oil, plus more for the bowl
-
05
4 cups (480g) bread flour
-
06
1 1/2 teaspoons (9g) fine sea salt
Instructions
First, let's wake up the yeast. Find a large bowl, my favorite is a big ceramic one that feels warm to the touch. Pour your warm water into it—it should feel like a pleasant bath, not too hot, not too cold. Sprinkle the yeast and sugar over the top, give it a gentle swirl, and then just let it be for about 5 to 10 minutes. You’re looking for it to get a little foamy and creamy on top. It’s a quiet, beautiful moment, the first sign of life in your dough.
Once your yeast is bubbly and happy, drizzle in the olive oil. In a separate bowl, whisk together the bread flour and salt, just to make sure they’re evenly acquainted. Add the flour mixture to the wet ingredients all at once. I like to use a wooden spoon or a spatula to mix everything together until it forms a shaggy, messy ball and there are no dry patches of flour left. Don't worry about how it looks at this stage; it’s supposed to be a little chaotic.
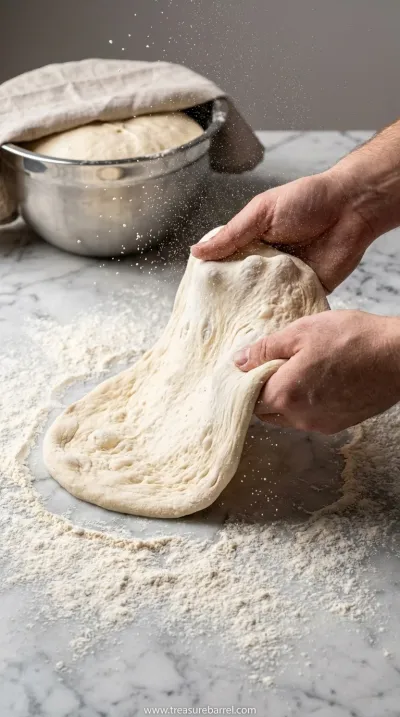
Now for the best part. Lightly flour a clean countertop and turn the dough out. It’s time to knead. For the next 8 to 10 minutes, gently push, fold, and turn the dough. You’ll feel it transform from a sticky, lumpy mass into something smooth, elastic, and almost alive under your hands. It’s such a rhythmic, calming process. If you’re using a stand mixer, use the dough hook and let it go on low speed for about 7-8 minutes. This step is what makes our cozy classics so special.
Once your dough is beautifully smooth, take a clean bowl and lightly grease it with a little olive oil. Form your dough into a neat ball and place it inside, turning it over once to coat it lightly with the oil. This prevents a skin from forming. Cover the bowl with a clean, damp kitchen towel or plastic wrap. Find a warm, draft-free spot in your home—I like the top of the fridge or inside the oven with just the light on—and let it rise for about 1 to 1.5 hours, or until it has gloriously doubled in size.
Gently press down on the risen dough to release the air. Transfer it to your floured surface and divide it in half for two pizzas. At this point, you can either use it right away by shaping it into rounds and letting it rest for 10 minutes before topping, or you can wrap it well and store it. This truly is an easy homemade pizza dough, ready for whatever pizza adventure you have planned.
Notes & Tips
-
1
Don't rush the rise. Giving the dough its full time to rest is what develops that wonderful flavor and airy texture. Patience is a key ingredient here, so let it do its magic.
-
2
Flour your hands and surface just enough to prevent sticking. Using too much extra flour during kneading can make the dough dry and dense, so be gentle and add it sparingly.
-
3
The temperature of your kitchen can affect rising time. On a warm day, your dough might be ready in an hour. On a colder day, it might need a little longer. Just watch the dough, not the clock.
Tools You'll Need
-
Large Mixing Bowl: You'll need a nice, big bowl to give the dough plenty of room to expand as it rises. I prefer a ceramic or glass bowl because they retain heat nicely, creating a cozy environment for the yeast.
-
Stand Mixer (Optional): A stand mixer with a dough hook can certainly make the kneading process hands-free and a bit faster. However, I truly believe that kneading by hand connects you to the process in a special way.
-
Bench Scraper: This simple tool is surprisingly helpful for dividing the dough cleanly and for scraping up any sticky bits from your work surface. It just makes handling the dough feel cleaner and more professional.
-
Kitchen Scale: For the most consistent and perfect results every time, weighing your flour is the way to go. It’s much more accurate than measuring cups and ensures your dough has the perfect hydration.
Must-Know Tips
-
Warm, Not Hot: Ensure your water is just warm to the touch (around 110°F/43°C). Water that's too hot will kill the yeast, and your dough won't rise. It's a gentle art.
-
Let It Rest After Kneading: That first rise is crucial. It’s when the gluten network you built during kneading relaxes and the yeast works its magic, creating air pockets and flavor.
-
Don't Use a Rolling Pin: For a truly authentic, airy crust with a beautiful edge, stretch the dough by hand. A rolling pin will compress all those lovely air bubbles you worked so hard to create.

Recipe by
Sofia BelleSofia bakes with love 🧁💛, sweet smells filling her home 🍪🏡, and flour on her hands 🤲✨. She believes every loaf 🍞 and cake 🎂 tells a story of wa ...
Get Delicious Recipes Weekly
Join 25,000+ home cooks getting our best recipes straight to their inbox.
Free forever • No spam • Unsubscribe anytime